This post is written by Pete. For all his posts, check out this link.
Wondering how to buy an engagement ring? Or just curious about what your man went through? Pete is writing a series for us on How To Buy An Engagement Ring. Below is part one of the series. You can check our Part 2 (the four C's) here.
Not gonna lie, but part of the reason why I dragged my feet about popping the big question to Lisa is
because I knew I had to take on the daunting task of finding an engagement ring. At one point I even
said, "Can't I just tie a twist tie around your finger and call it a day?"
Needless to say that idea went over like a fart in church. At that point I realized that I needed to crap or
get off the pot or "quit being a lazy bum and get a ring."
"Crap," I thought. "Where the hell do I even
start? I know about as much about diamonds as a 4 year old does about metaphysics."
Anybody that knows me will tell you how I believe engagement rings are a pointless rite of passage, a
tradition probably invented by a diamond company back in the day. You know, kind of like how
Valentine's Day is a fake holiday invented by carstores? Same concept here, but that's just my opinion -- and most of the time my opinions earn me a fresh slap in the teeth.
Here is a FACT: Regardless of what
my opinion is about the engagement ring tradition, I knew I would either get Lisa the ring of her dreams or my sweet
Jap-lock (as I call her because she's Japanese and Polish) Princess would run out of patience and find another man to live
happily ever after with. And I wasn't about to let the best thing that ever happened to me in my entire
life get away! Personally, I didn't care what the tradition was, or how ridiculous I thought it was – I
would have done anything to earn the honor of having Lisa as my wife ... dang man, still feels surreal to
say "wife" ... wow ... feels so good ... can't believe I have a wife ... takes a while to get used to I guess? I don't
care if the tradition was that men had to wear neon string bikinis and chase giant wheels of cheese
down a hill to gain a woman's affection. You can bet your ass I'd be at the bikini shop looking for the
perfect bikini that emphasized my fantastic thighs.
With that being said, here's the process I went through to find my delicious wife a ring. The first step
was asking Lisa what kind of design she liked. Man there's tons of 'em! Lisa was a big fan of the "bypass cut," which means that the sides of the ring traverse instead of making a straight line. She also liked if you look at the ring head-on you can see thru it, which is a bezel setting. (Lisa's note: You can check out this link to see images and definitions of settings, shanks, and more. It's a huge help.)
She decided on a design she had come across from a jeweler in Pennsylvania.
Bypass rings are cool too because the wedding band snaps snugly against the engagement ring on the
"big day." Oooh boy that's so nice, kinda like two souls snapping together to be one. Oooh man that's
good! Feel free to use that one fellas. It's on the house. You're welcome.
Now that I had the ring design, all I had to do was have it made. Easy right? Oh hell no. Turns out the
specific bypass design Lisa wanted was copyrighted by the jeweler in Pennsylvania and to have it
replicated would have cost an insane amount of money. But I had no fear! The bypass design is popular,
and the catalogs in the jewelry store I used had a whole bunch of bypass designs, in a wide range of
prices -- from very affordable to "you're an idiot who loves to waste money" expensive. Once I picked a
design I knew Lisa would like, it was time to move on to the diamond. That part was actually cool. As I
learned about what all the codes mean, I realized that I'd be able to get a really nice diamond that was
affordable -- there's a lot of wiggle room there because, when buying a diamond you want to think about the "4 C's": carat, cut, color, and clarity. But that's for part two of the series.
BRIDAL BABBLE: What style of engagement ring are you looking at?
Thursday, June 25, 2015
Monday, June 22, 2015
Enjoy Your Wedding Cake (On your one year anniversary)
Pete and I were out to dinner last night, celebrating our anniversary. Our waitress asked if we wanted any dessert and Pete told her that we had cake at home. He was referring to our wedding cake, one that had been renting space in our friends' deep freezer for the last year.
Having your wedding cake a year later isn't something that you can just remember to do last minute. You can't jump up with minutes to spare on your first anniversary and remember about the cake that has been sitting in the freezer and eat it. No, it's a process, just like storing the top tier of your wedding cake is (if you don't know how to do that, you can click the link and get the steps).
To eat your wedding cake, you have to take it out of the freezer and put it in the fridge for 24 hours. Then, take it out of the fridge to allow it to thaw for about 30 minutes.
When you're ready for it, that's when the unwrapping starts.
First you open the box, then you remove two layers of foil, then four layers of plastic wrap -- and, if you're like me, you nick the edge of the cake when you're pulling up the last layer of plastic wrap and ruin the edge. And, if you're also like me, every layer between you and the cake is a reminder that you have really good friends. If you remember, we actually didn't wrap our own cake. Our friends did it for us, then stored it for us, and then invited us over for dinner (and cooked for us) on the day we needed to pick it up.
How did it taste? So good. Seriously. It was just as fresh as the day it was served at our wedding. The pecans in the chocolate turtle ganash were still crunchy, the cake was still moist enough that crumbs could be picked up with the back of a fork. It was a lot better than I actually anticipated. Yes, people tell you that your cake is still good a year later, but if you are a skeptic about year old cake, let me put that doubt to bed. If you wrap it right, your wedding cake topper will still be good. Plus, it will give you an excuse to use your cake knife and server another time.
BRIDAL BABBLE: Are you planning on saving the top tier of your wedding cake to eat on your anniversary?
Sunday, June 21, 2015
One Year Later ...
I just posted this on A Bride On A Budget's Facebook page, but I felt like I should copy and paste it for the blog too. So here goes ...
I can't believe it's been a year, one whole entire trip around the sun, since our "You may now kiss the bride" moment.
We have the same jobs, live in the same apartment, and own the same cat one year later. Everything is the same, and yet it is all completely different.
I loved -- absolutely loved -- our wedding day, but even more, I love our married life. And that's something to keep in mind as you are planning your wedding. You're not just planning for that one day. You are planning for your entire life.
Wednesday, June 17, 2015
How To Create Your Cocktail Hour Playlist
Pete's back for another blog post. You can read his first one here.
I’ve always believed that music is medicine, music is magic, music is a language that any human being from anywhere on this planet can understand, a language we intuitively know and can comprehend fully without ever having to be taught, regardless of the genre or the country the music comes from. Music creates an environment with its own "feel" and setting, an environment with its own "vibe," if you will. With that being said, it follows logically that the musical choices you make for your wedding's cocktail hour will directly impact the overall feel your cocktail hour will have.
Once you decide on the way you want your cocktail hour to feel, you can then plan your playlist accordingly. For our wedding, Lisa left this task to me. She is a brave woman. Thankfully we were in agreement that we wanted our cocktail hour to feel fun. We wanted to create an environment that felt uplifting, happy, and relaxing at the same time. I believe that the feeling you create at the cocktail hour, with the music you choose, sets the tone for the whole wedding. Personally, I cannot understate the power and influence of the music one chooses. It creates the mood and the backdrop that affects the mood of all of your guests at a subconscious level.
Wanna throw the all-too-common "El Snoozo" wedding? Go with classical! You'll have people falling asleep at the table in no time. Just watch as your guests doze off one by one, and fall face down in their plates of fine cheeses and cured meats. My line of thought was: Let’s pick songs that won't make people want to start a mosh pit and/or regret coming all the way to North Carolina, yet won't make people feel like its nap time either.
My goal was simple: find music we liked that would create an environment conducive to smiling, dancing and drinking -- and would work well as background music without making people say, "Ah man what the hell is this song playing?"
I would have loved to pick Black Star by Mos Def & Talib Qweli. That album inspires me and makes me really happy, but I don’t think my dad would have been like, "Black Star! I love this album! Good choice Pete, man do I feel happy! I can’t wait to break dance!" Plus, you want to play a variety of songs, not just one album start to finish.
So here’s how I built the playlist for our cocktail hour. While the specific songs you select may be different -- we all have different musical tastes and opinions of what artists and songs are happy, exciting, good, bad, etc. -- the general process worked well for me, and I think it'll work for you too.
The first thing I did was log into my Spotify account and look at my starred tracks (ones that I had noted as my favorite). Knowing the vibe I wanted to create, I proceeded to browse looking for songs that would fit the bill. I also made sure to apply this thinking to a variety of genres, not just one. For example, I have a love affair with The New Mastersounds and knew that the band made music that pretty much everyone can tolerate, and would help create the ambiance I was looking for. I also used Ricky’s Theme by the Beastie Boys. Yes the Beastie Boys. Sound bonkers to you? Just give a listen:
If you’re a Beastie Boys fan, you didn’t even have to click the link to understand that’s an awesome pick. But, even if you're not a fan, this is an example of picking the right song, regardless of the band. I would have loved to pick You Gotta Fight for Your Right (To Party), but that isn't exactly a cocktail hour song.
Don’t have Spotify? You can do the same thing on Pandora. I’ve used both and prefer Spotify. It's more user friendly, gives better related artists and songs, and allows you more control over skips and rewinds. Don't have either? They're both free to download as an app or you can use them from their respective websites. If you've never used either, you probably don’t have a starred list to work with. No worries, here’s a super simple (and fun) solution: All you need is one song and/or artist idea to start. Simply type the name of the song or the artist into the search bar and find a whole bunch of other artists under the related artists column. From there you can sample tons of music you can't believe you never knew existed.
As long as you have a seed artist or song, you can type it in and let Spotify or Pandora do the rest for you. If you're really stuck and can’t think of a seed artist or a song, there's a solution for that too. Just click on browse (at the top left of corner of Spotify), then click genre and moods, and you’ll have access to 32 different categories (work out, focus, party, etc.) to inspire you. Even more good news: When you click on any of the 32 main categories, there is a wealth of specific sub-categories and playlists to help you narrow your focus even further.
When you find a song that matches your criteria, just right click on it, and add it to a “Cocktail Hour” playlist! Once your playlist is complete you have a few options when it's cocktail hour time:
1. Plug your phone into a stereo and play your playlist from the app. For those of you with Bluetooth speakers, leave the plug at home.
2. If you have the free version of either service and don’t want your guests to hear commercials every few songs, you could just pay for the songs on iTunes, and play your music from your phone sans commercials.
3. Save the list as a Word document and give it to your DJ or band to play during the cocktail hour. Make sure to send your list over before your wedding day so the DJ or band has time to find the songs you want (that's what we did).
BRIDAL BABBLE: What songs would you put on your cocktail hour playlist?
Tuesday, June 16, 2015
DIY Soda Bottle Flower Favor Bags
A while ago, I pinned a cherry blossom painting made from a soda bottle. So I thought, "What a perfect way to decorate a bridal shower invitation." I wanted to test it out on a gift bag first, though, and good thing I did. Because when I was planning my wedding, nothing was easy, nothing went as planned. So of course, this craft went that way. I saved it, though, and I like the result, but it's a good lesson. Don't expect your wedding DIY to come out like Pinterest.
DIY Soda Bottle Flower Favor Bags
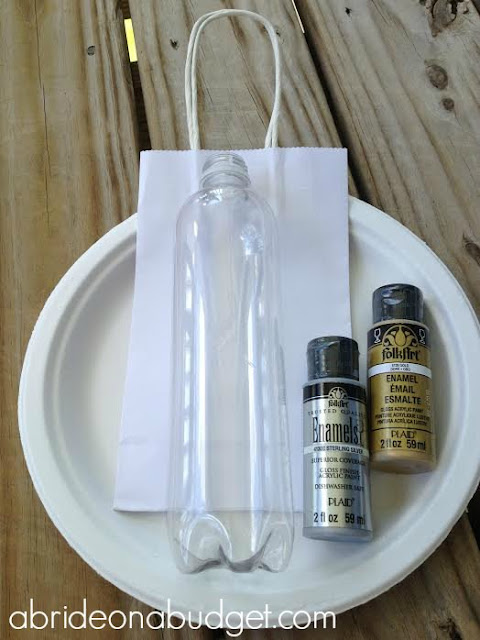
What You'll Need:
- Paper plate or paint palette
- White gift bag
- Soda bottle (I actually used a Sparkling Ice bottle, since that's what I handy)
- Silver paint
- Gold paint
- Paint brush
What You'll Do:
Check your soda bottle. You'll need to make sure it's one with five "feet" at the bottom. The ones that around round, like water bottles, won't work.
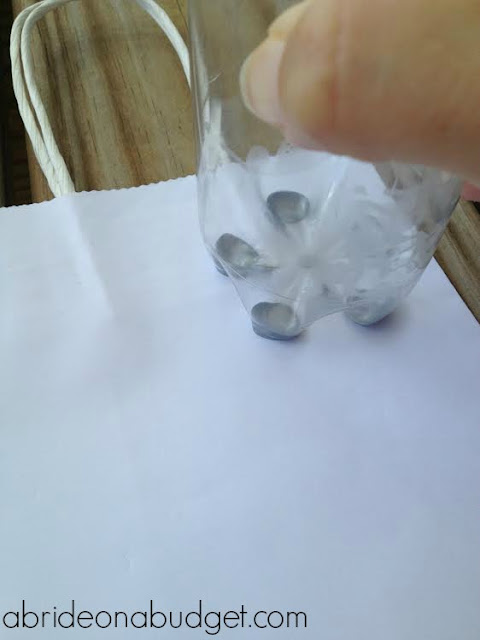
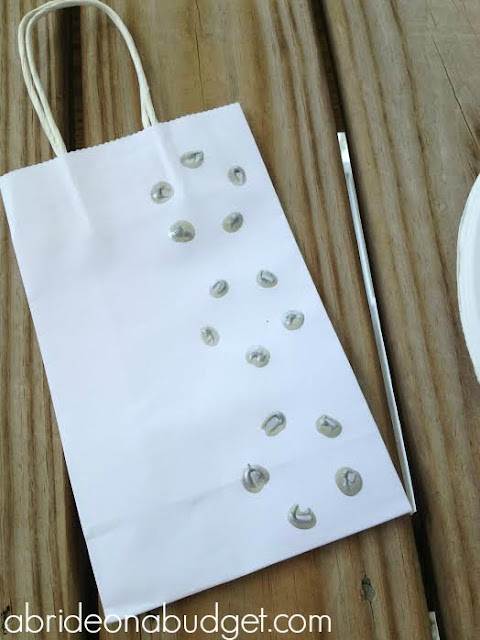
Add a dollop of paint to your plate or palette. Dip each foot in the paint.
Stamp the soda bottle onto the gift bag.
And, according to Pinterest, that's supposed to be that. But look. This looks more like dots than anything else. And you can't give a gift bag like that. So this is where you kiss Pinterest goodbye and break out your own ideas.
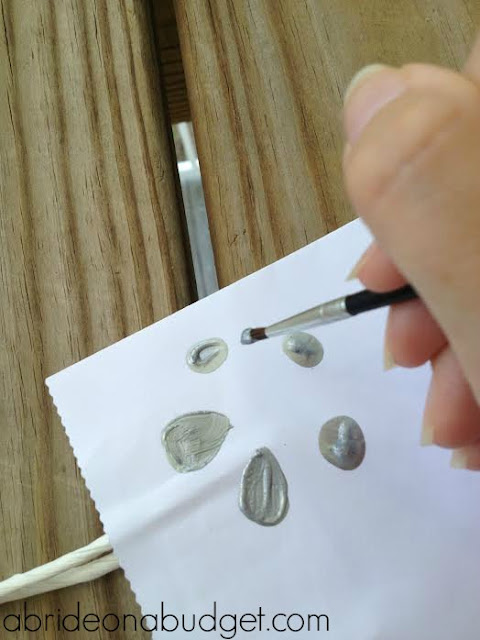
Take out a paint brush and dip it in the paint. Turn your spots into almond-shaped flower petals.
Use the gold paint to paint the centers of the flower, plus decorative lines.
Let this dry completely and then fill it with your thank you gifts for your gifts. If you need thank you gift ideas, check out our bridesmaids gifts and the thank you gifts we gave to those who helped us at the church.
BRIDAL BABBLE: What would you fill these soda bottle flower favor bags with? (If you want to know, I filled mine with Pete's anniversary gift because yup, our first anniversary is next week. Can you believe it?)
Monday, June 15, 2015
DIY Adirondack Chair Cake Topper
There was not one part of my wedding planning that was easy. Not one single thing. Not even the darn cake toppers.
Oh, I thought the cake topper would be simple. I wanted a pair of Adirondack chairs with flip flops in front of them. "No problem," the woman at our cake tasting said. "I'll send you a link where you can buy them."
Weeks went by and she never sent a link. I googled and found nothing. Well, not exactly nothing. I found a bunch that were just under 4-inches from end to end. The trouble was our cake topper was six inches. Two 4-inch chairs wouldn't fit and one chair wasn't exactly romantic.
I emailed the bakery for a link. "I'm really sorry about this," she began, "But it looks like the seller doesn't carry them anymore."
So I scoured the Internet for hours, finally coming on a pattern at Kyle's Woodworking. When you can't buy it, DIY it.
I'm going to be honest. This wasn't easy. It took me about three hours one night to make a pair of Adirondack chairs. I was so happy with them, so it was absolutely worth the time I spent on them. But this was not easy.
DIY Adirondack Chair Cake Topper
What You'll Need:
- Free pattern from Kyle's Woodworking (printed)
- Craft sticks
- Wood glue
- X-Acto Knife
- Pencil
- Apple Barrel Beachcomber Beige paint
- Paint brush
What You'll Do:
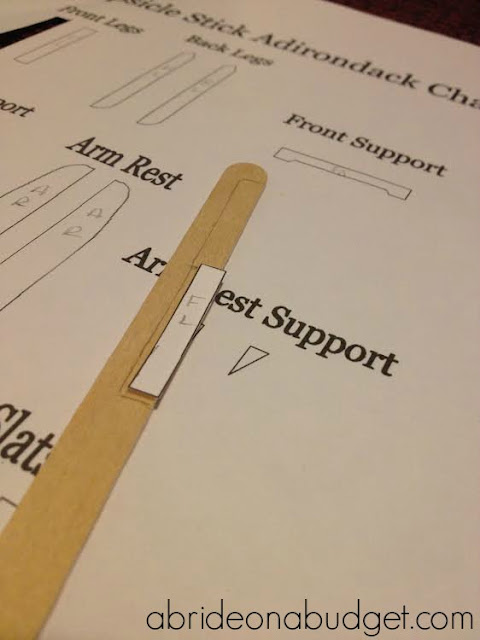
The pattern is pretty easy to follow, but not if you cut everything at once. What I did, first, was label each piece before I cut it (AR for arm rest, etc.)
Cut the pieces from the pattern. I did them one at a time so I didn't get them confused. Trace those pieces onto craft sticks. Label them. Then cut them from the sticks.
Patiently (very patiently), follow Kyle's Woodworking's blog post here.
Set the chair off to the side and make it a mate.
Let them dry overnight.
When they are completely dry, paint them with the beachcomber beige paint, skipping the feet of the chair. Even though Apple Barrel paint is non-toxic, I didn't want anything painted sitting on top of our cake.
The bakery used fondant to make flip flops to sit in front of the chairs on our cake, then sugar to act as sand under them.
BRIDAL BABBLE: Do you think you would make this DIY Adirondack Chair Cake Topper?
Thursday, June 11, 2015
Why You Shouldn't Kickstart Your Wedding
When we first got engaged, one of my friends sent me a text. "Do you know where you're registering?"
Very tongue in cheek, I wrote her back, "Probably Wells Fargo."
I was joking, completely joking. But I read an article not too long after about people who were actually registered at their bank instead of a store. They weren't asking for silverware and a mixer; they were asking for your cold, hard cash.
I put it out of my mind for the last two years until someone posted an article on A Bride On A Budget's Facebook page about crowdfunding a wedding. And, without even reading that article, I was filled with a ton of opinions about this. Thus, is post was born.
Crowdsourcing or crowdfunding, if you don't know, is basically asking everyone to pitch in a couple bucks to help you (with your idea, project, medical bills, etc.). Kickstarter is the most popular site to ask everyday people to give you money towards your project. Zack Braff used it to raise over three million dollars to fund his movie, Wish I Was Here (his campaign is over, but you can see it here). My favorite campaign on Kickstarter was for Bunch O Balloons (here), which gives you a way to make 100 water balloons in a minute. The campaign ended up raising almost a million dollars and the balloons are now available on Amazon, at Walmart, and more.
Then there's Go Fund Me, which is used more to just help someone in need rather than someone who wants to create something. It's where a stranger raised nearly $350,000 to buy a car for James Robertson, a Detroit man who was in the paper because he walked 23 miles a day to work (you can see his campaign here).
These backers -- the crowd -- collectively funded Zack Braff's movie, bought James Robertson a car, and can pay for your wedding. Tempting, right?
Let's be realistic. Weddings are expensive. Really expensive. After them, people joke and say, "I wish I would have saved the money we spent on our wedding and just put a down payment on a house." But that's not really too much of a joke. Weddings can be equivalent to a down payment on a house (or, in the affordable town where I lived in Pennsylvania, almost half a house). Or a brand new car. Or the rent in my apartment for three years. So to think about someone helping you pay for it, it's a fleeting thought doesn't flee too quickly.
But it should.
Every bride should have a budget. Some have a budget of $1,000; some can spend $30,000; and others assign a $100,000 price tag to their wedding. Your budget is determined by what you can save and spend. You. Just you (and your fiance and parents, if you're lucky). Not you plus anyone with an Internet connection.
You shouldn't crowdsource because you should stay in your means blah blah blah boring. That's where this could be going. And it's true. Don't overspend. Don't try to keep up with the Jones. Don't try to top the royal wedding. If you can't afford champagne, don't have it etc. etc. etc.
But, even more than that, think of the problems it could cause. What if you so casually share the link on your Facebook page (because this is what you have to do. You need to advertise your campaign or no one will be able to find you). And you write something simple in your status update that's like, "Only 12 months until my wedding day. Wanna help me pay?" And drop the link. And then Mona, some girl who was in your English class freshman year who you only accepted on Facebook because you're nice like that not because you actually ever spoke to her, donates $20 with a "Congrats."
And here is the problem.
You had no intention of inviting Mona to your wedding. You pretty much had no intention of ever talking to Mona outside of social media unless you happened to pass her at an alumni event, and even then she might only get a passing wave. But here she is, donating to your wedding. If you don't invite her, you look rude. And if you do invite her (and a guest), you are paying more for them than her donation. So now your Kickstarter campaign is actually costing you money.
Plus, it makes people feel entitled to force their opinions on you. What if Aunt Sally calls you, telling you she found the perfect wedding invitations? "You have to get them," she stressed. "They're really lovely. I'll even pay." And you see a photo and hate them. Absolutely hate them. But before you can say no, you check your Kickstarter campaign and oh look, Aunt Sally donated $100 with the message, "Now you can get those invitations we talked about." And you're stuck. Keep her money and get the invitations you really want and you hurt her feelings. Get the invitations she wants you to get and this wedding is no longer yours.
A wedding reception is a party after you and your groom commit your lives to each other. As long as you are happy and spending time with the people you love, it doesn't matter if you leave the next day for some far off island location. If you can't afford to go, don't go. Don't try to get your friends to pay for your trip.
BRIDAL BABBLE: Would you kickstart your wedding? What about yoor honeymoon?
Wednesday, June 10, 2015
Playing With Our Wedding Band
We had a band at our wedding instead of a DJ (which is another story for another day). When we decided on a band, though, Pete said that he really wanted to play with them on our day. He plays guitar in a garage band (that, unfortunately, doesn't get out of the garage).
When we were booking the band, I asked if Pete could play with them. Of course, they said yes and let him pick the song. They hadn't rehearsed together ever; they were planning on winging it.
I asked them one other favor. Ever since I met Pete, he had told me his dream guitar was a Gibson Les Paul Standard. I didn't know what that meant, really, but I made sure to memorize the words. And, before our wedding, I bought Pete his dream guitar as a wedding gift. But he didn't know. I asked the band if they wouldn't mind setting that guitar up with their equipment, along with Pete's current guitar that he brought and packed himself. Both guitars sat on stage, waiting for the reveal.
Now that you know the backstory, Pete makes his blog debut to tell you his story ...

But here I was, spinning around at a wedding where I was the groom, being pulled hither and thither by screaming guest after screaming guest in a blur of laughter and screams of joy. But beneath it all ran a raging river of anxiety over the fact that I was going to be getting up on stage to play a song of devotion for my dream-angel-inspiration-too-good-to-be-true-but-actually-is (aka Lisa), and doing it in front of about 100 people who I loved and adored, and who had never even seen me play guitar!
At this point almost a year later, I remember it going down like this (as I pull the memory from the long term storage bank in my mind):

I was in the lounge across from the ballroom, laughing, drinking, and clanking bottles, one uproarious "CHEERS!" after another, hugs, sweating, laughing, having six conversations at once, a blur of a face here, a face there, then someone calls my name, and I spin to see another face, then POW!
I snapped out of it when Lisa grabbed my arm and told me the two words that made the reality of all of this as real as it could possibly get: “You’re on!” As Lisa lead me to the stage by my hand I’m thinking, "Wait…what…now? But I can’t go on cold. I was gonna warm up first ... "
Then screams of joy, people yelling my name, applause, blinding neon lights. I’ve got my shades on, I’m totally overstimulated, don’t know where to look, what’s happening or what is even supposed to be happening. Then I’m handed my guitar.
"But wait that’s not my guitar," I thought. "It’s a freakin' Gibson LES PAUL!" And then I noticed a note hanging from it. It read: Happy Wedding Day! Love, your wife.
"Wow," I thought. "Lisa asked the band if I could borrow a Les Paul to play! Man, that’s my dream guitar. How’d she know? She’s a woman; women remember everything, especially Lisa."
With an ear to ear grin, I threw the Les on my back -- the feel, the sound, the slim and smooth rosewood neck -- wow. I just savored it, was immersed in it so deeply I didn't see the blinding lights, I didn't hear the screaming and cheering. I was snapped out of it by the guitarist.
"Hey man," he said. "You want me to take the intro and you take the solo?"
Time resumes. The screaming, the lights, the anxiety, it all comes fading back in. "Yea man, sure!" I said. And we’re off and running, cold, no warm up, with the blind hope that my fingers will do what I taught them on their own.

When the song was over, I wasn’t quite sure what had just happened. I could have sworn I just played SRV with the wedding band, but it felt like it was a dream. I wandered into the crowd of guests and was hugged innumerable times. I recall a voice in the crowd saying, "That was great! I didn't even know you played guitar!"
Then Lisa materialized out of the crowd and said, "You know that’s your guitar, right?"
Mine? I thought. My reply was something to the effect of ,“Yeah, mine to play for that song."
"No," said Lisa. "Yours to take home. Forever. That's your guitar. Happy wedding day."
Then it started to sink in, and as it did I felt my soul being apprehended by shock, like I couldn’t reconcile what Lisa had just said with the possibility that I actually now possess my dream guitar, the guitar I’ve only been so lucky to touch and play briefly in so many guitar shops, only to think to myself as I put it back on the rack, "Wow that guitar is perfect, too bad I’ll never afford one."
Then my head fell onto Lisa’s shoulder, and I wept as I thought to myself, "How did I get so lucky? The perfect guitar and the perfect woman. Man I don’t deserve this ... "
BRIDAL BABBLE: What did you think of Pete's first post?
Tuesday, June 9, 2015
Homemade Cow Centerpiece
My friend recently sent me a photo of a milk jug-turned-cow and told me it was a great idea for a wedding centerpiece for a farm-themed wedding. My first thought was, "I would never have a farm-themed wedding" and my second thought was, "I will never have another wedding, so it's really not about me right now, is it?"
And, as luck would have it, we actually had a nearly-empty milk jug in our fridge. When I used the last bit for coffee the next day, I looked at the empty milk jug and asked if it wanted to become a cow.
(And yes, I did actually ask it because I work at home, by myself, with a cat. And Pete works 14 hour days twice a week, including the day this story took place. And when I call people, they only answer because they are concerned that something must be wrong since I called instead of texted. But really, if I call you. You should answer. Something must be wrong with me if part of my daily communication involves an empty milk jug.)
The milk jug did not reply -- I'm not that crazy -- but I took the silence to mean that yes, this homemade cow centerpiece project was happening. (In case you are concerned about a lack of social interaction on my part, don't worry. I did receive a text from a friend while I was making this. And Pete came with me to shoot the final photo. I'm not a crazy cat lady just yet.)
What You'll Need:
Cut a thick strip of the black cardstock (my strip was about an inch and a half, but yours may vary based on the size of your milk jug).
Cut that strip in half. Add glue to one end and roll the black strip into a small cylinder. Glue this under the milk jug as legs. Let it dry completely.
If your jug won't stand on its legs, you can tape a "u" on the inside. Have the two sides of the u inside the cylinder and the bottom of the u at the cylinder's base. Then, affix the bottom of the u to the milk jug.
Using the black paper, cut out two round circles. With the white paper, cut out two smaller circles. Then, go back to the black and cut out two even smaller circles. Glue them in this order to create eyes.
I free handed these, but I did fold the piece of paper in half before cutting so they would be symmetrical (even though it doesn't look like it at all in the photo above).
Time to make the ears.
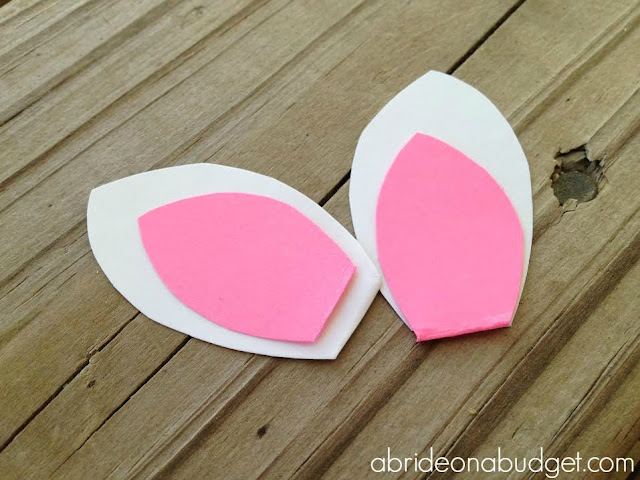
Cut a white sheet into a ear shape. Cut the same shape, but smaller, in pink. Glue them in that order to make your ears. Glue them above the eyes on your cow.
Trace the milk jug's top to make a pink circle.
Glue that onto your top.
Cut a long, thin pink strip. Glue it around the rest of the top.
Now, I understand this pink nose sort of makes my cow look like a pig. You could make his nose black or white instead, but I just thought it needed some color other than the pink in its ears. This is a wedding, and anywhere you can add a pop of color is alright with me.
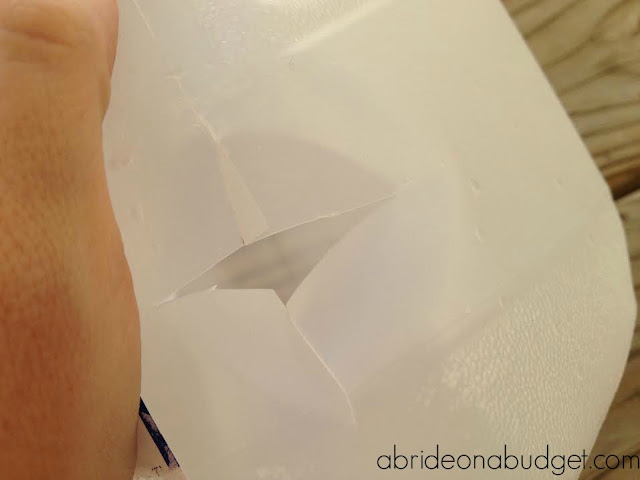
In the underside, just a plus sign with your scissors. This is where you'll slide in the tea light.
Be sure to only use a battery-operated tea light in this. You don't want to set it on fire.
Ta da.
So cute, right? You could definitely use nail polish remover to take off the lot number and expiration date from the side of your cow's face. If you are using this for your wedding, I definitely would do that.
Isn't he just so cute?
And, as luck would have it, we actually had a nearly-empty milk jug in our fridge. When I used the last bit for coffee the next day, I looked at the empty milk jug and asked if it wanted to become a cow.
(And yes, I did actually ask it because I work at home, by myself, with a cat. And Pete works 14 hour days twice a week, including the day this story took place. And when I call people, they only answer because they are concerned that something must be wrong since I called instead of texted. But really, if I call you. You should answer. Something must be wrong with me if part of my daily communication involves an empty milk jug.)
The milk jug did not reply -- I'm not that crazy -- but I took the silence to mean that yes, this homemade cow centerpiece project was happening. (In case you are concerned about a lack of social interaction on my part, don't worry. I did receive a text from a friend while I was making this. And Pete came with me to shoot the final photo. I'm not a crazy cat lady just yet.)
Homemade Cow Centerpiece
What You'll Need:
- Empty milk jug (washed and dried)
- Glue Scissors
- Three sheets of cardstock (one each of pink, white, and black)
- Battery-operated tea light
What You'll Do:
Cut a thick strip of the black cardstock (my strip was about an inch and a half, but yours may vary based on the size of your milk jug).
Cut that strip in half. Add glue to one end and roll the black strip into a small cylinder. Glue this under the milk jug as legs. Let it dry completely.
If your jug won't stand on its legs, you can tape a "u" on the inside. Have the two sides of the u inside the cylinder and the bottom of the u at the cylinder's base. Then, affix the bottom of the u to the milk jug.
Using the black paper, cut out two round circles. With the white paper, cut out two smaller circles. Then, go back to the black and cut out two even smaller circles. Glue them in this order to create eyes.
I free handed these, but I did fold the piece of paper in half before cutting so they would be symmetrical (even though it doesn't look like it at all in the photo above).
Cut out two large "spots" from black paper to glue onto the milk jug. Try not to cut too evenly or it will look more like a cloud than a spot. Also, be conscious of the circle "ditch" in the milk jug. You'll want to cut a spot large enough to cover that. Glue one spot over that, then another on the other side.
Time to make the ears.
Cut a white sheet into a ear shape. Cut the same shape, but smaller, in pink. Glue them in that order to make your ears. Glue them above the eyes on your cow.
Trace the milk jug's top to make a pink circle.
Glue that onto your top.
Cut a long, thin pink strip. Glue it around the rest of the top.
Now, I understand this pink nose sort of makes my cow look like a pig. You could make his nose black or white instead, but I just thought it needed some color other than the pink in its ears. This is a wedding, and anywhere you can add a pop of color is alright with me.
In the underside, just a plus sign with your scissors. This is where you'll slide in the tea light.
Be sure to only use a battery-operated tea light in this. You don't want to set it on fire.
Ta da.
So cute, right? You could definitely use nail polish remover to take off the lot number and expiration date from the side of your cow's face. If you are using this for your wedding, I definitely would do that.
Isn't he just so cute?
He's even cute at night too.
You could actually turn on the tea light when you are setting these up and then allow them to illuminate when it starts to get dark out. You don't want to try and dig in your cow to get the tea light when you are already using these as your centerpieces (it's not that easy, honestly) so make sure you pick up tea lights that are long lasting.
BRIDAL BABBLE: Would you make this homemade cow centerpiece?
Monday, June 8, 2015
Pin Of The Week: Champagne Flutes With Gold Sugar Rims
I pinned this week's pin of the week a while ago, but sort of ignored it. See, it's champagne with gold sugar rims. And I left it alone because even though I have a recipe for edible glitter (baked sugar and food coloring), I couldn't figure out how to make it gold.
Turns out, you don't have to. Someone else did it for you. Seriously, you can buy gold sugar on Amazon. Yeah, it's a thing.
Using it is easy. To rim the glass, just dip the edge in water (or heck, a little champagne). Then, roll the wet edge in the gold sugar. Pour the champagne and you're ready to go. These would be so perfect for your wedding morning, a bridal shower, or at the wedding itself (or gosh, even to make Thursday a little more special).
After you're done, you can use any extra sugar to decorate cookies, cakes, or cupcakes. Give them a little extra bling.
BRIDAL BABBLE: I'm obsessed with metallics right now, so I'm absolutely loving this. What do you think of these champagne flutes with hold sugar rims?
Thursday, June 4, 2015
DIY Bridesmaids Wine Bottle
A Bride On A Budget received these bottles of wine for this post. Additional items were purchased by ABOAB without compensation.
When my friend's cousin asked her to be a bridesmaid, she did it with a bottle of wine. I thought it was so cute ... and maybe something you might want to do.
So I did what anyone would do, I created a free printable for you. Actually, I created two of them. One is for you to ask your girls to be your bridesmaids, the other is for your future in laws.
The printables are at the bottom of the post. You can just save them to your desktop (by right clicking) and print them. They are formatted for an 8.5x11 sheet of paper, so it fits perfectly on a sheet of printer paper. I also made them in generic colors so anyone can use them.
DIY Bridesmaids Wine Bottle

- Printer paper
- Printables
- Tape
- Ruler
- Paper trimmer
- Bottles of wine (We used three bottles of Woodbridge by Robert Mondavi wine: Chardonnay, Pinot Noir, and Riesling. These are currently on display in every grocery store around here. I cut my labels to fit these.)
What You'll Do:
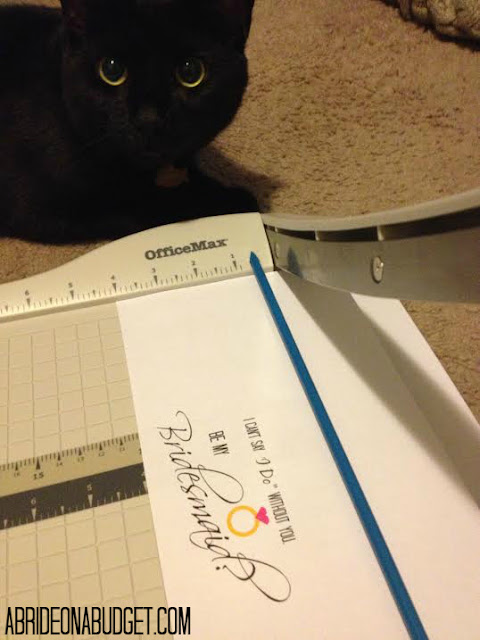
Print the printables. With a ruler, measure four inches* (with the text centered between it) and make a small mark with a pencil.
*Four inches is the height of the Woodbridge wine label. If you're using a different brand, you will need to measure and cut accordingly.
Using the pencil marks as a guide, cut the image onto a four-inch strip.
Be really careful in case you have a super cute and nosy like mine who completely wants to be included in everything. My cat, Totes McGotes, always wants to be involved. He was so good and just sat and watched me, but I was worried about him close to the blade.
Wrap the label around the bottle, taping it in the back.
That's it.
If you want, you can leave a little extra room at the top and write your bridesmaids' names above the image. The printable has enough space for you to do that.
If you're feeling really creative (or just don't like your handwriting), you can open the printables in a program like PicMonkey (which is what I used to design these originally) and add in your bridesmaids' name up above the image. Just be sure to keep it small enough to fit on the front of the bottle. You can use my image as a guide.
Bridesmaids printable:

Future in laws printable:
Connect with Woodbridge by Robert Mondavi: Facebook | Twitter | Pinterest
We have a few other wedding printables available for free, too. They're all listed below:
- Bridal Shower Word Search
- Mason Jar Hot Chocolate Mix Favors
- Be Wise, Don't Drink & Drive Owl Printable
- Lucky Duck Wine Rehearsal Dinner Gift
- DIY Bridesmaids Cards
- DIY Thanks A Latte Coffee Wedding Favor
- Honeymoon Packing Checklist
- DIY Bridesmaids Wine Bottle
- Famous Couples Bridal Shower Game
- Thank You For Being My Groomsman Cigar Gift
- DIY Wedding Sparklers & Free Printable Tags
- Tears Of Joy Envelopes
- Bridal Bingo
BRIDAL BABBLE: Would you makes a bridesmaids wine bottle for your girls?
Tuesday, June 2, 2015
Four Ways For Couples To Be Healthy Together
Pete and I live in North Carolina and all our family and friends live in New York. That means we spend a lot of time doing things as just us. But, honestly, being newlyweds, that's nice. It really gives us time to hang out together and just grow our relationship. We do everything from going to the beach to grocery shopping to getting healthy together. That last one, health, it's arguably the most important. We do our best to be as healthy as possible for each other and our life. That doesn't mean we worry about numbers on a scale (the battery in our scale died months ago and we actually haven't fixed it because that number doesn't matter). It's about non-scale victories: feeling good and making choices that keep us that way. There are so many of these choices that we make daily and together. I listed them below, in order of how they happen in our day, not order of importance.
1. Drink smoothies for breakfast.
Smoothies seem to be the latest buzzword, but we've been having them for a while (ever since Pete watched a video where Alton Brown suggested your breakfast should be purple). Each night, Pete will put together a smoothie for each of us in blender cups (which we got from our wedding registry). What's so cute is that his smoothie recipe calls for half of two fruits, which means the best way to use a whole fruit is if we each have half. Just like marriage: two parts of a whole.
Berry Smoothie Recipe
1/2 mango
1/2 banana
1/4 cup frozen mixed berries
1/4 cup orange juice
2. Be active together.
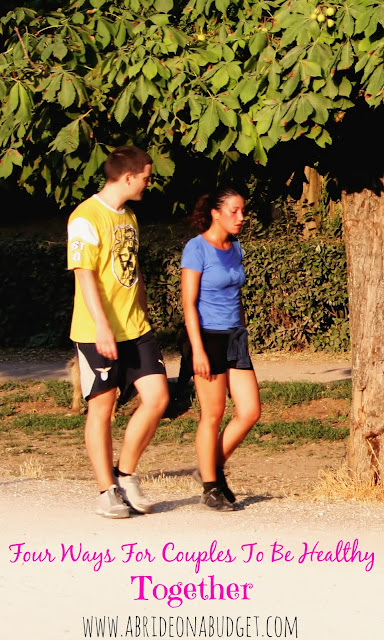
I work at home (for myself) and Pete works outside of home. After work, when he's done for the day, I build a break into my schedule. We use that time to walk to the local park and walk a few miles together before heading home. It's good for us physically (because of the activity) but for us as a couple too. Our walk is a phone-free zone. Neither of us spend time texting or on social media or playing mobile games. We use that time to converse with each other about our day (and to vent about anything frustrating that happened that day too). It's nice to carve out that time o really be present for each other.
But that's not the only way couples can be active together. Go hiking, take runs on the beach, go to the gym together, put on a P90x DVD. All these activities are a lot more fun with a partner -- and marriage gives you that workout buddy. If you can't work out together every day, that's fine. Just try your best to find time to do something together (even if it's just yoga between the commercials while you're watching a TV show).
3. Cook dinner at home -- together.
Pete and I cook nearly every meal at home. We run our dishwasher more often than anyone else I know, but that's something that makes me happy. It reminds me that we used our bowls and pots and pans to create something delicious rather than calling for take out. When we cook at home, we do it from scratch. We know exactly what is going into our bodies. I laugh at us sometimes because we do really make most everything from scratch. Pete makes homemade chicken stock when we buy a whole chicken for dinner; I make ricotta cheese; we make bread. If it's possible to make it, we do.
You don't have to make everything from scratch, but you should make meals at home. It's cheaper and healthier, plus it gives you more time to spend together as a couple. Go on Pinterest and find a new recipe, then make it together. It's so much fun. Plus, if you split up responsibilities, you'll both be involved and no spouse will resent the other (and that makes for a happy marriage).
If you're looking for healthy and delicious recipes ideas, I have a couple really easy ones that anyone can make. Try our Cauliflower Soup (my new favorite) or our Chicken Chili.
4. Relax together. And apart.
Some of the best conversations had are the ones where no words are said. When you can just sit with someone without saying anything, that's a comfort people yearn for. At the end of the day, just try and relax with your significant other. Maybe you'll watch the news, maybe you'll snuggle, or maybe you'll stream something on Netflix (We would suggest House of Cards, but you can pick whatever you like). When we're hanging out at night, Pete actually puts his phone on airplane mode. He's really popular and his phone is constantly going off. And that's fine because having friends is important. But when we are unwinding together at night, he makes sure that it's just us.
But relaxing apart is nice too. Pete goes to bed before me, so he will go to the bedroom with a magazine and just read, then he'll listen to meditation before bed. And me? I love Candy Crush. It shuts down my entire system and just causes me to unwind. Spending time together is important, but it's also healthy to have some alone time and foster your own interests.
BRIDAL BABBLE: What other ways you can think of for couples to be healthy together?
Four Ways For Couples To Be Healthy Together
1. Drink smoothies for breakfast.
Smoothies seem to be the latest buzzword, but we've been having them for a while (ever since Pete watched a video where Alton Brown suggested your breakfast should be purple). Each night, Pete will put together a smoothie for each of us in blender cups (which we got from our wedding registry). What's so cute is that his smoothie recipe calls for half of two fruits, which means the best way to use a whole fruit is if we each have half. Just like marriage: two parts of a whole.
Berry Smoothie Recipe
1/2 mango
1/2 banana
1/4 cup frozen mixed berries
1/4 cup orange juice
- Add all the ingredients to a single-serve blender cup. Blend. Enjoy.
2. Be active together.
I work at home (for myself) and Pete works outside of home. After work, when he's done for the day, I build a break into my schedule. We use that time to walk to the local park and walk a few miles together before heading home. It's good for us physically (because of the activity) but for us as a couple too. Our walk is a phone-free zone. Neither of us spend time texting or on social media or playing mobile games. We use that time to converse with each other about our day (and to vent about anything frustrating that happened that day too). It's nice to carve out that time o really be present for each other.
But that's not the only way couples can be active together. Go hiking, take runs on the beach, go to the gym together, put on a P90x DVD. All these activities are a lot more fun with a partner -- and marriage gives you that workout buddy. If you can't work out together every day, that's fine. Just try your best to find time to do something together (even if it's just yoga between the commercials while you're watching a TV show).
3. Cook dinner at home -- together.
Pete and I cook nearly every meal at home. We run our dishwasher more often than anyone else I know, but that's something that makes me happy. It reminds me that we used our bowls and pots and pans to create something delicious rather than calling for take out. When we cook at home, we do it from scratch. We know exactly what is going into our bodies. I laugh at us sometimes because we do really make most everything from scratch. Pete makes homemade chicken stock when we buy a whole chicken for dinner; I make ricotta cheese; we make bread. If it's possible to make it, we do.
You don't have to make everything from scratch, but you should make meals at home. It's cheaper and healthier, plus it gives you more time to spend together as a couple. Go on Pinterest and find a new recipe, then make it together. It's so much fun. Plus, if you split up responsibilities, you'll both be involved and no spouse will resent the other (and that makes for a happy marriage).
If you're looking for healthy and delicious recipes ideas, I have a couple really easy ones that anyone can make. Try our Cauliflower Soup (my new favorite) or our Chicken Chili.
4. Relax together. And apart.
Some of the best conversations had are the ones where no words are said. When you can just sit with someone without saying anything, that's a comfort people yearn for. At the end of the day, just try and relax with your significant other. Maybe you'll watch the news, maybe you'll snuggle, or maybe you'll stream something on Netflix (We would suggest House of Cards, but you can pick whatever you like). When we're hanging out at night, Pete actually puts his phone on airplane mode. He's really popular and his phone is constantly going off. And that's fine because having friends is important. But when we are unwinding together at night, he makes sure that it's just us.
But relaxing apart is nice too. Pete goes to bed before me, so he will go to the bedroom with a magazine and just read, then he'll listen to meditation before bed. And me? I love Candy Crush. It shuts down my entire system and just causes me to unwind. Spending time together is important, but it's also healthy to have some alone time and foster your own interests.
BRIDAL BABBLE: What other ways you can think of for couples to be healthy together?
Monday, June 1, 2015
DIY Wedding Table Setting
This blog is called "A Bride On A Budget." Everyone has a budget. Some budgets are higher than others, but no one I know (and no one who I think reads this blog) has an unlimited stream of money. Everyone has a limit, which means everyone has a budget.
That doesn't mean you can't have an amazing wedding, it just means that sometimes you have to get a little creative. Like with our DIY wedding table setting.
I absolutely love how it came out. It's simple and pretty ... and made from a toilet paper roll. One woman's trash is another woman's wedding table setting. This is a very good chance you have toilet paper in your home. As do your parents. And your bridesmaids. Ask them all to start collecting their rolls for you and you'll have enough in no time.
DIY Wedding Table Setting
What You'll Need:
- Toilet paper rolls
- Paint (I used Martha Stewart Pearl because I love the shine in it)
- Paper plate
- Shot glass
- Scissors
- Pencil
- Foam paint brush
- Plastic utensils
- Glue
- Paper doilies (mine were four inches)
What You'll Do:
Fold the toilet paper roll in half.
Align the shot glass on the end of the toilet paper (about one-third of the glass should be over the roll). Draw around it with a pencil.
Cut the semi-circle out.
Use that semi-circle to measure a matching semi-circle on the other side. Cut that one out too.
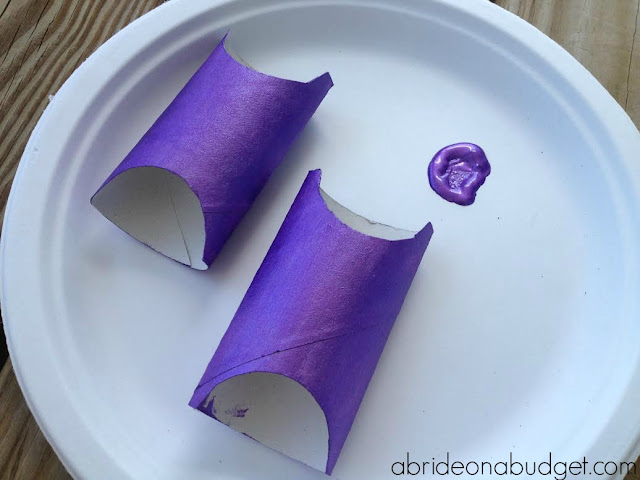
Paint a layer of paint over the entire toilet paper roll. I used a foam brush because you don't end up with streak marks like you do with a brush with bristles. One layer of this paint was enough.
Let it dry.
Paint the inside as well, as far as you can go. If I had a smaller foam brush, it would have been easier to paint the entire inside. You don't need to, honestly. No one is really going to pick this up to make sure you got every nook and cranny inside. But you do want to make sure you paint deep enough that when your guests remove their utensils, they're not looking at the inside of a plain toilet paper roll.
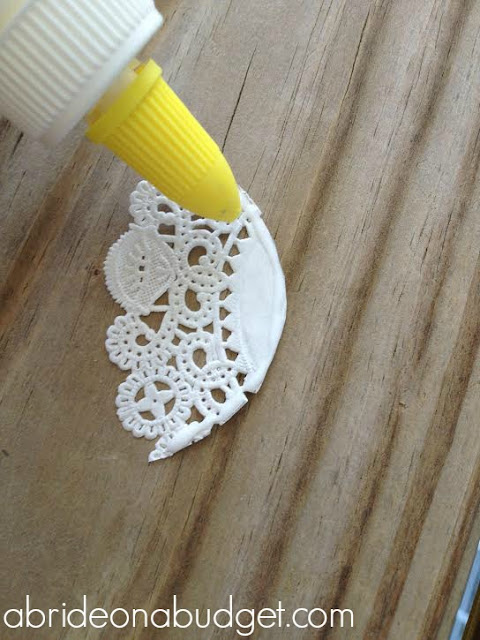
Use that same semi-circle to measure a piece of doily. I moved mine around until the "corners" matched up with the doily's edge. Trace the semi-circle with a pencil.
I was able to get four pieces out of each four-inch doily I had. Five would have been a little too tight.
Glue around the edge.
Affix it into opening on the toilet paper roll. Do the same on the opposite side. Let the glue dry completely. Fill with a knife, fork, and spoon and leave it on each place setting at your wedding (bridal shower or rehearsal dinner).
BRIDAL BABBLE: Do you think you could make this DIY wedding table setting?
Subscribe to:
Posts (Atom)
