Thursday, October 27, 2016

Bridal Bingo (And a free printable)

One of my favorite parts of a bridal shower is the games, especially bridal bingo. I know a lot of people think the games are corny, but I think they're a great way to stay involved in a shower.

I mean, what if you're at a shower where the only person you know is the bride-to-be? She's off being social because she knows everyone (or, well, almost everyone, except, potentially, a few in-laws-to-be). It leaves you stuck at a table with other people who also know the bride only. Or, worse, a table full of people who know everyone but you.

There's only so much chit chat about how you know the bride and the weather before you start looking at your phone and wondering when you can sneak out.

That's why you need bridal games. They help pass the time a little easier and keep people involved.

My favorite shower game? Bridal bingo.

Bridal bingo is such a fun bridal shower game! Get a bridal bingo board for FREE from www.abrideonabudget.com.
 
It's perfect for a bridal shower.

Guests get a blank bingo board and fill it with gift items they think the bride-to-be will receive. Then, as the bride is opening gifts, you mark off your bingo card. First person to get five in a row wins.

If you remember what you bought, that easily fills a box. And if you shopped her registry, you can sort of remember what else was on there when you were shopping. Or go with sheets and towels. Everyone always registers for sheets and towels.

The photo above is my friend Beth's bingo board from my shower, and, of course, she won the first prize.

Prizes were cute lemon keepers from Good Cook filled with lemon candy. My mom gave out 25 (because after that, she ran out of Christmas bags to wrap them in). More prizes is better than less because it keeps more people involved.

If you want to play bridal bingo at your shower, I created a printable for a bridal bingo board. Just right click the photo and save it to your computer. Whenever you're ready, you can print it on an 8.5x11 sheet of paper. You can print two boards per sheet. Make sure to have one board per guest -- and maybe a couple extras, just in case.

Bridal bingo is such a fun bridal shower game! Get a bridal bingo board for FREE from www.abrideonabudget.com.

If you don't have a printer, but you still want to play the game, you can always order bridal bingo sheets.

We have a few other free bridal shower printables too. They're all listed below:

BRIDAL BABBLE: Do you love playing bridal bingo?

Wednesday, October 26, 2016

DIY Bachelorette Party Drink Spinner

This DIY Bachelorette Party Drink Spinner shop has been compensated by Collective Bias, Inc. and its advertiser. All opinions are mine alone. #NeverTooHungover #CollectiveBias

Messaging below is intended for ages 21+ and is intended to be enjoyed responsibly, in moderation.

We live in a town where bachelorette parties come to be. I've never seen so many in my life. Every time we go out, there are at least two women in makeshift veils with a gaggle of women around her.

And I always say, "Aww, there's a bride," with more sincerity than most of the other things I probably say that night.

I love brides-to-be, their happiness and smiles and anticipation. I also love that bachelorette parties are their excuse to stop wedding planning, stop stressing, and start having a good time.

I'll be honest: Most of the bachelorette parties we bump into happen at bars. Which is fun, especially if you bring our bachelorette party spinner with you.. It's meant to be completely fun, and, we are encouraging you to enjoy the spinner and any bachelorette parties responsibly and in moderation.

msg 4 21+: Planning a bachelorette party? Make it even more fun with games! Get a free printable for this bachelorette party spinner from www.abrideonabudget.com. #NeverTooHungover

DIY Bachelorette Party Drink Spinner


The bachelorette party drink spinner is a really fun and one of the easier bachelorette party games to make.

Whatever drink you land on is what you should buy for the bride. And, of course, the bride can always say no or opt for water or soda instead. Have fun with this, and at the party, but it's important that you are responsible. And, if you are drinking, be sure to have a designated driver or arrange a taxi.

msg 4 21+: Planning a bachelorette party? Make it even more fun with games! Get a free printable for this bachelorette party spinner from www.abrideonabudget.com. #NeverTooHungover

What You'll Need:

What You'll Do:


msg 4 21+: Planning a bachelorette party? Make it even more fun with games! Get a free printable for this bachelorette party spinner from www.abrideonabudget.com. #NeverTooHungover

Use the paper trimmer to cut out the spinner and scissors for the arrow. The spinner is 4x4, which will perfectly fit into your back pocket (I tried!).

msg 4 21+: Planning a bachelorette party? Make it even more fun with games! Get a free printable for this bachelorette party spinner from www.abrideonabudget.com. #NeverTooHungover

Cut two sheets of contact paper that are approximately 5x5. Peel back one sheet and affix your spinner in the center. Peel back the paper on the second sheet and affix it over the spinner. Cut the edges with your paper trimmer.

Follow the same method to laminate the arrow as well.

msg 4 21+: Planning a bachelorette party? Make it even more fun with games! Get a free printable for this bachelorette party spinner from www.abrideonabudget.com. #NeverTooHungover

Cut a small slit in the arrow and the center of the spinner. Then, widen the slit in the spinner to a circle. If it's just a slit, it won't actually spin. It needs enough room for the paper fastener to move.

Put the paper fastener through the slit in the arrow, then through the spinner. Then, flatten the pieces of it to the back of the spinner.

Take it out with you and spin. The bachelorette party drink spinner is laminated, so don't worry if something spills on it. Just wipe it off and keep playing. And laminating it makes it pretty durable, so you can save it for the next friend's bachelorette party.

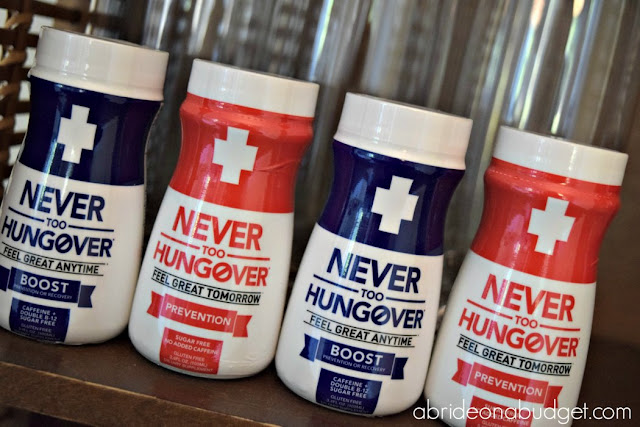
Bachelorette parties are turning from one night out into more of a weekend celebration, which means that heading to work Monday morning can be hard. That's why it's actually a good idea for your maid of honor to pick up Never Too Hungover Prevention or Never Too Hungover Boost for the bridesmaids. The 3.4oz bottle is recommended for up to 7 drinks. If you are planning on drinking more than seven, two bottles of Never Too Hungover are recommended.

msg 4 21+: Planning a bachelorette party? Make it even more fun with games! Get a free printable for this bachelorette party spinner from www.abrideonabudget.com. #NeverTooHungover

You can get Never Too Hungover Prevention (with a limeade taste) or Never Too Hungover Boost (with a berry taste). You need to drink it before/while drinking to help prevent the negative effects of a hangover, so give them to each bridesmaid before the night starts. You can give one to the designated driver too because Never Too Hungover is also good for an energy boost, even without alcohol!

Never Too Hungover, if you've never heard of it, is a healthy vitamin blend that helps neutralize toxins, restore vital nutrients, and rehydrate the body. Sounds like something good to pair with a night of drinking.

msg 4 21+: Planning a bachelorette party? Make it even more fun with games! Get a free printable for this bachelorette party spinner from www.abrideonabudget.com. #NeverTooHungover

Now, about that printable.

msg 4 21+: Planning a bachelorette party? Make it even more fun with games! Get a free printable for this bachelorette party spinner from www.abrideonabudget.com. #NeverTooHungover

Just right click that image above and save it to your computer. Then, you can print it whenever you are ready for it.

BRIDAL BABBLE: Would you bring this bachelorette party drink spinner to your party?

Want more bachelorette party ideas?

Monday, October 24, 2016

DIY: Homemade Canvas Prints

I had a time when I was obsessed with Pinterest. I spent quite a bit of time pinning, but I had a way to justify that. I said it  was okay because I was pinning stuff for this blog, and that's considered work, so it's excusable. And then, because I still pin a lot, I also do a lot of arts and crafts still ... like these homemade canvas prints.

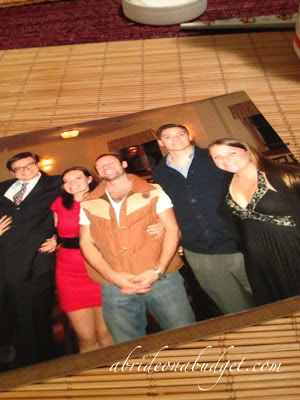
I found the project on Pinterest and nearly immediately had to make them using our engagement party pictures. They're really easy to make an definitely something you can do with your wedding photos.

And, speaking of, if you have Amazon Prime, you can get 50 free 4x6 prints with the code OCT50PRINTS, while supplies last.

Want to hang some photos? You should make these Homemade Canvas Prints from www.abrideonabudget.com and hang them that way!!

Homemade Canvas Prints


Like I said, these homemade canvas prints are easy to make. But, they're also easy to ruin. If you're storing them before hanging them, do not stack them on top of each other. The heat will fuse them together.

Want to hang some photos? You should make these Homemade Canvas Prints from www.abrideonabudget.com and hang them that way!!

What You'll Need:

What You'll Do:

Take the flooring sample and turn it upside down on the paper.

Want to hang some photos? You should make these Homemade Canvas Prints from www.abrideonabudget.com and hang them that way!!

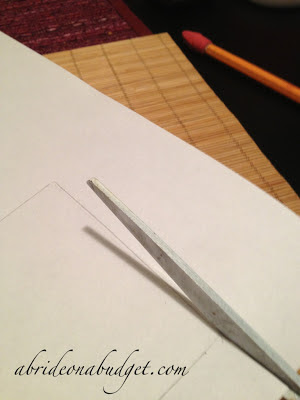
Trace the flooring sample. Use a pencil in case it slips and you need to start over. If your middle name is perfection, you can use a pen.

Mine's not. It's Mariko. It's my grandma's name and it's Japanese for Marie.

Want to hang some photos? You should make these Homemade Canvas Prints from www.abrideonabudget.com and hang them that way!!

Cut out the box.

Want to hang some photos? You should make these Homemade Canvas Prints from www.abrideonabudget.com and hang them that way!!

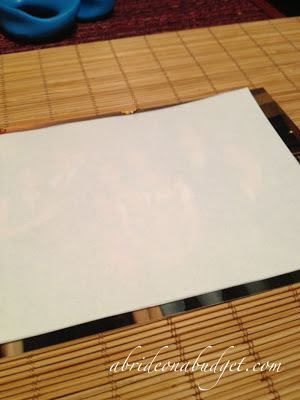
Lay the tracing on top of the photo. You'll be able to see the photo through the paper, so you'll be able to align the photo as you want. If you're having trouble, though, you can hold it up to the light and it'll help guide you. Or, use the trick we learned in elementary school: Tape the photo and paper to a window and the light will help you see through the paper. This won't work, however, if you are making this craft at night.

Want to hang some photos? You should make these Homemade Canvas Prints from www.abrideonabudget.com and hang them that way!!

Cut the photo to the size of your tracing.

Hold the photo against the flooring tile to check the size.

If you weren't completely precise with your tracing, you'll end up with a bit of overlap. That's okay. You can just cut it. Or not. Whatever works.

Want to hang some photos? You should make these Homemade Canvas Prints from www.abrideonabudget.com and hang them that way!!

Apply Mod Podge to the flooring sample. I did it to the shiny, finished side of the sample because the back is sort of coarse and porous and I wasn't sure how the Mod Podge would take to that.

Want to hang some photos? You should make these Homemade Canvas Prints from www.abrideonabudget.com and hang them that way!!

Cover the entire tile. Make sure it's a thin layer. If you have globs, they can potentially cause air bubbles behind your photo and then you're gonna make a mess.

Want to hang some photos? You should make these Homemade Canvas Prints from www.abrideonabudget.com and hang them that way!!

Affix the photo to the front of the flooring sample. Now, here's where it gets scary.

Want to hang some photos? You should make these Homemade Canvas Prints from www.abrideonabudget.com and hang them that way!!

Cover the entire photo in Mod Podge. I'm gonna be honest: I wasn't sure about this. It looked fine with the photo stuck on there. I really thought about leaving it and ending the tutorial right there. I mean, I had never covered a glossy photo in Mod Podge before. I wasn't sure if I was going to ruin the photo or what.

But then I told myself if I did ruin the photo, I could just print another for less than a quarter, so it's worth a shot.

Want to hang some photos? You should make these Homemade Canvas Prints from www.abrideonabudget.com and hang them that way!!

And, since I was diving right in, while I was waiting it to dry, I followed all the steps above and began working on a second photo.

They dried completely clear. My worrying was for nothing (as is often the case with my worrying).

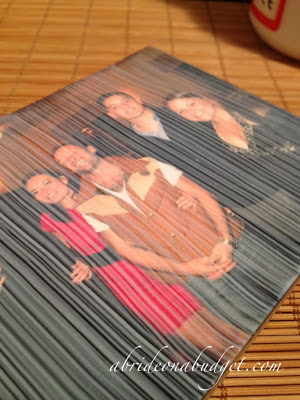
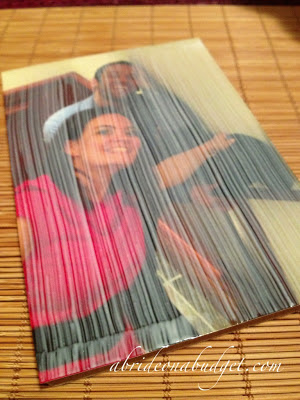
When they were dry, I applied a second coat of Mod Podge. On the one above, my first coat was up and down and my second was left to right. It created a crosshatch appearance when both coats were dry.

Want to hang some photos? You should make these Homemade Canvas Prints from www.abrideonabudget.com and hang them that way!!

When you hold the photo on an angle, that's when you can see the texturing of it. Or you can just touch it and feel it, but since you can't touch it on the screen, holding it at an angle towards the light was the best I could do (it also makes me look like I'm in a witness protection program but giving a televised interview so my face had to be blurred, which is kinda funny).

Want to hang some photos? You should make these Homemade Canvas Prints from www.abrideonabudget.com and hang them that way!!

The photos dried completely clear ... as expected. They're not glossy like they were before the Mod Podge applications, so it definitely looks like something was done to these.

They look fantastic. I'm absolutely in love with them. I really like how they came out, I love how they feel (both physically and the ambiance) and it really beats buying a few more frames and hanging photos on the wall. The truth is, we have a lot of photos in frames hanging, as most people do. And, eventually, I feel like frames are just harsh and uninviting, so I like the open airiness of these.

To hang them, just use hot glue to string to the back of these and hang them using a nail.

BRIDAL BABBLE: Do you think you could make these homemade canvas prints?
Wednesday, October 19, 2016

DIY Chalkboard Serving Tray #CoffeeCreamerCombos

This shop has been compensated by Collective Bias, Inc. and its advertiser. All opinions are mine alone. #CoffeeCreamerCombos #CollectiveBias

When you're planning your wedding, you stress. It's true. I wish I could say that there wasn't a single time when my frustration got the best of me, but I can't. I told myself I was allowed to have one terrible wedding planning meltdown ... and I did.

But to keep yourself sane, you have to take care of yourself too. You need to carve out time to just breathe or take a walk or hang out with a bridesmaid and listen to her talk about her life and you have to curb the wedding talk.

And sometimes, you have to take care of your fiance too. Because as hard as it is for you to stress over chair covers, it's hard for him to sit back and watch you stress, knowing he can't do anything about it.

So maybe, just maybe, serve him breakfast in bed. And you can totally serve it on a DIY Chalkboard Serving Tray.


DIY Chalkboard Serving Tray


I actually upcycled this from an old cabinet door. It's the first time that I tried a project like this, you know, one using tools all by myself. As I'm typing this, my arm is still kind of sore. But I'm so incredibly proud of myself ... so much that I think I'll serve myself breakfast in bed on this for the next week or two.


What You'll Need:
  • Cabinet door
  • Two door handles
  • Chalkboard spray paint
  • Painters tape
  • Chalk
  • Scrap paper
  • 4 screws
  • Drill
  • Screwdriver

What You'll Do:

Wash and dry the cabinet door first. You want to make sure that any dust or oils (from touching it) are completely gone.


Use painters tape to line around the inner portion of your door. It was easier for me to cut the tape into very small pieces when I was doing the first row. I was able to be more accurate with my placing. Then, cover the rest of the outer "lip" of the door. Continue covering until the only white space showing is what you want to be spray painted.


Bring your cabinet door outside and set it on a piece of scrap paper. You absolutely don't want to spray paint indoors. You also probably want a barrier between you and whatever surface you are spraying over. I usually go into our woods to spray paint so the only thing under me are pine needles, but I still put down the scrap paper anyway.

Spray one even layer of the chalkboard spray paint. You'll need to let this sit fifteen minutes before you can spray another layer. I used this as a time to call my mom and see if she wanted to take a walk down the block with me. That was a lot more fun than sitting and watching paint dry.

Come back and spray a second layer of spray paint. Now this needs to sit for 24 hours before you can do anything else.


After a day has passed, peel off the painter's tape.
Color completely over the chalkboard surface with a piece of chalk, then wipe it away. Woohoo. You have a chalkboard now.


Measure exactly where you want the handles to go and mark them with an "x".

Here's the hardest part, if you're like me and not very versed in power tools.


Using the drill, drill a hole completely through the "x". Repeat this four times.

Small aside: you want to put your cabinet door on a flat surface, overhanging it. Your drill needs to go all the way through and you don't want to put a hole in whatever you're leaning on. Also, if you are holding your drill straight down, your hole will be straight as well.


Then, put a screw into a whole and screw it up almost all the way through. Pete told me you could use the drill to do this as well, but it wasn't working for me, so I did it with a screwdriver. That's why my arm is killing me (and why I should probably do more than walking as exercise). When the screw starts popping through the wood on the other side, fit it into the hole in the handle. Continue screwing until it is secure.

Now comes the easy part: figuring what to serve for breakfast. If you know me, you know my love of coffee. I'm obsessed. I'm drinking a tremendous cup right now (picking it up with the opposite hand of the one that worked the screwdriver). My current coffee obsession is a good cup of caramel coffee. Oh. My. Gosh. For a long time, I wasn't a fan of flavored coffees. I was just a plain and simple flavor free coffee drinker. A friend told me to try caramel and I was hooked. So imagine my excitement when I found our Harris Teeter has Dunkin Donuts® Bakery Series® Caramel Coffee Cake in stores. Oh hello new favorite!


Pair it with the Dunkin’ Donuts® Coffee Creamer in Extra Extra (because we all deserve a little extra in our lives) and you have the perfect cup. Plus, you can also pick that up at Harris Teeter, making it one-stop shopping.


Coffee isn't enough for breakfast, so be sure to fill your serving tray with other goodies, like a muffin and fresh fruit. And, since you are serving it on a chalkboard, be sure to leave sweet notes on it, especially if you're bringing your fiance breakfast in bed. You can make them wedding related, like, "Can't wait to marry you in 200 days" or timely with "I fall for you every day."

BRIDAL BABBLE: What would you write on your DIY chalkboard serving tray?

Tuesday, October 18, 2016

Easy DIY Tissue Favors

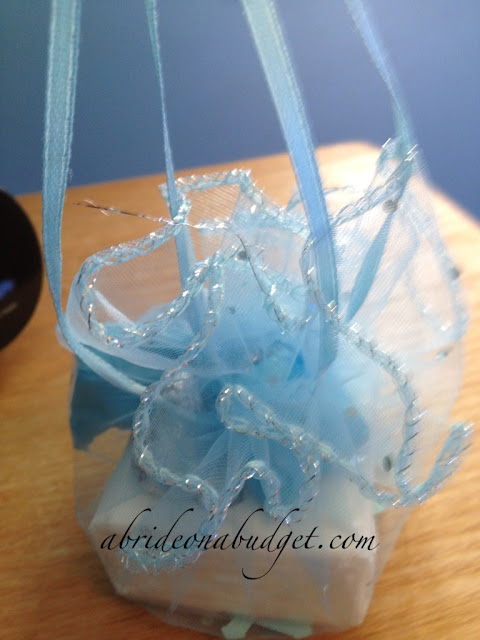
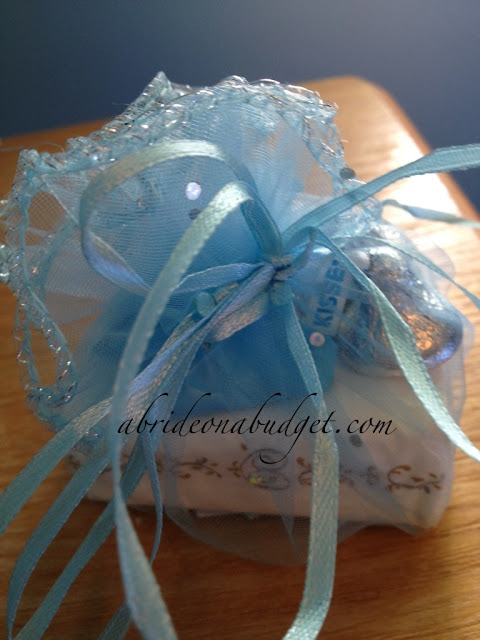
I went to my friend's son's baptism party once upon a time, and she made these super cute and easy DIY tissue favors.


Now, if you invite me somewhere, you should immediately assume I will pull apart anything you give me and put it back together -- while photographing it. The truth it, there won't be an easy favor that I'll get without deconstructing it and posting it here.

Easy DIY Tissue Favors


Granted, yes, these easy favors are baptism-themed, since, yes, we went to a baptism. But you can take this concept and apply it to your wedding with a few little tweaks.

easy favors

What You'll Need:

What You'll Do:


Start by opening the bag. What's great about these bags is that the ribbon is attached so you don't have to buy ribbon separately. Also, you don't have to fumble with trying to tie these. You just pull the ribbon and it closes.

easy favors

Place the confetti at the bottom of the bag. I would say about two pinches will work perfectly, but you have to see how many bags you have and allocate appropriately.

easy favors

Warn your guests that there's confetti inside. Or don't -- and have them open the bag like me ... with confetti all over their lap. It's sort of like sending a glitter bomb.

easy favors

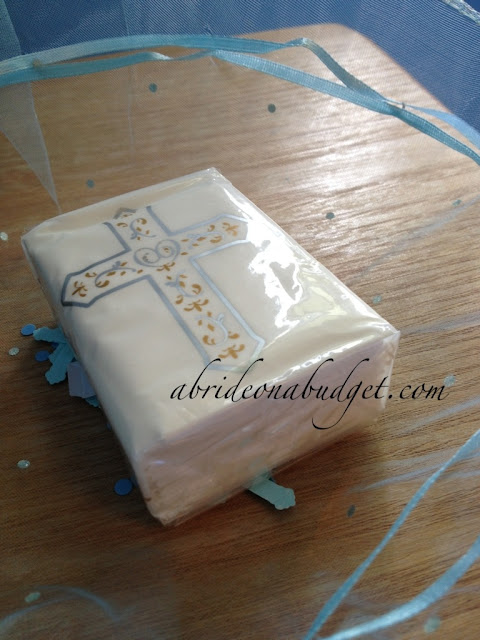
Put the tissues on top of the confetti.

easy favors

Pull the ribbon a little to create a wall. It'll be a lot easier for you to place the other items on top when you do this. If you leave the entire bag wide open, you risk having the candy fall on the sides, which is just a little annoying.

easy favors

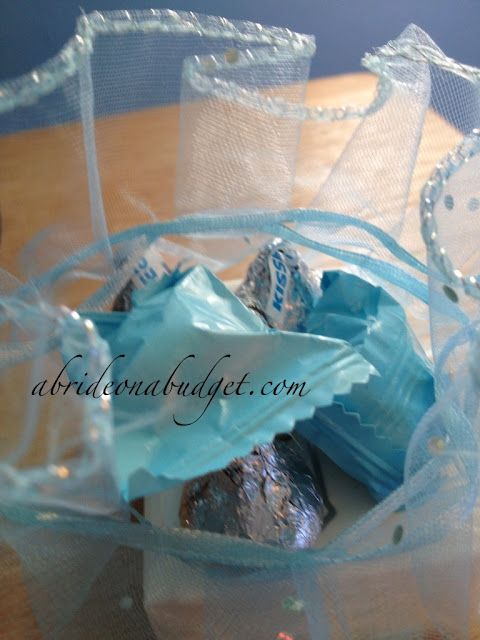
Fill the bag with kisses and buttermints.

I love both of these for wedding favors. Kisses are obvious and mints because you and your spouse are "mint to be."

easy favors

Pull the ribbon tight.

easy favors

Tie the ribbon in a bow.

easy favors

Affix a thank you sticker.

This is key. Wedding thank you cards traditionally don't go out for about six months after the wedding, but this is a way to say thank you right away.

These are really a simple easy favor to put together and to place on each table setting on your wedding. Plus, they're really budget-friendly, but don't look cheap. That's completely ideal.

BRIDAL BABBLE: If you made these easy DIY tissue favors, what would you fill them with?

Monday, October 17, 2016

What Should You Write On A Personalized Wedding Hanger?

I remember being at my cousin's bridal shower, and as she opened the gift from the bridesmaids, I saw something that made me say: I want that.

It was a personalized wedding hanger.

Want a personalized wedding hanger but you're not sure what to write on it? Get five great ideas at www.abrideonabudget.com.

The trouble, though, is deciding what you should write on a personalized wedding hanger.

What Should You Write On A Personalized Wedding Hanger?


Bride
This is actually what I did -- on the hanger that I forgot in my closet on wedding day and didn't even use for photos. Sigh. What was good, though, is I was able to lend it to a friend who got married after us. She used it in her photos no problem. If my hanger wasn't as generic, I wouldn't be able to share it.

Mrs. NewLastName
I didn't change my name, so that was never an option for me, but if you're planning on changing yours, that works. It might seem a little strange to look at it in the closet for a while, also because that's really your husband's mother's name for the time being, but it will work for after you're married.

Mrs. 
If the whole idea of the hanger in your closet with your future mother-in-law's name on it for months, you can just go with Mrs. It's simpler. But, if you're like me and you aren't planning to change your last name, you actually won't technically be a Mrs. You'll be Ms. So keep that in mind.

Your Wedding Date
Instead of putting a name identifier, you can put your wedding date instead. That will be a pretty reminder of your anniversary every time you look at it. I've seen hangers that actually add the wedding date up on the wood part, so just make sure you aren't doubling that.

Lisa ♥ Pete
Okay, you wouldn't actually be putting Lisa and Pete because those are our names, not yours. But you could get this with your names. Then, you could use it in the future to hang other clothes on, which especially works because you will always love your husband.

Decisions decisions.

If you're looking for one of these, be sure to check out all the personalized wedding hangers on Amazon. And, if you're looking for the one in the photo, it's here.

BRIDAL BABBLE: What would you write on a personalized wedding hanger?

Thursday, October 13, 2016

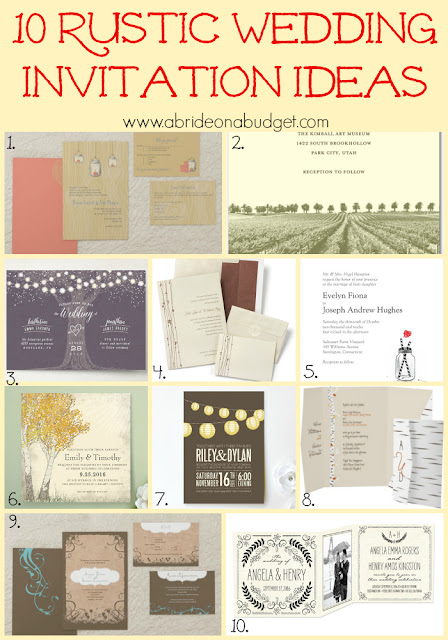
10 Rustic Wedding Invitation Ideas

Are you planning a rustic wedding? They're so popular. With mason jars, hay bales, and twinkling lights, you have a bunch of options for pretty wedding decor. Definitely kick that off with rustic wedding invitations.

There are a ton to choose from out there, but I'm here to help. I went through tons to put together this list of 10 Rustic Wedding Invitation Ideas. Hopefully they'll help you decide on yours.

Are you planning a rustic wedding? Be sure to get started with these 10 Rustic Wedding Invitation Ideas from www.abrideonabudget.com.

10 Rustic Wedding Invitation Ideas

  1. Candlelit Mason Jar Wedding Invitations
  2. Rustic Romance Wedding Invitations
  3. Garden Lights Wedding Invitations
  4. Vines Invitation Kit
  5. Rustic Jar Wedding Invitations
  6. Fall Tranquility Wedding Invitations
  7. Paper Lanterns Wedding Invitations
  8. Love in the Woods Invitations
  9. Garden with a Twist Invitations
  10. Rustic Wreaths Wedding Invitations
If you're planning a rustic wedding, be sure to check out our rustic weddings board on Pinterest.

If you're unsure about your wedding invitations, you can get a few samples to help your decision making. You can get one free invitation from MagnetStreet and/or eight samples from Wedding Paper Divas.b>Which of these rustic wedding invitation ideas is your favorite?