Our baby, Mike, is getting married!
We are so happy for him and so excited to welcome a very sweet, kind, and adorable young lady -- Chrissy -- into our family. Their wedding is next month, so I made them a DIY wedding card box.
It is a tradition for me to create these boxes for each of our children to use on their special day. It started with my making a homemade card box for my daughter Lisa, the owner of this blog, four years ago and then for our older son six weeks later! (Yes. They really did do that to us -- but it was wonderful!)
I thought, as I was making this box, that there might be A Bride On A Budget readers who would like a tutorial on making something for their guests to deposit their cards into. I took pictures while I worked on the box so that I could do this guest post. Normally, you would find me posting on my own blog, Life Of 2 Snowbirds. (Hey, had to get a shout out in there somehow!!)
DIY Wedding Card Box
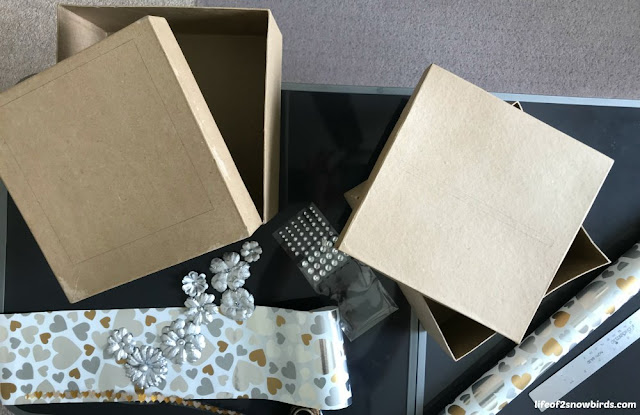
I ordered the cardboard boxes from this online. The set I ordered had three, but I only used two of the three boxes for this project.
If you need a three-tier card box, you can still follow these DIY wedding card box instructions. You'll just have to add an extra layer. It'll be easy to figure out once you start getting into these steps.
If you need a three-tier card box, you can still follow these DIY wedding card box instructions. You'll just have to add an extra layer. It'll be easy to figure out once you start getting into these steps.

What You'll Need:
- Set of cardboard boxes
- Box cutter
- Wrapping paper
- Ruler
- Scissors
- Mod Podge
- Roller
- Hot glue gun with glue sticks
- Washi tape
- Pencil
- Binder clips
- Embellishments (totally up to you)
What You'll Do:

Cut out openings.
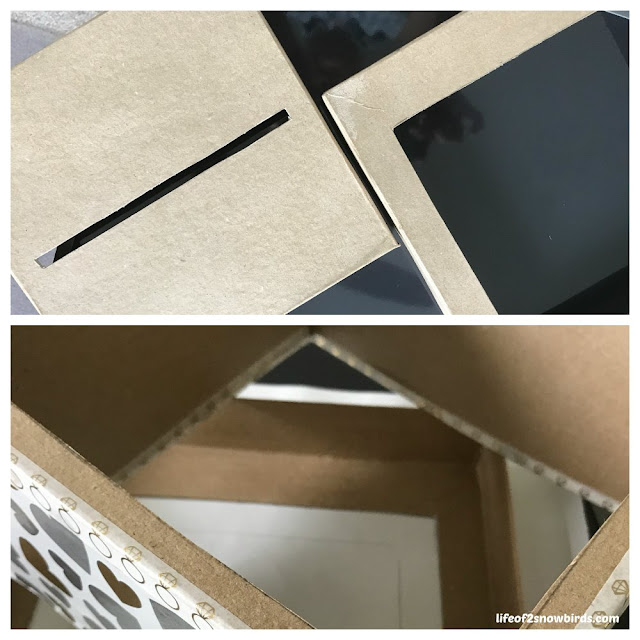
Using your ruler, measure an opening in the lid of the smallest box approximately 1/4-inch wide by 7.5-inches long. This is the slit for the cards to enter the box. I measured mine to end up in the middle of the lid, but where you want the opening is up to you.
Next take the smaller box and place it on the lid of the larger box. I placed my boxes with the backs of the boxes flush, but you can place your smaller box in the middle of the larger box if you prefer.
Lightly trace the outline of the smaller box onto the lid of the larger box. Now, make this outline 1/2-inch smaller on all sides. Measure and draw your new lines. Cut along these inner lines with your box cutter.
You'll end up with a piece of cardboard from the lid of the larger box.
Take the piece of cardboard and place it in the center of the bottom of the smaller box. Trace around it. Cut along these lines with your box cutter to make a matching hole in the bottom of the smaller box.

Wrap boxes.
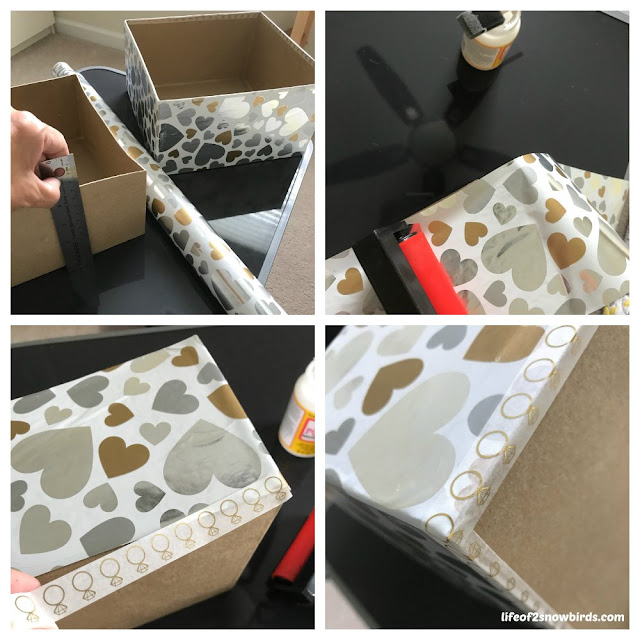
Measure the height and total length (which means all four sides total) of each box then measure and cut a strip of wrapping paper this size to wrap around each box. You'll want to add about 1/2-inch extra to the length of the wrapping paper so the ends of the strip overlap slightly. You will be hiding this seam in the back of your finished box.
Brush one side of the box with Mod Podge and place one end of the wrapping paper on it. Press down and adjust as necessary. Use your roller to get the air bubbles out from underneath the paper before you continue to the next side of the box. Repeat until all sides are glued down.
Do this to both boxes.
Use Washi tape to give a finished, clean look to the bottom and top edges of each box.
Note: I love using Washi tape because it is easily removable if you didn't get it on right the first time. It stays sticky even after pulling it off a couple of times. It also is sticky enough to stay on the box, but not sticky enough to rip the wrapping paper when it's being removed.

Wrap lid of small box.
Place the lid of the smaller box on the wrapping paper. Measure and draw lines 2-inches from the edge of all sides of the lid. Cut the wrapping paper along your lines.
Take the lid off the paper and Mod Podge the top only (You will be gluing the sides of the lid later.) Place the lid back on the center of the paper and press down. Flip the lid over so you are looking at the top side, and roll over the wrapping paper with the roller to get the air bubbles out.
Turn box lid over (you are now looking at the underside of the lid) and cut a slit, with your box cutter, in the center of the card entry opening. Carefully fold the edges of the wrapping paper through the slot and use the Washi tape to hold them down.
Draw a straight line from the corner of the box straight to the edge of the wrapping paper (see top right picture). This will make a rectangle. Cut off each rectangle. Mod Podge the wrapping paper one side at a time. Fold the paper over the side and into the lid. Use the roller to flatten and repeat with all four sides.

Wrap lid of large box.
Just like with the smaller lid, measure the lid and draw lines 2-inches from the edge of all sides of the lid. Cut the wrapping paper along your lines, then glue it in the same manner you did the smaller lid.
Then, following the instructions for the smaller lid, glue down the sides.
You will now be cutting away the center of the wrapping paper.
You will want to cut this piece 1" smaller, on all sides, than the opening. Measure and draw lines. Cut out a square (and discard it). Cut the wrapping paper diagonally at each corner. Mod Podge each edge of the paper, one side at a time, fold back and glue down onto box.
Use Washi tape on the corners of both lids to add some embellishment and to hide your seams.
Hot glue around the cutout of the larger box.
Line up the opening on the bottom of the smaller box to the opening on the large box. Place the smaller box on top of the large box.
Clip the boxes together with binder clips for a more secure bond. Remove clips when bonded.
Now the fun part.
Get your creative juices going and decide how you might want to decorate your box.
I was planning to buy ribbon to wrap around the bigger box and then add a large flower to put on the front center of it. When I went to the store to find this flower that I had visions of, it didn't exist. So I just wandered around the store with a scrap of the wrapping paper I used for the box and finally found beautiful paper flowers that matched the wrapping paper perfectly.
I also found stick on "bling" to add sparkle. Plus, I already had the heart tape. I decided that I wanted Chrissy and Mike's names and wedding date on the box and simply typed it out and printed it on card stock.
I can't believe this is the last box I'll be making, but that means all of my kids have found their soulmates. And that means that their mom's wish for them has come true!
BRIDAL BABBLE: Do you think you could make this DIY Wedding Card Box?


No comments:
Post a Comment