Showing posts with label favors. Show all posts

Friday, August 30, 2024

DIY Happy Trails Trail Mix Wedding Favor

I've always loved the idea of a late night snack at the end of your wedding, something to send the guests off with for them to enjoy during the car ride home (or in the hotel room before they pass out). I also love puns. A lot. More than most people probably should.

So these Happy Trails Trail Mix Wedding Favors are perfect. Plus, they're so easy to put together.

If you want some more ideas, check out all of our wedding favor ideas.

You should DEFINITELY send your wedding guests home with a late night snack ... and these Happy Trails trail mix wedding favors from www.abrideonabudget.com are PERFECT.

This trail mix is perfect for guests to grab when they're leaving at the end of the night.

Just set them all out on a small table by the exit of the ballroom. Make sure to make a sign that they'll see so that they make sure to grab a bag on the way out.

Happy Trails Trail Mix Wedding Favor


Affiliate links are included in this post and A Bride On A Budget may make a small commission if you use them.

You should DEFINITELY send your wedding guests home with a late night snack ... and these Happy Trails trail mix wedding favors from www.abrideonabudget.com are PERFECT.

Happy Trails Trail Mix Wedding Favor Ingredients:


How To Make Happy Trails Trail Mix Wedding Favors:


You should DEFINITELY send your wedding guests home with a late night snack ... and these Happy Trails trail mix wedding favors from www.abrideonabudget.com are PERFECT.

Fill your bags with small handfuls of your items. Realistically, you can make anything into trail mix although, traditionally, it's peanuts and raisins. Because of nut allergies, you'll probably want to skip the peanuts or any sort of nuts.

Better safe than sorry.

Try to get a mix of sweet and salty, and you're good.

Personally, I like Cheerios because they're cheap (especially if you can catch a sale or just pick up the generic in bulk) and they take up a lot of room. If you choose all very small items, like granola, it will cost you more to fill the bags.

You should DEFINITELY send your wedding guests home with a late night snack ... and these Happy Trails trail mix wedding favors from www.abrideonabudget.com are PERFECT.

If you can lay the bag flat and have one single layer of items, you've filled it enough. You don't want to overstuff the plastic bags.

This isn't breakfast for the road, just a cute little parting gift. It shouldn't be a huge expense (and it will be if you fill each bag to the top).

You should DEFINITELY send your wedding guests home with a late night snack ... and these Happy Trails trail mix wedding favors from www.abrideonabudget.com are PERFECT.

Fold over the unfilled portion and tape it to the back. My bags ended up being one-third filled and the rest of the bag was folded over.

Affix the sticker on the front of the bag. I thought about using it to close the back, but then your display would show the edge of the bag. 

You should DEFINITELY send your wedding guests home with a late night snack ... and these Happy Trails trail mix wedding favors from www.abrideonabudget.com are PERFECT.


I used square address labels that are 2x2, which is perfect for one-third of a sandwich bag.

I designed this quick design in Canva, then printed them out at home. Simple.

See, most DIY items are about presentation. Sure, you could grab a pack of address labels from the store and print them yourself, but that rectangular shape won't take up enough real estate on these bags to make them look good.

And the thing with DIY. You don't want to run the risk of it looking cheap (and print at home address labels will run that risk).  

You should DEFINITELY send your wedding guests home with a late night snack ... and these Happy Trails trail mix wedding favors from www.abrideonabudget.com are PERFECT.

Sixlets (which are candy-coated chocolate-flavored candies, if you don't know), come in a variety of colors. I used the Spring mix because it's colorful and gives these trail mix bags a little pop.

You can buy these in bulk in any color you want, so you can make them match your wedding colors.

It took me under a minute to make each. If you set up an assembly line where each person have one job (one person to each trail mix item, one to close the bags and make sure the air is out, and one to affix the sticker and tape), you could knock these out in no time.

Just make sure your venue has an exit table or can turn over the welcome table to place these, and have your DJ or band make an announcement that these are available to guests.

Trust me, your guests will be talking about their trail mix the next day.

BRIDAL BABBLE: What would you put in your trail mix?


More Edible Wedding Favor Ideas


I made this trail mix as an example, but we actually did an edible favor as a send off. But, ours was a full candy bar with a ton of galvanized buckets filled with various wrapped candies.

You can see our full candy buffet spread if you click that link.


Monday, July 26, 2021

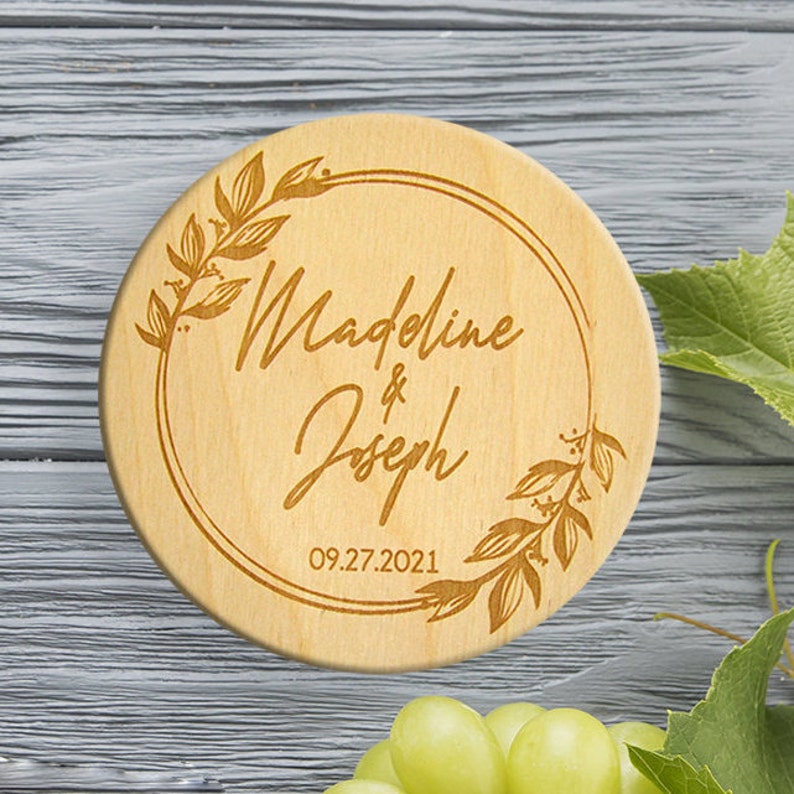
DIY Wooden Coasters Wedding Favors

This DIY Wooden Coasters Wedding Favors post is sponsored.

I'm a huge fan of edible wedding favors. If you ask my opinion about your wedding favors, I'll suggest something edible.

My second suggestion is something useful.

These DIY Wooden Coasters fall into the latter category, but they kind of go with the edible -- well, drinkable -- suggestion.

These are so incredible easy to make, but they are time consuming. So, if you already have your wedding date planned, start making these coasters now.

I say this because these are made from wood that we cut from trees in our backyard that had fallen down during a hurricane. And wood takes a long time to dry well enough to be appropriate for crafting.

Fresh cut wood needs to air dry for one year for every inch thick it is. These are cut about 1/4-inch, so we needed to air dry them for approximately three months before we could make these.

Of course, you can order natural unfinished wood slices online too if you don't want to go into your backyard and chop down trees.

These DIY Wooden Coasters Wedding Favors are perfect for your rustic wedding. You can use actual fresh tree or purchased unfinished wood slices to make them.

DIY Wooden Coasters Wedding Favors


These DIY Wooden Coasters Wedding Favors are perfect for your rustic wedding. You can use actual fresh tree or purchased unfinished wood slices to make them.


DIY Wooden Coasters Wedding Favors Supplies:


How To Make DIY Wooden Coasters Wedding Favors:


To Make Your Own Wood Slices:


These DIY Wooden Coasters Wedding Favors are perfect for your rustic wedding. You can use actual fresh tree or purchased unfinished wood slices to make them.

Start with a piece of freshly fallen down branch.

We have a lot in the backyard that fall during storms. Branches that have dried out due to time won't work because the wood will basically turn to dust when you try to cut them.

Use a miter saw to cut 1/4-inch slices of the branch.

These DIY Wooden Coasters Wedding Favors are perfect for your rustic wedding. You can use actual fresh tree or purchased unfinished wood slices to make them.

Leave the wood slices in a warm dry area for about three months. Every few days, flip them so each side gets exposed to the air.

To Make DIY Wooden Coasters:


Measure the widest part of your coasters, omitting the bark around the outside. That's the largest you're able to make your design. The design will look better if you leave some room between the edge of the design and the edge of your coasters, so we suggest not making the design go all the way to the edge.

Now, this is the fun part. You can design your coasters however you want. You can add your wedding date and your names, but honestly, something a little more generic increases the chances that your guests will want to keep these.

I made two different designs: "bottoms up" and "cheers". You could make them more wedding themed, like, "Let's toast the couple" or, if you're having a designation wedding, you could print an image of the state/country you're in with the words, "Take home a piece of (insert town here)" assuming, of course, your wood is actually from there.

If you have some graphic design skills, you can design your coaster images using a free design website, like Canva.com. That's what I used. If you don't have any design skills, the graphic I created is below.

To use that, just right click it and save it to your computer. 

Print the image on the NuFun Activities Wood Transfer Paper. You do not want to mirror the image when you print it. You want to print it as is.

If you've ever use transfer paper to make something like a homemade t-shirt, this is the opposite of how you print those. With that type of iron-on transfer paper, you mirror the image when you print it. Not with this transfer paper.

These DIY Wooden Coasters Wedding Favors are perfect for your rustic wedding. You can use actual fresh tree or purchased unfinished wood slices to make them.

Cut your design from the transfer paper. You want to cut as close to the design as possible. There will be white remaining around the design, but that's okay.

These DIY Wooden Coasters Wedding Favors are perfect for your rustic wedding. You can use actual fresh tree or purchased unfinished wood slices to make them.

Peel the liner from the back of the transfer paper.

Side note: This is a little difficult to do at first. I was able to separate them with a little pressure and my nails. It does start to get easier once you get the hang of it.

Place the coaster design exactly where you want it to lay on the wood slice you cut or natural unfinished wood slices.

These DIY Wooden Coasters Wedding Favors are perfect for your rustic wedding. You can use actual fresh tree or purchased unfinished wood slices to make them.

Place the parchment paper on top of the design.

These DIY Wooden Coasters Wedding Favors are perfect for your rustic wedding. You can use actual fresh tree or purchased unfinished wood slices to make them.

Use an iron to apply firm, even pressure on the parchment paper.

Alternating between holding the iron on top of the parchment paper and leaving it there is your best bet. You can slightly move the iron and back and forth over the parchment paper.

These DIY Wooden Coasters Wedding Favors are perfect for your rustic wedding. You can use actual fresh tree or purchased unfinished wood slices to make them.

Remove the parchment paper to check on your design. The white around the design will be completely translucent when you're done ironing, leaving only the design behind. If there's still white remaining, keep ironing.

Set the coaster aside and continue until you've made all your coasters. Let them cool completely.

These DIY Wooden Coasters Wedding Favors are perfect for your rustic wedding. You can use actual fresh tree or purchased unfinished wood slices to make them.

What's really cool is as the coasters get heated up, the rings from the wood get really defined. I think this is actually the sap coming through the rings, but I'm not an dendrologist, so don't quote me.

I know this for sure happens with the fresh wood you cut on your own, since that's what we used. I don't know for sure if it happens with the natural unfinished wood slices you purchase online. If it does let us know.

The definition that comes out looks amazing. I love how it adds a different dimension to the coasters. The backside of the coasters get this definition too, which is cool.

These DIY Wooden Coasters Wedding Favors are perfect for your rustic wedding. You can use actual fresh tree or purchased unfinished wood slices to make them.

Bring the coasters outside and spray them with spar urethane. This will protect them from spills and condensation from glasses. Let them dry outside for an hour before touching them.

These DIY Wooden Coasters Wedding Favors are perfect for your rustic wedding. You can use actual fresh tree or purchased unfinished wood slices to make them.

To Package Wooden Coasters As Wedding Favors:


When you're ready to package these as wedding favors, place two coasters in an 4x6-inch organza bag. Make sure the color of your organza bags matches your wedding colors.

These DIY Wooden Coasters Wedding Favors are perfect for your rustic wedding. You can use actual fresh tree or purchased unfinished wood slices to make them.

Set one organza bag on each place setting at your wedding.


Free Wooden Coasters Wedding Favors Printable:


If you want to use the printable we created, just right click the image above (it has no border so it will print properly).

It's formatted to be printed on an 8.5x11-inch sheet of NuFun Activities Wood Transfer Paper.

How much does it cost to make Wooden Coasters Wedding Favors?


Each pack of NuFun Activities Wood Transfer Paper comes with 25 sheets of transfer paper and 5 sheets of parchment paper. Each of our free printables has designs for eight coasters. So you can 200 coasters per pack.

If you put two coasters per organza bag, as we suggest, that's 100 wedding favors from one pack of paper.

As far as costs go, the pack of NuFun Activities Wood Transfer Paper is under $10. You can get 100 organza bags for about $7. And the wood, if you cut it like we did, is free. That means you can make 100 beautiful, handmade favors for under $20.

Amazing.


Purchase Wooden Coasters Wedding Favors:


If you love the ideas of these wooden coasters as your wedding favors, but you don't want to make them yourself, that's okay. You can purchase wooden coasters wedding favors online.

Some of our favorites are below:


More DIY Favor Ideas:


If you're looking for more DIY favor ideas, we have a few you might love below:


BRIDAL BABBLE: What would you print on your DIY Wooden Coasters Wedding Favors?

Tuesday, June 16, 2020

Homemade Fudge Wedding Favor

If you love this Homemade Fudge Wedding Favor recipe, be sure to Yum it here: Yum

My mom makes homemade fudge every Christmas to go with her famous cookie platters. It's one of those treats that you sneak into the fridge for. You know, the kind of treat that you take, then move everything in the container around a little bit to cover the empty spot your sneaky hands just created.

I never made it myself, though, until 2015.

See, it rained for about ten days in a row here, and Pete and I braved the hurricane and flooding to pick up some groceries. So of course, we had to pick up the ingredients to make homemade fudge.

Because calories don't count during a hurricane.

As I was making it, I realized what a perfect wedding favor this would be and, thus, this post was born.

Looking for a cheap and easy treat? Check out this TWO-INGREDIENT homemade fudge from www.abrideonabudget.com. Seriously, it's a perfect homemade wedding favor -- or any party favor, really. And just two ingredients (which you may already have at home!). Pin now, make it later.

Homemade Fudge Wedding Favor


This recipe below is for basic homemade fudge. You can use this as a base for all different sorts of fudge.

I have a couple examples of fudge varieties at the end of this post, so be sure to check those out after you have the basic recipe down.

Looking for a cheap and easy treat? Check out this TWO-INGREDIENT homemade fudge from www.abrideonabudget.com. Seriously, it's a perfect homemade wedding favor -- or any party favor, really. And just two ingredients (which you may already have at home!). Pin now, make it later.

Homemade Fudge Wedding Favor Recipe:


What You'll Need:

What You'll Do:

Looking for a cheap and easy treat? Check out this TWO-INGREDIENT homemade fudge from www.abrideonabudget.com. Seriously, it's a perfect homemade wedding favor -- or any party favor, really. And just two ingredients (which you may already have at home!). Pin now, make it later.

Combine the chocolate chips and sweetened condensed milk in microwave safe bowl.

Microwave it for one minute.

Add in the vanilla. Stir until all the ingredients are combined and the mixture starts getting thick.

If the chocolate chips aren't melted completely, you can add the bowl back into the microwave at 30 second intervals.

Looking for a cheap and easy treat? Check out this TWO-INGREDIENT homemade fudge from www.abrideonabudget.com. Seriously, it's a perfect homemade wedding favor -- or any party favor, really. And just two ingredients (which you may already have at home!). Pin now, make it later.

Pour the bowl's contents into a foil-lined 8x8 cake pan. Spread it out evenly.

Chill it in the fridge, at least two hours.

Cut into bite-sized 1-inch pieces. This recipe will make 64 1-inch pieces.

Looking for a cheap and easy treat? Check out this TWO-INGREDIENT homemade fudge from www.abrideonabudget.com. Seriously, it's a perfect homemade wedding favor -- or any party favor, really. And just two ingredients (which you may already have at home!). Pin now, make it later.

Resist the temptation to eat the entire batch. I know, it's hard.

Try. To. Be. Strong.

You have a wedding dress to fit into, after all.

Looking for a cheap and easy treat? Check out this TWO-INGREDIENT homemade fudge from www.abrideonabudget.com. Seriously, it's a perfect homemade wedding favor -- or any party favor, really. And just two ingredients (which you may already have at home!). Pin now, make it later.

How To Package Homemade Fudge


What You'll Need:

What You'll Do:

Looking for a cheap and easy treat? Check out this TWO-INGREDIENT homemade fudge from www.abrideonabudget.com. Seriously, it's a perfect homemade wedding favor -- or any party favor, really. And just two ingredients (which you may already have at home!). Pin now, make it later.

Cut the butcher paper into 4x4 inch squares.

Put a piece of fudge in the center of the paper square. Fold two opposite sides to the middle. Fold the other two sides in. Set aside.

Do this three times, with three pieces of fudge, then stack those three pieces.

Tie a piece of baker's twine around it. Tie a thank you tag to it when you get to the top, then use the excess twine make a bow atop.

How absolutely adorable would that look at everyone's seats?

This homemade fudge wedding favor recipe makes 64 pieces. So that's about 21 favors per batch. If you're having 100 guests at your wedding, you need to make four batches to complete your favors.

This fudge was so easy to make and Pete and I actually made it together, so this sounds like a good bonding experience for you and your fiance.

Summer might be over, but you can still have s'mores at your wedding! Just make these DELICIOUS homemade s'mores fudge wedding favors from www.abrideonabudget.com.

Homemade Wedding Fudge Varieties


Now that you have the basic homemade fudge recipe down, you can work on varieties.

Some of our favorite homemade fudge varieties are:

You can add nuts -- although, if you're doing this as a favor, I would avoid those because people may have allergies -- candy cane, marshmallows ... you could use white chips, peanut butter chips ... I mean, really, your possibilities are pretty endless.

If you want the additions of those things to be mix ins, stir them in after you have melted the chocolate chips and sweetened condensed milk in the microwave. That way, they'll be in the mixture when you pour it into your pan.

If you want them to be toppings, pour the fudge into the pan and spread it evenly first, then add your toppings on top of the fudge while it's still warm.

Use the back of a fork to press the toppings into the fudge.

If you don't push the toppings into the fudge before cooling it, there is a very good chance that they'll fall off and won't actually stick into your fudge.

End your Halloween meal with this super fun (and easy!) Halloween Fudge. Get the recipe at www.drugstoredivas.net.

How To Make Fudge In Your Wedding Colors


This could actually end up being its own post, honestly. But for now, we're going to just give you a quick overview of what you could do to make two toned fudge.

Also, we're pretending you have two wedding colors (so it will look like the image above, just without the candy on top). If you have more colors, you can just adapt this to include more colors.

Two Tone Fudge:

Start with 1 can of sweetened condensed milk, 3 cups of white chocolate chips, and food coloring in your wedding colors.

Split the white chocolate chips between two bowls. Pour the sweetened condensed milk between both bowls. Set one aside.

Take one of the bowls and microwave it for one minute. Stir until the chocolate has melted. Add a few drops of your first food coloring to the mixture, then stir to combine.

Pour the mixture into a foil lined 8x8 pan, spread it evenly, and put it in the fridge for at least two hours.

After it has chilled, microwave the bowl you set aside. Add your second food coloring color to this mixture.

Carefully pour the second color on top of the first color and spread it evenly. Put this back in the fridge to chill at least two hours before cutting.

Just like the fudge above, you can wrap it in butcher paper and twine. Definitely choose twine that matches your wedding colors if you do that. But, since you went through all the trouble of making this match your wedding colors, you should just buy clear, cellophane treat bags and package them in those so everyone can see your hard work. You can even get a foil twist tie to match your wedding colors.

BRIDAL BABBLE: What would you put in your homemade fudge wedding favor?

Wednesday, January 8, 2020

Super Simple Apple Cider Wedding Favors

Fall weddings can be cold. I'll be very honest about that. But there is so much personality that you can add into fall weddings. Pumpkins, pies, apples ... that can actually all make your wedding really stand out. Just don't do all at once. Skip the idea of an apple pumpkin pie instead of a wedding cake. Instead, just go with super simple apple cider wedding favors.

I actually got these at a wedding at the tail end of last year. I'm not sure if the couple DIY'd them or purchased them, but you can totally make them yourself if you have a little time on your hands.

Or if your family and friends have a little time on their hands.

See, if you're making these yourself, you are basically just opening apple cider and pouring it into nottles. This post is more of an idea than a tutorial, to be honest. You want the favors to be as fresh as possible, so you want to make these as close to your wedding day as possible. Plus, if you actually keep them too long, they'll ferment and can potentially explode when your guests open them.

Apple Cider Wedding Favors are perfect for fall weddings. Find out what to include in this Super Simple Apple Cider Wedding Favors post on www.drugstoredivas.net.


Super Simple Apple Cider Wedding Favors


If you really wanted to, you could make homemade apple cider. But honestly, you're getting married. You don't have time for that. Instead, just buy gallons of apple cider from the local orchard or the grocery store.

That's why I'm calling these super simple. Not because they're basic (they're not!), but because they're easy to assemble simply.

What You'll Need:


What You'll Do:

When you're buying the glass bottles, choose ones that match your style. So if your wedding has a vintage feel, look for vintage bottles. If you're having a very modern wedding, go with more of a square- or block-shaped glass bottle. A mason jar would work for a rustic wedding And if you want to keep it classy, a tall, smooth bottle works.

Wash and dry your glass bottle.

Open the apple cider. Very carefully, use the funnel to help fill each bottle with apple cider. Close the bottle.

Continue on until you have enough of the apple cider wedding favors for your guests.

Tie the thank you tag to the jar using a piece of ribbon.

Apple Cider Wedding Favors are perfect for fall weddings. Find out what to include in this Super Simple Apple Cider Wedding Favors post on www.drugstoredivas.net.

The apple cider wedding favors we got were so cute and had thank you tags that said "apple'y ever after" on them. You could use that play on words or you could just write thank you. If you're feeling really whimsy, you could get apple-shaped thank you tags.

These apple cider wedding favors would pair perfectly with apple cider doughnuts.

If you're getting the apple cider from a local orchard, there's a good chance they make apple cider doughnuts on site. So order those, as long as they can be individually wrapped, and give them out as a pair.

I'm a huge fan of edible wedding favors, so if you're inviting me to your wedding, give me something I can eat on the car ride home.

BRIDAL BABBLE: Would you give out these apple cider wedding favors?

Monday, September 16, 2019

Homemade Spicy Salt Wedding Favor

I like edible wedding favors. I've said that before, and it still holds true. No one needs a personalized picture frame with your names and wedding date on the bottom. Trust me. And after a while, no one needs wine glasses with your names and wedding date on them either. But edible favors, like this Homemade Spicy Salt Wedding Favor, people need that.

This salt is really delicious and actually a great idea for an edible favor because you can make it ahead of time. Like way ahead of time. The salt will preserve the peppers that you use to make it spicy (that was basically the point of salt back in the day). So you don't have to worry about making your favors during wedding week like you would if you were making baked goods for your wedding favors.

Your wedding guests will LOVE this Homemade Spicy Salt Wedding Favor. You can make it ahead of time too. Get the directions at www.abrideonabudget.com.


Homemade Spicy Salt Wedding Favor


The ratio of the ingredients below is to make one favor. Obviously, you'll have to multiply that based on how many favors you're planning on making.

Your wedding guests will LOVE this Homemade Spicy Salt Wedding Favor. You can make it ahead of time too. Get the directions at www.abrideonabudget.com.


What You'll Need:


What You'll Do:

Your wedding guests will LOVE this Homemade Spicy Salt Wedding Favor. You can make it ahead of time too. Get the directions at www.abrideonabudget.com.

When you're shopping for containers, make sure you choose ones that have a top that closes completely. Some with cork tops are cute, but they're not air tight. And since you will need to shake these, the last thing you want to do is throw salt all over yourself.

Wash and completely dry your containers.

Chop off the stems of the cayenne peppers. Don't worry about trying to de-seed them. The seeds are fine.

Your wedding guests will LOVE this Homemade Spicy Salt Wedding Favor. You can make it ahead of time too. Get the directions at www.abrideonabudget.com.

Put the peppers and the salt in a food processor. Pulse until the peppers get really broken up.

Using the funnel, fill the glass containers with the salt.

You may want to put the cap on and then give it a shake. You may see that the salt falls and that there's actually a lot more of the room to fill.

Put the cap on and continue until all the favors are done.

Your wedding guests will LOVE this Homemade Spicy Salt Wedding Favor. You can make it ahead of time too. Get the directions at www.abrideonabudget.com.

Once you're finished making these spicy salt wedding favors, the only thing you need to do is give them a shake every day. The peppers will produce an oil, so you want to make sure that it gets mixed into the salt. If you let them sit, it will all clump at the bottom.

You want to make these at least a week ahead of your wedding to give the oil enough time to fuse into the salt. You can make them up to a month ahead of time and keep shaking, but I didn't see much of a difference in taste after the 10 day mark.

If your guests are wondering how to use flavored salts, you can attach a recipe card to each favor. We love using this cayenne pepper salt in hummus to give it an extra kick.

You guests could also use it as a spicy salt for margaritas. Just dip the rim of the glass in water and then in the salt.

What would actually be an amazing idea, if your venue would allow it, would be to fill a large container with the homemade spicy salt (preferably a glass rectangle container) and bring it to your wedding. Ask the bartenders to use it to rim the glasses of a signature spicy margarita cocktail. Then, have a note at the bar saying the margaritas are using the same salt in the homemade spicy salt wedding favor. That would be a fantastic idea.

BRIDAL BABBLE: Would you make this Homemade Spicy Salt Wedding Favor for your wedding?

Friday, May 24, 2019

Homemade Red, White, And Blue Chocolate Star Wedding Favors

It's Memorial Day Weekend, which is making me think of red, white, and blue wedding favors. They can be really festive if you're having a wedding this weekend or a July 4th wedding. And, if you've been around here a while, you know I'm a big fan of edible wedding favors. So, of course, I think these red, white, and blue chocolate star wedding favors are perfect.

You can make them at home yourself whenever you have time, then save them until your wedding day.

I made them using a star-shaped silicone mold. If you're making these for your wedding, I would recommend picking up multiple molds. It would take you a really long time to make enough for all your guests if you could only make a couple at a time.

A perfect patriotic wedding favor are these Homemade Red, White, And Blue Chocolate Star Wedding Favors. Find out how to make them at www.abrideonabudget.com. You can change them to your wedding colors as well.

Homemade Red, White, And Blue Chocolate Star Wedding Favors


Now, small aside: I'm making them red, white, and blue in this tutorial because I'm posting this on Memorial Day Weekend. Honestly, you can make them any colors you want.

A perfect patriotic wedding favor are these Homemade Red, White, And Blue Chocolate Star Wedding Favors. Find out how to make them at www.abrideonabudget.com. You can change them to your wedding colors as well.

What You'll Need:
What You'll Do:


A perfect patriotic wedding favor are these Homemade Red, White, And Blue Chocolate Star Wedding Favors. Find out how to make them at www.abrideonabudget.com. You can change them to your wedding colors as well.

Using the garlic grater side of a cheese grater, shave the blue then red candy melts into the cavities of the star-shaped mold.

You don't want to completely fill the bottom with shavings. You do want to see the white through some of it.

And don't worry if you end up getting some of the shavings on the side. They'll add to the character of these.

Melt the white chocolate chips in a microwavable-safe bowl. I suggest regular chocolate chips for this instead of white candy melts. Personally,  I don't love the taste of candy melts (although they have gotten better recently), so I vote for white chocolate chips instead.

Melt them for 30 seconds, then stir. Put them back in the microwave for another 30 seconds, then stir. Continue this until the chocolate chips are completely melted.

A perfect patriotic wedding favor are these Homemade Red, White, And Blue Chocolate Star Wedding Favors. Find out how to make them at www.abrideonabudget.com. You can change them to your wedding colors as well.

Spoon a dollop of melted white chocolate into each star-shaped cavity in the mold. Don't overfill them because then the bottom of these won't sit flat. You're putting them in a plastic bag, so it's not the biggest deal if they're not perfectly flat, but I really am a perfectionist when it comes to anything wedding.

A perfect patriotic wedding favor are these Homemade Red, White, And Blue Chocolate Star Wedding Favors. Find out how to make them at www.abrideonabudget.com. You can change them to your wedding colors as well.

Bounce the silicone mold on your countertop a few times. That will flatten out the melted white chocolate.

If you're like me and you were messy when you were shaving the red and blue candy melts, the extra shavings along the top of the mold will fall into your chocolate when you're bouncing the mold. I think it's okay but if you're even more of a perfectionist than I am, you'll want to wipe the mold off before scooping the white chocolate.

A perfect patriotic wedding favor are these Homemade Red, White, And Blue Chocolate Star Wedding Favors. Find out how to make them at www.abrideonabudget.com. You can change them to your wedding colors as well.

Put them in the fridge to cool completely before popping them out of the mold. They'll come out so easily and without any real effort. Put them in a bag to sit in your fridge until you're ready to package them.

A perfect patriotic wedding favor are these Homemade Red, White, And Blue Chocolate Star Wedding Favors. Find out how to make them at www.abrideonabudget.com. You can change them to your wedding colors as well.

When you are, cut thin, long strips of red and blue card stock. Fold them back and forth, like an accordion. Then, cut them every two or so inches to create paper shred (or you could just purchase paper shred if you don't feel like making it).

A perfect patriotic wedding favor are these Homemade Red, White, And Blue Chocolate Star Wedding Favors. Find out how to make them at www.abrideonabudget.com. You can change them to your wedding colors as well.

Add the paper shred to the bottom of a plastic treat bag.

A perfect patriotic wedding favor are these Homemade Red, White, And Blue Chocolate Star Wedding Favors. Find out how to make them at www.abrideonabudget.com. You can change them to your wedding colors as well.

Put two or three red, white, and blue chocolate stars into the bag. Tie it with a white ribbon.

Place one at each guest's seat at your wedding.

BRIDAL BABBLE: Would you make these Homemade Red, White, And Blue Chocolate Star Wedding Favors?

Want more Homemade Edible Wedding Favor ideas?

Homemade S'mores Fudge Wedding Favors
Summer might be over, but you can still have s'mores at your wedding! Just make these DELICIOUS homemade s'mores fudge wedding favors from www.abrideonabudget.com.