Showing posts sorted by relevance for query flowers. Sort by date Show all posts

Monday, June 17, 2019

DIY Wedding Flowers Shadowbox

The day after my brother and his wife got married, they were heading off on a Mediterranean cruise. As we were saying our goodbyes in the hotel, my brother's wife handed her bouquet to my mom in case we were able to do something with the flowers. And, if not, no worries, she said. I immediately thought about a DIY Wedding Flowers Shadowbox.

See, when we got married, I preserved my flowers using silica gel. Well, not exactly my flowers.

We stayed the night at the hotel where our reception was, and when we got home, I realized that I left my bouquet in the room. We called immediately upon noticing, but they were gone. It broke my heart because I wanted to save them. So Pete actually called our florist and had them recreate and then deliver my wedding bouquet. And I was able to preserve those and use them in the projects I had intended.

I didn't want to make my brother's wife the same exact thing I made for myself, so I decided to use a few of their wedding items to create a full wedding shadowbox. It came out even better than I could have imagined.

Preserve your wedding items with a beautiful DIY Wedding Flowers Shadowbox. Get the tutorial to make one on www.abrideonabudget.com.

DIY Wedding Flowers Shadowbox


What You'll Need:


What You'll Do:

As soon as possible, put the entire bouquet in a large plastic bag and tie it shut. I would recommend a small garbage bag with a knot tied at the top. You want to keep out as much air as possible so the flowers don't start oxidizing and discolor I got.

Then, keep the bag in the fridge until you've purchased your silica gel and container. That will also delay the discoloration of the petals. You can, honestly, keep it that way for a month, but the sooner you make it, the better.

This is a two part process. The first involves preserving the flowers in silica gel, which takes two weeks. The second is the assembly of the wedding flowers shadowbox. So, keep in mind that if you do want to make this for yourself or offer to make this for someone, it's not a project that will be completed quickly.

To Preserve The Flowers:

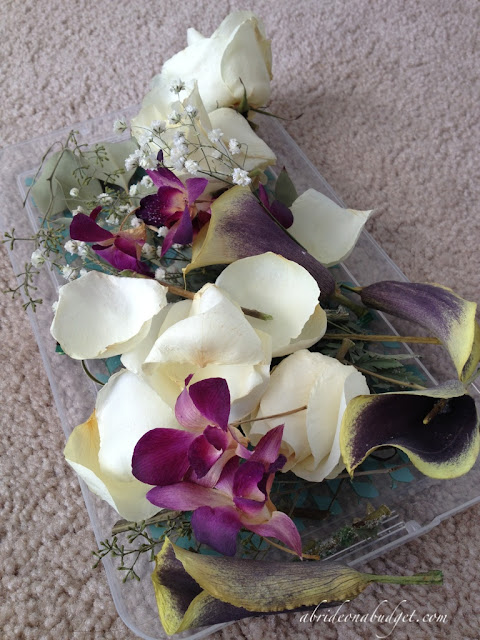
Take the bouquet from the fridge and remove it from the bag.

Carefully, unwrap any ribbon or burlap from the handle. It may be attached by pins, so look out for those. Don't throw these away. You'll use these to decorate the shadowbox later.

Very gently separate the flowers and any baby's breath or greenery. The petals are so delicate and may start falling off if you're too rough.

Preserve your wedding items with a beautiful DIY Wedding Flowers Shadowbox. Get the tutorial to make one on www.abrideonabudget.com.

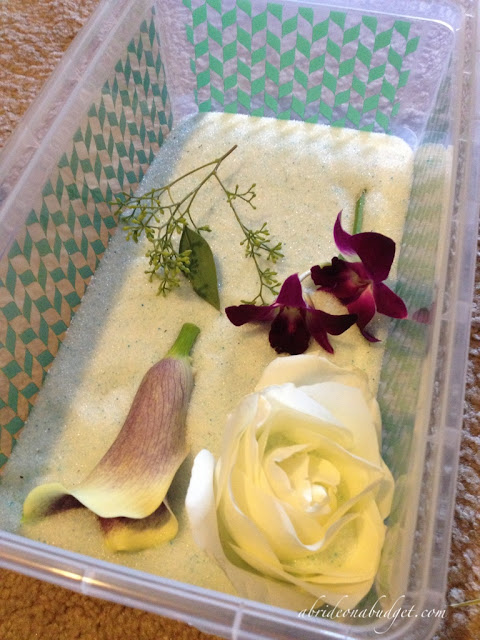
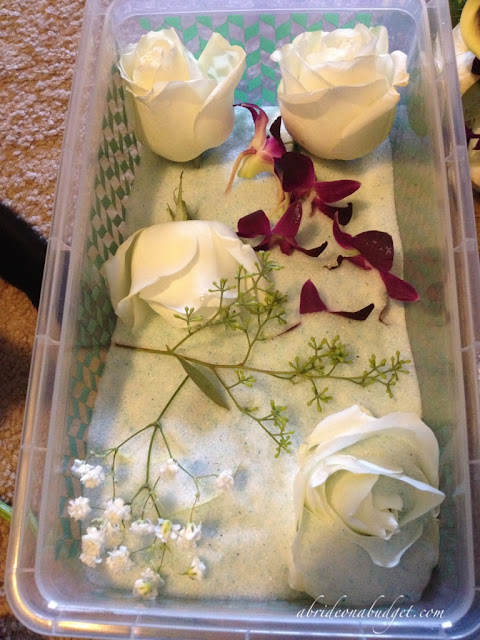
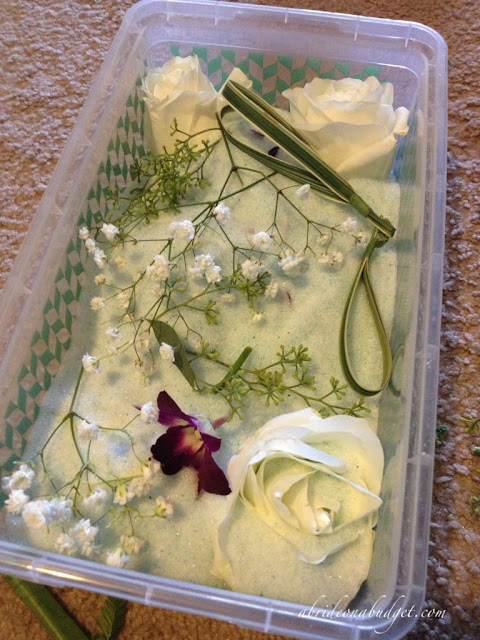
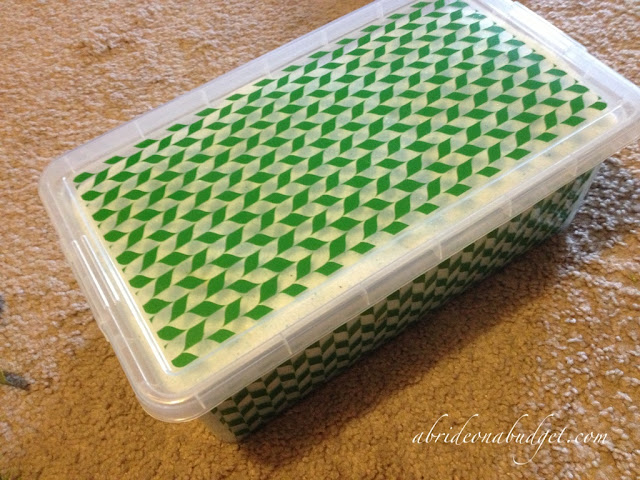
Fill the bottom of an airtight container with a layer of silica gel.

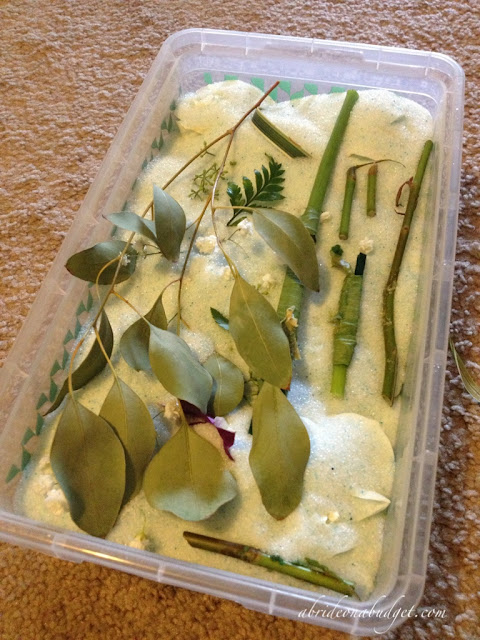
Place in a layer of flowers, baby's breath, and greenery on the silica gel. Cover that completely with another layer of silica gel. Add another layer of flowers and greenery, then another layer of silica gel.

Preserve your wedding items with a beautiful DIY Wedding Flowers Shadowbox. Get the tutorial to make one on www.abrideonabudget.com.

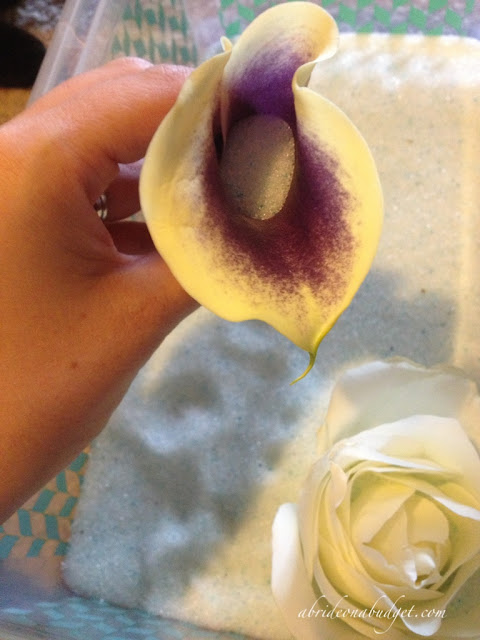
If you're preserving flowers like roses, you'll want to pour some the silica gel directly into the top of the flower before (gently) placing it in the box. This will help it hold its shape better and will preserve the inner petals as well.

Leave the box in a dry spot for two weeks.

After they've sat, carefully remove the flowers from the silica gel being sure to discard any silica gel that is between the petals. You can pour the silica gel from the box into a large airtight, zip-top plastic bag and reuse it. I've used mine a few times in the last five years.

Preserve your wedding items with a beautiful DIY Wedding Flowers Shadowbox. Get the tutorial to make one on www.abrideonabudget.com.

Individually spray each flower and piece of greenery with a layer of triple thick clear glaze. One layer is enough, but be sure to get both sides (and the inside of the flowers). Store them upright until they've dried. Overnight is best.

To Make The Wedding Shadowbox:

Preserve your wedding items with a beautiful DIY Wedding Flowers Shadowbox. Get the tutorial to make one on www.abrideonabudget.com.

In the two weeks you're waiting for your flowers, print a couple of wedding photos from the couple and accumulate any wedding accessories you can: the invitation, the save the date, wine corks, escort card holders, etc. Of course, some of that takes pre-planning.

Preserve your wedding items with a beautiful DIY Wedding Flowers Shadowbox. Get the tutorial to make one on www.abrideonabudget.com.

Take out the backside of the shadowbox and arrange your photos, accessories (including the burlap and ribbon), flowers, and greenery.

Preserve your wedding items with a beautiful DIY Wedding Flowers Shadowbox. Get the tutorial to make one on www.abrideonabudget.com.

Once you have everything arranged, you'll be able to decide if you need to trim the stems off the flowers and greenery or the burlap/ribbon.

Try to keep things like the invitation or save the date as is.

Preserve your wedding items with a beautiful DIY Wedding Flowers Shadowbox. Get the tutorial to make one on www.abrideonabudget.com.

Once you have everything as you want it, use the double-sided tape to hold down the burlap or ribbon. Then, if you have something like an invitation wrap, affix that to the front of the box.

Preserve your wedding items with a beautiful DIY Wedding Flowers Shadowbox. Get the tutorial to make one on www.abrideonabudget.com.

Add a few petals on the bottom of the box to add a little depth.

Preserve your wedding items with a beautiful DIY Wedding Flowers Shadowbox. Get the tutorial to make one on www.abrideonabudget.com.


Use the pins to affix everything else down. For the flowers, try to put two pins per (short) stem, then another two in the flower itself. You can glue everything down if you prefer, but I prefer the airy feeling the pins provide.

Preserve your wedding items with a beautiful DIY Wedding Flowers Shadowbox. Get the tutorial to make one on www.abrideonabudget.com.

Put the back on the shadowbox and double check to make sure nothing moved before you close it.

Hang it on the wall.

Preserve your wedding items with a beautiful DIY Wedding Flowers Shadowbox. Get the tutorial to make one on www.abrideonabudget.com.

BRIDAL BABBLE: What would you add to this DIY Wedding Flowers Shadowbox?
Want other ideas for your wedding flowers?

Monday, August 17, 2015

The Ultimate Wedding Flowers Guide

I was emailing with one of my friends once (a friend who I should keep better touch with, you'll agree after this story) and she mentioned she had gotten married. I was so excited for her and wanted to see pictures. She looked like a princess. Her photos were gorgeous ... and so was her cascading bouquet. I decided at that moment that it was the style I wanted.

So I went on Pinterest and started pinning cascade bouquets. I also decided early on that Pete would have a calla lily boutineer, in memory of his mom, since that was her favorite flower.

Other than that, though, I wasn't exactly sure what I wanted as far as flowers. I went with my mom to a florist, armed with the little information from the paragraph above. The florist was great. She sat down with us for a really long time to help us make decisions. We went to a second florist (because you need to shop around and compare) and he was fantastic. It helped that we had a much better idea of what would work. The better you can articulate what you want, the smoother your appointments will go.

Both the florists we saw were so unbelievably friendly and helpful. But what if yours aren't? Or what if you are DIY'ing your flowers? To help you, I put together the ultimate wedding flowers guide. This is exactly what I wish I had before I went wedding flower shopping.

wedding-flowers

The Ultimate Wedding Flowers Guide


A quick list of who and what (may) need flowers
Traditionally, you will have a bouquet as will all your bridesmaids. Your flower girls may have petals to drop (although ask your church or venue if that is allowed before you place an order because many places won't allow this anymore). You also usually order a corsage for your mothers and grandmothers.

On the guy's side, your groom will have a boutineer, as will his groomsmen. You also want to get one for any ring bearers and your fathers and grandfathers.

If you are getting married at a church, you might want to order alter flowers and pew bows. If you want floral centerpieces for the reception, you're going to want to order them with the rest of your flower package.

Some brides are ordering a toss bouquet now too. I actually ordered one because I didn't want to throw my beautiful cascade bouquet -- and it got left behind at the church so I never got to throw it. I just tossed one of my bridesmaid's bouquets instead. That's why a toss bouquet is on my list of five things you can absolutely skip and no one will notice or care.

How to choose your wedding flowers
When you go to a florist, he or she will have a bunch of flower books for you to peruse. See, those books came out way before Pinterest put options a click away. So these books were a great reference for you to choose your flowers. They are generally sorted by color, so it's easier for you to pick flowers that will match the rest of your wedding. Under each color, you will see example bouquets. Generally, brides will just pick one but if you have a different vision, you can explain it to the florist (or show a pin) and it can be made for you.

Along with these bouquet books, your florist may also have a book of just flowers. It's more of a botanist book than a florist one. But it's so helpful. Your florist may suggest a boutineer flower that you have never heard of. Instead of just nodding in agreement and hoping for the best, the florist can open to a page with the image of that flower on it so you can actually see what he or she is suggesting. Plus, when you flip through that book, you may spot a flower that you have never seen but fall in love with and need in your bouquet.

Does season matter?
To a degree, yes, but not as much as you think. I'm sure you've heard to order in season because it will save you some money. But many flowers, and probably the ones you want, are year round. You'll want to avoid roses in February since Valentine's Day drives the price up, and you should stay away from anything that's really difficult to order (your florist will give you a heads up on this).

Honestly, though, if you're worried about your budget, there's a good chance you won't be eyeing any extravagant or foreign flowers. Your florist will steer you in a good direction and you'll follow.

Now, there are the purists who will say that season really matters, some flowers can't be ordered in certain seasons (without a crazy fee), blah blah blah. But if you're flexible, you can choose beautiful, budget-friendly flowers in any season.

Can you change your order?
If you're fickle, you're in luck. Your wedding order will not be placed the minute you sign your contract (at least, it shouldn't be). Talk to your florist about when, exactly, your flowers will be ordered and when you can change your order, if need be. Maybe you will change your mind, maybe a bridesmaid will drop out and you will have to cancel her bouquet. Things happen and your florist should work with you.

Your florist doesn't have everything in stock all the time. In fact, there will be an order placed specifically for your wedding flowers. But once the order is placed, though, that's that. No changes (unless you want to pay additionally plus an expedited fee).

wedding-flowers

How to save money on your wedding flowers
Wedding flowers can end up being really expensive. Ours were the third most expensive item we paid for (and only a $50 difference from our six-piece band). But, even still, the price we paid was incredible. We ordered from the second florist we saw because one) we got more and two) it was half the price of the first florist. So, like I said, shop around.

But even with only one shop to choose from, your choices can help keep your cost down. First of all, the type of flowers your choose make a difference. If you want an entire bouquet of orchids, it will cost you a lot more that a bouquet of daisies. But that doesn't mean you can't have orchids. It just means your have to add some cheaper flowers as filler.

Take my bridesmaids bouquets for example. I wanted a pretty bouquet of wildflowers so the florist ran down wildflower options with me. Tiger lilies? Yes. Roses? Sure. Hydrangeas? No thanks. And then he stopped me. Stem to stem, a hydrangea may be more expensive than an anemone but it also takes up a lot more real estate in a bouquet. So if you add one, your bouquets will look fuller without costing you more.

You can save on boutineers too. I originally wanted all the groomsmen to have calla lilies, but that would have been pretty pricey. And, just like my bouquet was different than my bridesmaids, the florist suggested Pete's boutineer should be different than his groomsmen. So he got a calla lily and they got roses. So did my dad. And as for the ring bearers, well, they're little. So a full boutineer would be too big for them. Instead of a rose, we went with a rolled rose petal. It was so cute -- and saved me a couple bucks.

For the church, you can order pew bows without flowers from the florist as well, but I vote for adding a flower to them. It really does make a big difference. I didn't think so until I actually saw our wedding photos. Good thing my mom talked me into that one.

Do you need flowers?
The truth is, you don't need anything. You can always replace flowers with something else. Don't want floral bouquets? Make a brooch one. Don't want floral boutineers? Go with a starfish. Don't want your flower girl to drop petals? Have her blow bubbles.

You can skip flowers altogether, if you want. It's your wedding, so it's up to you.

How can you preserve your wedding flowers?
Silica gel. Definitely silica gel. It's so much more amazing than drying them. I have a full post about that here.

BRIDAL BABBLE: What type of wedding flowers are you ordering?


What are you doing with your flowers after your wedding?


Check out our Five Things To Do With You Wedding Flowers After The Wedding post.


what-to-do-with-your-wedding-flowers


Tuesday, November 18, 2014

Five Things To Do With Your Wedding Flowers After Your Wedding

Wedding flowers can get really expensive. There's your bouquet, your bridesmaids' bouquets, petals for your flower girls, corsages for your moms and grandmas, boutineers for your groom, his groomsmen, any ring bearers, and the fathers, alter flowers, pew markers, and anything you decide to have for the reception.

Most couples allocate 6-percent to 8-percent of their budget for flowers (you can find a full wedding budget broken down by percentages here). We were really lucky that our venue had centerpieces we could borrow so we didn't have to spend for floral centerpieces. Plus, the flower shop we used was so reasonable (it was nearly half of what another shop quoted us for nearly identical packages). We ended up spending 4% of our budget on flowers, which is half of what I had estimated so I was happy.

But what about when the wedding is over? What should you do with your wedding flowers then?

things-to-do-with-your-wedding-flowers-after-the-wedding

Five Things To Do With You Wedding Flowers After The Wedding


1. Donate them
We had two large arrangements for the church's alter, plus four pew markers (so that people knew to leave those pews open for immediate family and the wedding party). When we had a meeting with the priest before our wedding, I asked what we were supposed to do with the flowers after. "Most people donate them to the church," he said, before adding, "But you can take them if you want." So we left them. We actually also donated my toss bouquet because no one thought to grab it before we left the church (which is exactly why a toss bouquet is on my list of things you can skip at your wedding).

As far as wedding bouquets, you can donate those too. You'll be taking them with you to the reception, so you won't donate to the church. But, pre-wedding, call a local nursing home or hospital. Ask them if they accept floral donations. Many of them do, so just put a bridesmaid in charge of collecting flowers (bouquets, centerpieces, decor) and driving them to donate the next day. Just be sure to keep the flowers hydrated overnight so you're not donating wilted and half-dead flowers.

things-to-do-with-your-wedding-flowers-after-the-wedding


2. Preserve them
I am a big supporter of using silica gel to preserve your wedding flowers. It's a time-consuming process (and most of that time is waiting) but you can do it at home. And the flowers come out absolutely amazing, especially compared to drying them. The colors are so bright and vibrant. I have an entire post on how to preserve your flowers at home, so definitely take a look at that.

If you don't care about colors, you can always just dry them. Instructions for that are in the link above also.

I actually did what I could with silica gel (you need a container for that and mine had limited space) and left the rest of the bouquet to dry on its own. I actually have the dried bouquet sitting on my work desk. 

3. Create a shadow box from them
After you've preserved them, you'll want something to do with them. You can be like me and leave them sitting on your desk or you can create a display. You best bet is a shadow box. You can purchase them in a variety of sizes. If you've never seen one, they're basically plump frames. Instead of having room only for a thin, flat paper like a frame, these are wide so you can fit a bunch of stuff between the glass and the backing. You can pin your flowers to look like your arrangement or just add a few petals along with other wedding mementos.

things-to-do-with-your-wedding-flowers-after-the-wedding

4. DIY a Christmas ornament
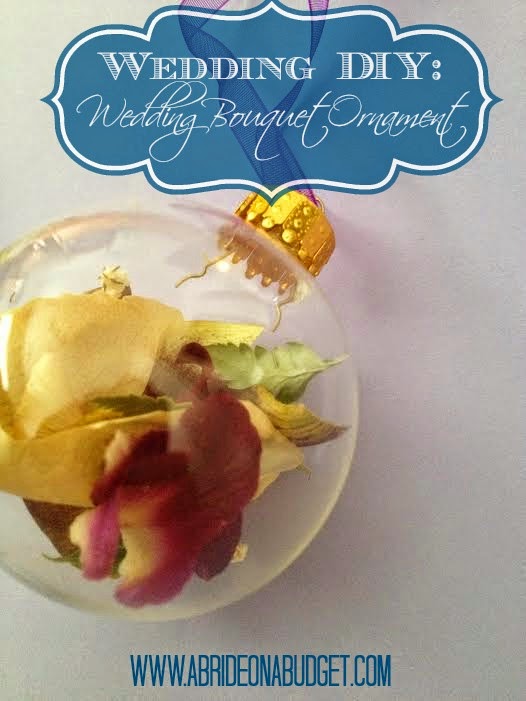
If you're even a little bit crafty, you can put together a Christmas ornament with your flowers. Just purchase some glass ornaments and put pieces of your wedding bouquet inside. These is really great if you have any sort of jeweled embellishments on your bouquet. Plus, you can use the tulle from your handle as the ribbon for the top. You can check out my DIY Christmas ornament tutorial, but this is pretty self explanatory. 

This is a great thing for people who aren't too sentimental and don't want to see wedding flowers displayed 24/7. This goes on your tree during the holiday season and then it goes back in a box for another year. You're sentimental, but not year round (plus, if you need a constant reminder that you got married, just turn around and look at your groom).

5. Throw them out
Oh my heart hurts at that suggestion, but that's because I am the most sentimental pack rat you will ever meet. I can throw magazines away so easily because I don't need reminders of if Selena Gomez and Justin Bieber are on again or off again. But childhood toys or handwritten notes, I can't throw them away because I can't get them back. And that's how I feel with anything wedding related. The day comes and goes and you don't get a do over. But, honestly, you probably have tons of photos of your bouquet. If you want a reminder of how they looked, you can just go back to your wedding album. And that's a lot less clutter than the actual flowers.

things-to-do-with-your-wedding-flowers-after-the-wedding

But even with that photo above (and a ton of others that I took when my second bouquet came), I still couldn't bring myself to throw out my bridal bouquet.

BRIDAL BABBLE: What do you plan to do with your wedding flowers after your wedding?


Deciding on your wedding flowers?


Check out our Ultimate Wedding Flowers Guide post.


Ultimate-Wedding-Flowers-Guide


Wednesday, August 27, 2014

Wedding DIY: Preserving Your Flowers At Home

I wasn't bridezilla until after the wedding. The night after, I sobbed inconsolably because my wedding flowers were gone. I had plans to turn them into decorations, into a Christmas ornament, and to display them. I wanted to save them forever, but they were stolen out of our hotel room after the wedding.

I was heartbroken. I was so upset that Pete actually "found" them and had them delivered to the apartment two weeks later (if that story sounds familiar, it's because I posted it here). It made me so happy knowing how much he cared -- and to know that I was able to do what I wanted with them.

Everyone I know who has saved flowers has either put them in the freezer (and then forgot about them, like my prom corsage) or dried them. But I decided to try silica gel. I had never used it before and wasn't sure my wedding bouquet was the place to try it on but I decided if it didn't work, I could always get a second replacement bouquet. Thank goodness I didn't have to. This worked amazingly.

Silica gel isn't something you should just toss. It can do AMAZING things, like preserving your wedding flowers at home. Seriously, it is SO MUCH BETTER than drying. Find out how to do it on www.abrideonabudget.com.

Preserving Your Flowers At Home


What You'll Need:


Silica gel isn't something you should just toss. It can do AMAZING things, like preserving your wedding flowers at home. Seriously, it is SO MUCH BETTER than drying. Find out how to do it on www.abrideonabudget.com.

What You'll Do:

Silica gel isn't something you should just toss. It can do AMAZING things, like preserving your wedding flowers at home. Seriously, it is SO MUCH BETTER than drying. Find out how to do it on www.abrideonabudget.com.

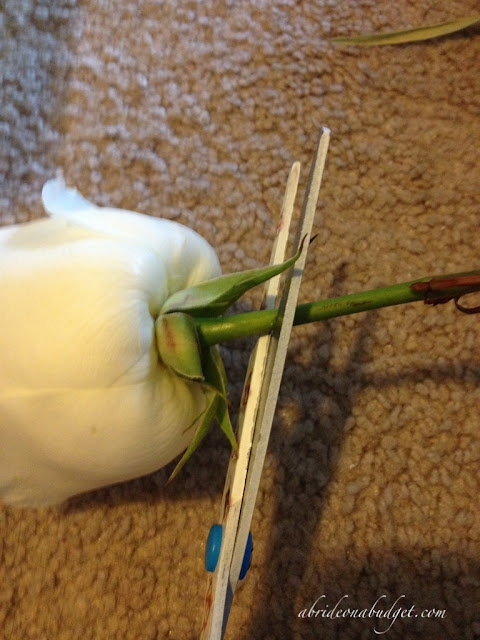
Cut the stems off the flowers.

Silica gel isn't something you should just toss. It can do AMAZING things, like preserving your wedding flowers at home. Seriously, it is SO MUCH BETTER than drying. Find out how to do it on www.abrideonabudget.com.

Pour a layer of silica gel in the bottom of the box.

Silica gel isn't something you should just toss. It can do AMAZING things, like preserving your wedding flowers at home. Seriously, it is SO MUCH BETTER than drying. Find out how to do it on www.abrideonabudget.com.

Fill your flower with silica gel (filling it will help it hold its shape, overfilling it will help it fall apart).

Silica gel isn't something you should just toss. It can do AMAZING things, like preserving your wedding flowers at home. Seriously, it is SO MUCH BETTER than drying. Find out how to do it on www.abrideonabudget.com.

Place the flower in the box.

Silica gel isn't something you should just toss. It can do AMAZING things, like preserving your wedding flowers at home. Seriously, it is SO MUCH BETTER than drying. Find out how to do it on www.abrideonabudget.com.

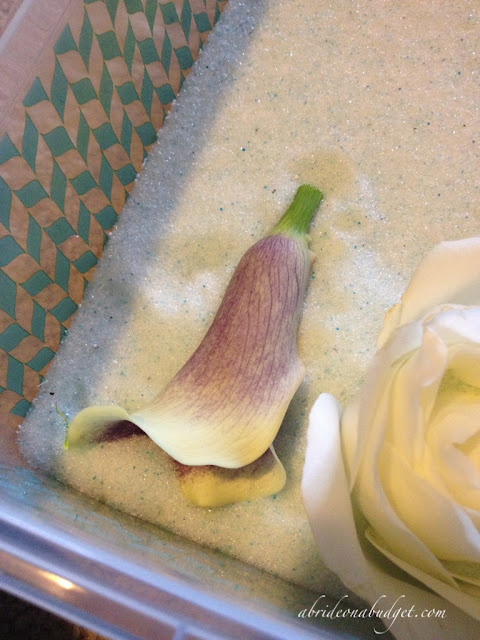
You can fill any type of flower.

Silica gel isn't something you should just toss. It can do AMAZING things, like preserving your wedding flowers at home. Seriously, it is SO MUCH BETTER than drying. Find out how to do it on www.abrideonabudget.com.

Just rest it in the box with the other.

Silica

Fill an entire layer with flowers and greenery.

Silica gel isn't something you should just toss. It can do AMAZING things, like preserving your wedding flowers at home. Seriously, it is SO MUCH BETTER than drying. Find out how to do it on www.abrideonabudget.com.

Top it with a layer of silica gel.

Silica gel isn't something you should just toss. It can do AMAZING things, like preserving your wedding flowers at home. Seriously, it is SO MUCH BETTER than drying. Find out how to do it on www.abrideonabudget.com.

Add another layer of flowers and greenery.

Silica gel isn't something you should just toss. It can do AMAZING things, like preserving your wedding flowers at home. Seriously, it is SO MUCH BETTER than drying. Find out how to do it on www.abrideonabudget.com.

Repeat with silica gel and flowers.

Silica gel isn't something you should just toss. It can do AMAZING things, like preserving your wedding flowers at home. Seriously, it is SO MUCH BETTER than drying. Find out how to do it on www.abrideonabudget.com.

And then again until the box is filled. Don't put the flowers right on top of each other or too close to each other, but layers of flowers and gel is okay.

Silica gel isn't something you should just toss. It can do AMAZING things, like preserving your wedding flowers at home. Seriously, it is SO MUCH BETTER than drying. Find out how to do it on www.abrideonabudget.com.

Fill to the top with silica gel.

Silica gel isn't something you should just toss. It can do AMAZING things, like preserving your wedding flowers at home. Seriously, it is SO MUCH BETTER than drying. Find out how to do it on www.abrideonabudget.com.

Close the lid and wait at least two weeks.

Silica gel isn't something you should just toss. It can do AMAZING things, like preserving your wedding flowers at home. Seriously, it is SO MUCH BETTER than drying. Find out how to do it on www.abrideonabudget.com.

After I had the flowers in the box, I strung a few together and hung them from the guest closet. I figured if silica gel didn't actually work, at least I would have these. I then left the rest of the bouquet whole on my desk and that dried pretty nicely, actually. I figured that would work for a memory if silica gel flopped.

But it didn't.

It was amazing.

Silica gel isn't something you should just toss. It can do AMAZING things, like preserving your wedding flowers at home. Seriously, it is SO MUCH BETTER than drying. Find out how to do it on www.abrideonabudget.com.

I opened the box, gently removed the flowers, and was shocked. They are as bright, beautiful, and clean as the day I put them in the silica gel. The whites were white, the greenery was green, and my flowers held up their shapes too.

My only regret was not buying a bigger box so I could preserve more of my flowers this way.

You can tell the rose I overstuffed fell apart, but I actually wanted petals for another craft. I'm going to purchase glass ornament balls and fill them with petals, then use the ribbon we used for our wedding favors to embellish and tie them.

But of course, I had to run in the other room to compare them to the dried flowers, just to make sure this process and the money invested was worth it.
Silica gel isn't something you should just toss. It can do AMAZING things, like preserving your wedding flowers at home. Seriously, it is SO MUCH BETTER than drying. Find out how to do it on www.abrideonabudget.com.

The top photo is dried flowers from the ones hanging on the closet. The bottom photo is the same flowers (Picasso calla lily, white rose, orchid, respectively). The picture speaks for itself.

From now on, any time I'm thinking about preserving flowers at home, this is the method I'm using.

BRIDAL BABBLE: Have you ever used silica gel for preserving your flowers at home? 


Deciding on your wedding flowers?


Check out our Ultimate Wedding Flowers Guide post.


Ultimate-Wedding-Flowers-Guide


Saturday, August 9, 2014

DIY Wedding Bouquets: Should you or shouldn't you do them yourself?

A Bride On A Budget received this flower kit for review. All thoughts and opinions belong to ABOAB.

I remember the first time someone told me about going to the wholesaler to purchase wedding flowers. She was going to put together her wedding bouquets and centerpieces.

"I could never," I said. And I meant it. Regardless of the fact that I wanted a cascade bouquet, there was no way I was going to DIY my wedding flowers. I wasn't a professional. I never assembled bouquets in my life. Even when Pete surprises me and brings me flowers home from the store, I don't really have confidence in my arrangement skills. Usually, I just cut the stems and put them in a vase. I don't concern myself too much with symmetry or aesthetics.

So DIY wedding bouquets were out of the question.

Yes, flowers are expensive. Post-tax, our flowers were our third highest expense (behind only the venue and our photographers), and we went with the most reasonably priced florist in town too (a second florist quoted us nearly double the price for less). So yes, you can save by arranging your own bouquets.

But, can you really? If you purchase the flowers from a wholesaler, then realize it's a disaster, then order from a florist, you've spent extra money. And, if you spend an entire day putting together DIY wedding bouquets (a day during wedding week, mind you), you could cost yourself a lot in time.

When Bloominous emailed me, I wasn't sure. Basically, you order the flowers from one of four pre-arranged packages. The flowers are overnighted to you with directions and a picture, and then you make your stunning wedding bouquet.

Sounds easy, but I wasn't sure.

DIY-Wedding-Bouquets

Bloominous actually has trial kits of each arrangement so you can practice and see if it's possible for you to actually do before spending money. I asked for the trial kit of the Vintage Cottage collection (because it's very baby's breath heavy and gypsophila is so popular in wedding bouquets right now).

DIY-Wedding-Bouquets

The kit arrives in a box. Yes, a box.

DIY-Wedding-Bouquets

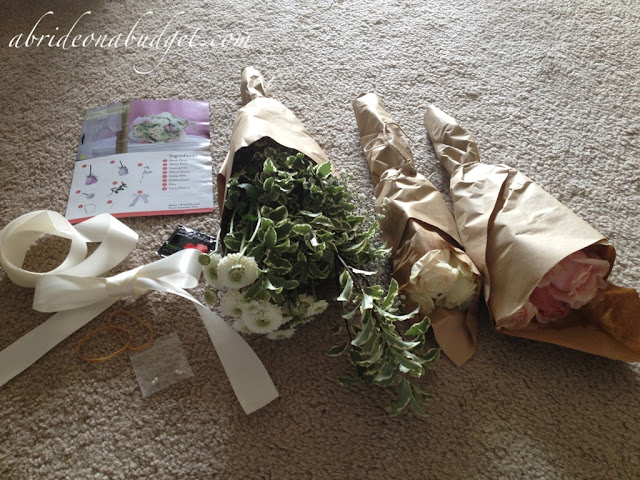
The kit contains everything you need, bundled together so you don't confuse anything. There's also an instructions page that tells you exactly what you need to do, which is really helpful because there's a good chance you don't know exactly what you need to do.

DIY-Wedding-Bouquets

The flowers are wrapped in paper bunches. When you open the paper, the flowers are bundled with a water soaked piece of foam at the bottom of the bunches.

DIY-Wedding-Bouquets

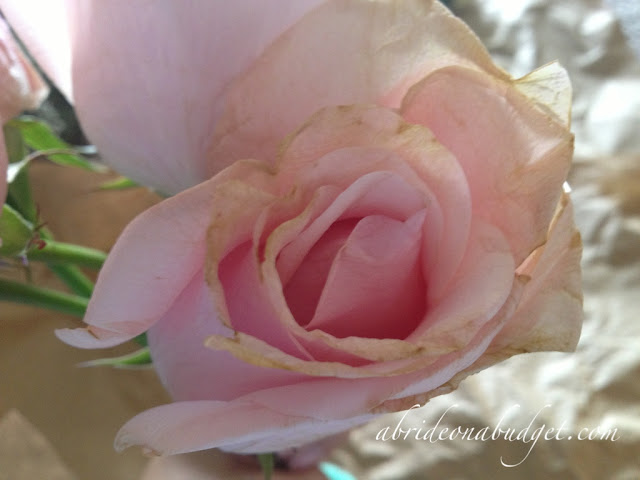
The flowers that arrive may not be perfect, but that's actually addressed in your instructions. It says the outer petals on roses are guard petals since they were left on to protect the flowers. Some of our flowers were browning at the edges, even the center petals.

DIY-Wedding-Bouquets

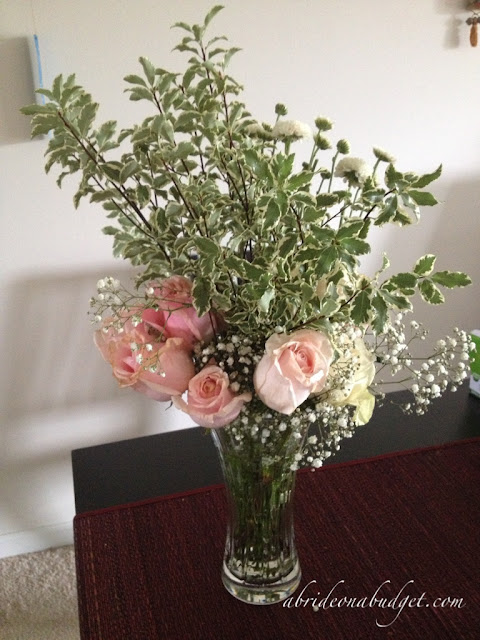
After you open the flowers, run the stems under water and cut off one inch from the bottom. Then, leave the flowers in water for at least four hours. It says wait until the day or two before your big day to start assembling them, so I would keep them in water until then. The flowers will continue to bloom after you assemble, so that's where the time frame comes from. They're cut-to-order from the farm, so they're mailed to you as fresh as possible. Because of that, they're not fully bloomed.

DIY-Wedding-Bouquets

Once I decided to put the bouquet together, I separated the flowers and leaves by type, since it seemed a little easier for me to grab and assembled when they were already assorted.

DIY-Wedding-Bouquets

The paper says start with four mums, two stems of gypsophila, one stem of greenery, and a blush rose.

So far, so good.

DIY-Wedding-Bouquets

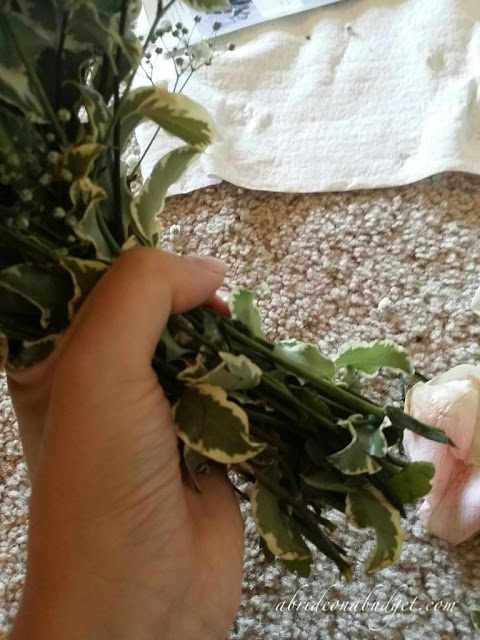
From there, continue filling the bouquet with roses, leaves, and baby's breath, trying to keep everything pretty symmetrical.

DIY-Wedding-Bouquets

I filled it all and then saw that there was another stem of mums left at the end, so I actually ended up taking the entire thing apart and starting over. The second time was a lot easier. I made sure to keep everything symmetric, matching the roses on either side.

I put the greenery around the edges because that's how I like it. When it was finished, I took a few leftover leaves and stuck them in the middle of the bouquet to try and give the bouquet a bit of texture. When I met with my florist, I kept saying that I wanted a lot of texture. I didn't want anything stiff and rigid in any of the bouquets. So, when I was DIY'ing this one, I wanted to make sure to have that come across.

DIY-Wedding-Bouquets

When your bouquet is set, cut the bottoms to the length you want. Have someone else do this or you will lose all your work. Pete cut the stems for me with poultry shears. They're a lot tougher than traditional scissors, and you'll need them to get through the stems of the greenery.

So, keeping that in mind, this is not a one person project. You will definitely want someone else on hand, even if it's just to cut the stems.

DIY-Wedding-Bouquets

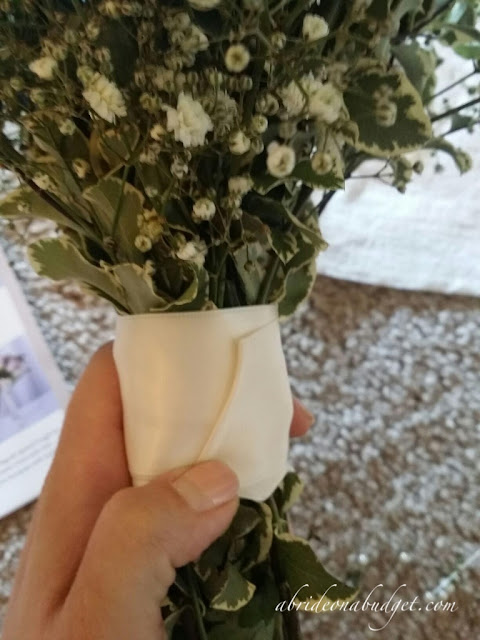
Wrap the stems with a rubber band so you can finally free up your hands.

DIY-Wedding-Bouquets

Wrap the enclosed ribbon around the rubber band, and fold it under (to a point) at the end.

DIY-Wedding-Bouquets

Pin it upward (with the enclosed pins)

DIY-Wedding-Bouquets

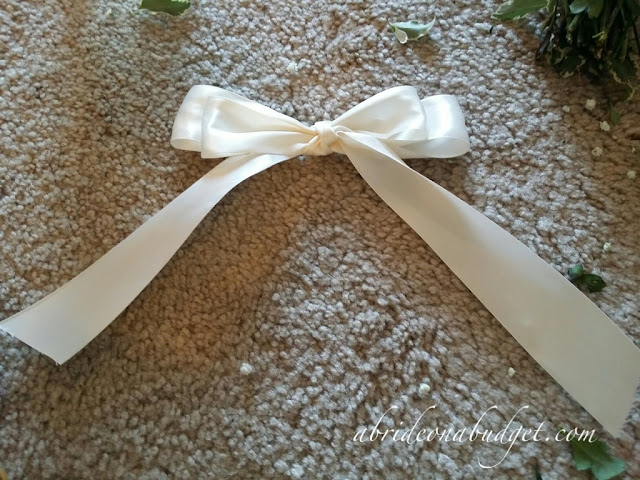
Use the second ribbon to create a bow. It took a little bit of trial and error, but I made a double bow. Honestly, that was the longest step of this whole process.

DIY-Wedding-Bouquets

Pin the bow to the ribbon.

DIY-Wedding-Bouquets

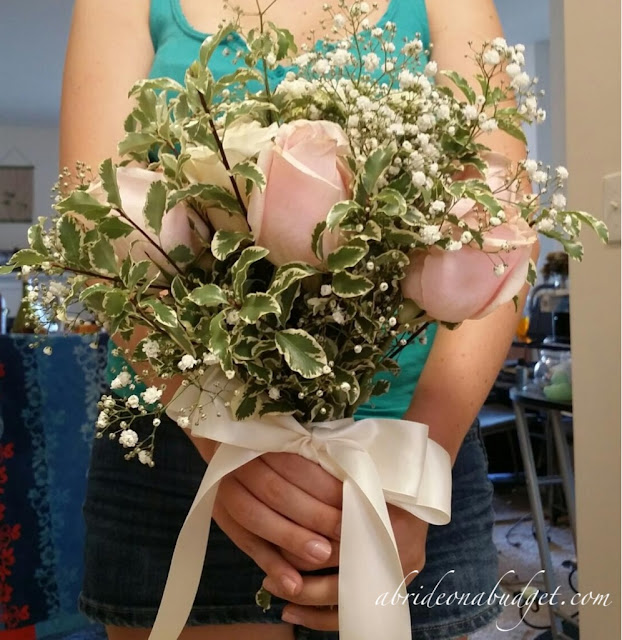
Walk down the aisle in style.

I was really impressed with my first DIY wedding bouquet. It looked super professional and didn't really take too long. Maybe twenty minutes from start to finish.

I wanted a cascade bouquet, so I wouldn't be confident in making that on my own right now, but if you want a handheld bouquet, you can definitely make it. I even had a rose and a little greenery left over, so I thought about making a boutineer too but I didn't have any pins or instructions for that.

Time is money, but money is money too. So, cost wise, how does Bloominous stack up? For the Vintage Cottage collection, a bridal bouquet (which is what I made) is $60. The bridesmaids bouquets (which are baby's breath only) are $25. Boutineers are $5 (the groom's is a rose and groomsmen are mums or carnations). We had roses for our groomsmen's boutineers, so that's the only item I can really compare apples to apples. Ours were $16 each, so triple the cost of Bloominous.

Our bridesmaids bouquets were more expensive than $25, but they were white hydrangea, lavender roses, purple stock, and seeded eucalyptus. So it's hard to compare that price to one that is gypsophila and greens only. The Country Charm kit on Bloominous has bridesmaids bouquets that have multiple flower types and those are $40. Less than what we paid, but remember, you do have to assemble them yourself.

We were very lucky and got exactly what I wanted for flowers at half the price I budgeted. There was a second florist in town that was charging double what we paid so Bloominous would be a huge savings from that florist. If you're getting astronomical quotes from florists (which, unfortunately, is realistic), Bloominous will definitely save you.

You will have to sit down and assemble them but it's really easy. Honest. Not to put down what florists do because, honestly, there are things that florists can create that I would never try to DIY. But, this homemade wedding bouquet looked really great and really professional (to my untrained eye. A professional florist may argue that, but they looked great to me).

What I really liked about Bloominous is that the company sends you exactly what you need to create the flowers. You don't have to worry about figuring out how many roses to purchase, how many mums you might need. It's easier than guessing what you might need, then finding out the night before your wedding that you are short a half a dozen roses and your homemade bouquets are incomplete.

I also really liked that there are very detailed instructions with nine photos total. It makes it so much easier to DIY. Even if you're not very crafty or creative, you can follow the instructions and make something really pretty.

If you have the time and manpower (and don't have any outrageous wedding bouquet ideas or expectations), I would definitely suggest DIY'ing your flowers. You might want to order a trial kit from Bloominous first, though, just to get your confidence for your wedding day flowers.

BRIDAL BABBLE: Could you put together DIY wedding bouquets?


Deciding on your wedding flowers?


Check out our Ultimate Wedding Flowers Guide post.


Ultimate-Wedding-Flowers-Guide