Showing posts with label decorations. Show all posts

Sunday, February 22, 2026

Everything You Need To Know About Getting Married During Lent

If you're Christian, you know Ash Wednesday starts the Lenten season. What you may not know is that if you get married during the Lenten season, there are some rules you have to follow. If you didn't know, well, this post will tell you everything you need to know.

If you're planning a church wedding, click that link for some more posts with info you might also not know.
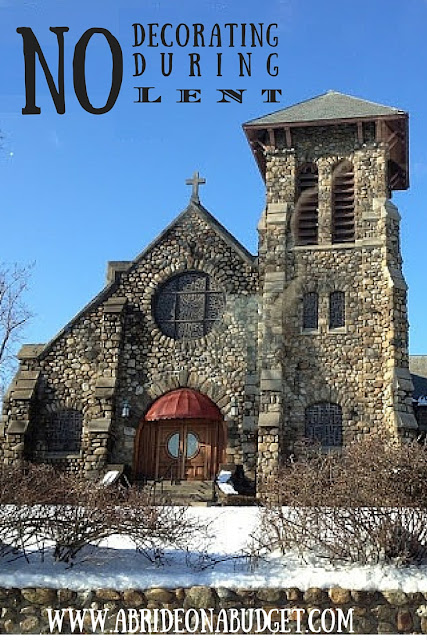
If you're picking your wedding date, and planning on getting married in a church, be sure to check to see if it's during Lent. Many churches will NOT allow you to decorate at all during the Lenten season, so keep that in mind -- and read this post from www.abrideonabudget.com about it.

If you're Catholic, you know that Lent is supposed to be a time of reflection and sacrifice.

For a couple that's getting married during the season, well, that means you're sacrificing a few things too. Like decorations and flowers in your church service.

Yup, there's no decorating the church during Lent. Didn't know that? That's why we wrote this everything you need to know about getting married during Lent post.

Everything You Need To Know About Getting Married During Lent

Affiliate links are included in this post and A Bride On A Budget may make a commission if you use them.

A few years ago, I was out with my friend Nicole, chatting about weddings, and she brought up a friend who planned her wedding and church ceremony, all blind to the fact that her wedding was happening during Lent.

And that meant no decorations at the church.

No white tulle pew bows. No flowers adorning the alter. Nope, nada, zippo, zilch.

On one hand, it sure saves a lot of money.

Having a bow on every pew and a runner down the aisle can get expensive. And those flower arrangements up on the alter, ones that you're asked to donate to the church after, those aren't cheap.

So getting married during Lent eliminates those costs (and since it's a church mandated order, it stops you from looking cheap).

But, on the other hand, it might make your photos inside the church a little lackluster.

Pete and I planned a summer wedding, so this wasn't something we had to keep in mind, but it is just one small aspect of the wedding planning to think about that you maybe didn't consider when you got engaged.

So, think about this before you pick a date.

Ash Wednesday, Easter, and the Lenten season change annually. So, even if the date you love is in the clear this year, it might not be during the year you get married.

There are a few other things to keep in mind when getting married during Lent, so let's chat about those.

What days during Lent can you get married?

The church allows couples to get married during Lent, but there are exceptions.

You can't get married on Good Friday and Holy Saturday (the Friday and Saturday before Easter). 

There's no official decree that says couples can't get married on Easter Sunday, but it is regarded as one of the holiest days in the church. So there's a very high chance that a priest won't allow an Easter Sunday wedding.

Plus, you know, I'm not a fan of holiday weekend weddings anyway, so I would suggest you take the whole weekend off.

Another thing to keep in mind is that many churches will do Stations of the Cross on Friday evenings. Ours actually does soup and stations.

So, if you're hoping for a Friday wedding, you may have to host it earlier in the day than usual since the church will be booked later on.

Can your wedding have a full Catholic mass during Lent?

So, when you go to mass, you're actually celebrating mass. And during Lent, you're supposed to minimize the celebrating.

So some Catholic churches will not allow a full mass for your wedding if it's during Lent. You'll have to check with your specific church on this one.

Some churches will do a full Catholic mass but will skip the wine so you can have a "sober" mass.

Personally, I don't agree with this because the wine is meant to be the blood of Christ, but the law was passed in Rome in the 1990's. And since I'm not getting remarried, and not in Rome for sure, my disagreement is naught. 

Can you have singing at your wedding during Lent?

This is another one that is up to the discretion of your church.

Some churches say you can't have a full celebration during Lent. And celebrating includes singing. So the church may say that you can get married, but there cannot be any singing.

That's actually not just reserved to weddings.

Small aside, but if you're planning a funeral during Lent, the church will say the funeral must take place with minimal fanfare, which means no singing.

One of the most important things for me was to have Ave Maria sang at our wedding. It was my grandma's favorite church song, and my parents had it sang (sung?) during their wedding ceremony. So it was important for me to have it sang (sung?) during our wedding.

A lack of singing would definitely have had me change our wedding date.

If singing during the ceremony isn't that important to you, then you don't have to worry about this.

What meals can you serve if you're getting married during Lent?

Getting married during Lent means you may have to change your wedding menu.

For Christians, there's no meat on Friday. So if you're having a Saturday wedding, with a Friday rehearsal dinner, you want to make sure you're offering meatless options. And if you're having a Friday wedding, you want to keep this in mind for your wedding menu.

Maybe you don't observe Lent, so you're not worried about vegetarian dinners, but some of your guests will be. And you don't want them to feel uncomfortable -- or hungry.

You want to make sure that these meatless meals are also actually vegetarian. Soup sounds vegetarian, but many soups are made with beef or chicken broth, so Christians can't eat them.

Double and triple check with your caterer before choosing your menu.

BRIDAL BABBLE: What small detail did you not realize until after you were engaged? Let us know in the comments.

Tuesday, February 14, 2017

DIY LOVE Sign

Signs at weddings are so fun and can add a nice touch. But they can also take a huge chunk out of your budget. So the more DIY wedding signs you have, the better.

In May, we made a grow box. We went to the store and had some wood cut into pieces. Each left a small 1-inch by 3.5-inch rectangle behind. I asked if I could have them and our trash turned into treasure. I used it to make this super cute DIY LOVE sign. If I was planning our wedding, I would have displayed it at our welcome or sweetheart table. But since I'm not, it has found a home in our living room.

Wedding signs are SO popular! But you don't have to buy them all. You can make your own. Find out how to make this DIY LOVE sign at www.abrideonabudget.com.

DIY LOVE Sign


Wedding signs are SO popular! But you don't have to buy them all. You can make your own. Find out how to make this DIY LOVE sign at www.abrideonabudget.com.

What You'll Need:

What You'll Do:


Wedding signs are SO popular! But you don't have to buy them all. You can make your own. Find out how to make this DIY LOVE sign at www.abrideonabudget.com.

Lay the five pieces of wood on scrap paper. Spray paint them and then sit in the woods, literally watching paint dry.

Spray a second (and third) coat. In the meantime, you can call a few friends so you're not the weird neighbor sitting in the woods behind her house watching paint dry. But, if you're like me, no one will answer and then you'll get a text from your husband saying you look like a creeper.

Wedding signs are SO popular! But you don't have to buy them all. You can make your own. Find out how to make this DIY LOVE sign at www.abrideonabudget.com.

While that's drying, use the foam brush to paint the heart red.

Wedding signs are SO popular! But you don't have to buy them all. You can make your own. Find out how to make this DIY LOVE sign at www.abrideonabudget.com.

You can write the letters softly with chalk onto the black wood or you can just paint if you trust your freehand. Either way, use the small paint brush to paint the letters L, O, V, and E in white onto the black wood. Let it dry.

Drill a wood screw through the heart onto the final black block.

Display.

BRIDAL BABBLE: Where would you display this DIY LOVE sign?

Wednesday, April 22, 2015

Pin Of The Week: Purple Shot Glass Candle Wedding Decor


I usually scroll through Pinterest quickly. Most pins start to blend in with the others and not much stands out ... until this pin.


I saw this week's Pin of The Week and originally thought it was some sort of two-toned candle. But then I read the description. The previous pinner said: shot glass + purple rocks + tealight candle.

So easy ... and so much cheaper than trying to find these two-toned candles. Plus, small tea lights like that will last all through your reception and they're a lot cheaper than buying full votives.

Purple Shot Glass Candle Wedding Decor


What You'll Need:
  • Fill the shot glass with the purple rocks.
  • Remove the tea light candle from its casing.
  • Place a tea light on top of the rocks.
  • Light it.

So perfect, so pretty, and such a great example of a wedding project on Pinterest that is actually possible for your purple wedding decor. Sometimes it works out that items on Pinterest are actually possible to DIY.

BRIDAL BABBLE: Would you add this to your purple wedding decor?

Wednesday, September 17, 2014

DIY Tissue Paper Tassel Garland (Make in minutes! No gluing or sewing needed!)

When we were looking at wedding venues, I knew I wanted one that was "move in ready." I didn't want something that I had to do a lot to. I wanted a venue that does weddings all the time and had the decor to back it up. I didn't want to rent tables, I didn't want to worry about napkins, I didn't want to think about recessed lighting.

We picked a venue on the beach (instantly the "outside" was taken care of) that has sixty-odd weddings a year. There was a lot we didn't have to do, as far as decor goes, and I was super happy with that. See, everyone in our bridal party lives up north, so it was just me and Pete down here in North Carolina putting everything together. And decor that I would have created would have been made on an assembly line of two, so I opted against any DIY decor.

But yesterday, my Twitter friend Sarah asked if I had a photo of a tassel garland. I didn't ... but I also didn't think it could be that complicated to put together. So I grabbed some twine and tissue paper and my assembly line of two (although I swapped Pete for my kitten Totes) to see what I could do. To my surprise, I had one for her in a handful of minutes.

Make a tissue paper tassel garland in minutes without gluing with this tutorial from www.abrideonabudget.com.

I was actually shocked at how easily this came together. It took me about ten minutes, start to finish, and that included taking these step by step photos and chasing away my very curious cat. Plus, there's no gluing or sewing involved with this tissue paper tassel garland, which makes it so much easier.

Make a tissue paper tassel garland in minutes without gluing with this tutorial from www.abrideonabudget.com.

DIY Tissue Paper Tassel Garland


What You'll Need:
What You'll Do:


Make a tissue paper tassel garland in minutes without gluing with this tutorial from www.abrideonabudget.com.

Fold your tissue paper into six to eight sections (depending on the size of the paper).

Make a tissue paper tassel garland in minutes without gluing with this tutorial from www.abrideonabudget.com.

Cut it into strips.

Make a tissue paper tassel garland in minutes without gluing with this tutorial from www.abrideonabudget.com.

Fold a strip in half, then cut strips about two-thirds of the way up. Remember to cut from the "open" side of the paper. Four strips (so three cuts) was the perfect size for me.

Make a tissue paper tassel garland in minutes without gluing with this tutorial from www.abrideonabudget.com.

String the "folded" side onto a piece of twine.

Make a tissue paper tassel garland in minutes without gluing with this tutorial from www.abrideonabudget.com.

Scrunch the top of the tissue paper, then twist to create a "knot.' I twisted one and a half rotations and it felt really secure. It's been hanging all afternoon and I haven't worried about any tassels falling down.

Make a tissue paper tassel garland in minutes without gluing with this tutorial from www.abrideonabudget.com.

Repeat with another piece until your tissue paper tassel garland is complete. It took seven tassels to cover 23 inches of space, if you're looking for numbers. From knot to knot is about two inches, give or take. I liked that because it gives the bottom of the tassels enough room to billow out and not get cramped and lost. Plus, if you have them right on top of each other, you'll use more tissue (which means it will cost you more).

I rotated between purple and white (because that's what I had on hand). You could make yours all one color, all mutli-colored, whatever fits your theme best. I actually love how it looks hanging up in our living room.

I sent the photo to Sarah, and she turned it into a cute photo (so of course, I had to post it).

Make a tissue paper tassel garland in minutes without gluing with this tutorial from www.abrideonabudget.com.
For something I just threw together in my spare minutes while I was waiting for my coffee to brew with items I already had lying around at home, I'm pretty impressed. DIY isn't as intimidating as you might think.

BRIDAL BABBLE: What decor items are you going to try to DIY?

Saturday, August 3, 2013

DIY Tutorial: Homemade Faux-Marquee Letters (Cute props for your wedding photos)

A Bride On A Budget received these lights for this review and project. All thoughts are our own.

Photo booths were the wedding staple for a while. Photo booths and taking photos in frames. And with letters.

I don't know when the wedding trend for marquee letters for your booth started, but I do know it can get expensive. I looked up marquee letters online (because I wanted to purchase an ampersand) and everywhere I looked wanted about $200.

No. Just no.

My mom is here to visit and she's pretty crafty. So I decided one of our (many) wedding tasks for this week would be to create a faux-marquee letter.

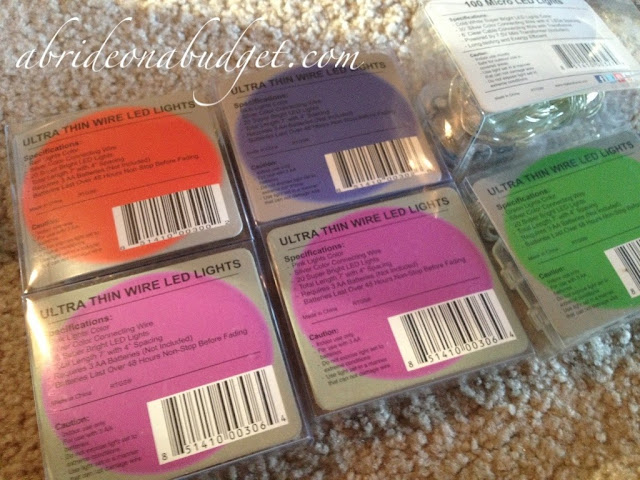
For review, we had received these gorgeous strings of lights from RTGS Products.

Homemade-Marquee-Letters

There are two different types of lights available. There are 7-Foot Micro LED Lights, which have 20 lights tota. Those are battery operated. Then there are 30-Foot Micro LED Lights, which have 100 lights total. The longer lights are plug in and come in two variations of white. The smaller ones come in various colors, such as purple, green, blue, or white. You can definitely choose the colors based on your wedding colors.

Homemade-Marquee-Letters

Depending on what you want to do with them will influence what lights you choose. I have a project lined up where I'm planning to adorn an old frame (which is missing the glass) with the long string of lights. We can just plug it in when we want to use it and it'll be a pretty magical focal point.

The battery-operated lights are great in that they're a little more portable. Plus, there's an on/off switch so you won't drain the battery. The battery life is quite a while, though. You could turn it on, set the lights out for an outdoor event, and they begin to illuminate as it gets darker.

Of course, you can't just leave a string of lights on a table. So you have to get a little creative.

Homemade-Marquee-Letters

Like setting them in a mason jar or pickle jar (preferably one with a little wider bottom than what I had. I think this would be nicer if the battery pack actually sat on the bottom of the jar and then you placed it on your tables at your outdoor wedding.

Or you can use them for the faux-marquee letters, like us. They're great for that because the string they are on is completely flexible. You can bend it however you want, and it will stay put.

Homemade Faux-Marquee Letters


Homemade-Marquee-Letters

What You'll Need:

  • Cardboard (we used a box that had just come in the mail)
  • Metallic bubble mailer in silver (ours came in the box. You can pick some up on Amazon if you don't have any)
  • String of lights (in your choice of color)
  • Glue Dots (or just tape ... or both)
  • Scissors
  • Pencil


You probably have everything you need in your house, except the lights. So your faux-marquee letter is costing you $6.25 instead of $200. Take the $193 you're saving and go out to dinner. Or a movie. Or invite your Great Aunt Edna to your wedding now that you can afford an extra plate.

What You'll Do:

Homemade-Marquee-Letters

Use the pencil to draw the ampersand (or whatever design you'd like) on the cardboard. Pencil is best in case you make a mistake.

Homemade-Marquee-Letters

Cut out the symbol. Don't worry about the lines. You'll end up covering them in two steps.

Homemade-Marquee-Letters

Trace the symbol onto the bubble mailer with the pencil (sorry for the blurry photo. I left my mom in charge and she got a little shaky trying to pose and snap).

Homemade-Marquee-Letters

Cut out the symbol from the bubble mailer.

Homemade-Marquee-Letters

Affix it to the cardboard using Glue Dots or tape (or both, as it seems in our case).

Homemade-Marquee-Letters

So far, so good.

Homemade-Marquee-Letters

Wrap the lights around the symbol.

What we ended up doing was taping the lights on the back, just to make sure they would stay in place and wouldn't get ruined from usage. We also taped the battery box to the center of the ampersand. It gives guests somewhere to hold -- and it's the perfect way to hide the battery box.

When you're done, bring it to your reception and snap photos of other couples using it ...

Homemade-Marquee-Letters

Like us using it in the light (okay, it was a little too light to actually see the red string of lights, but they did bounce off the silver, which was key).

Homemade-Marquee-Letters
We used it again when it was darker (same night, even though Pete had a different shirt and I lost my sweatshirt). And, even though you can't really see me in the photo (which may be more the fault of the photographer, not the lighting), you can absolutely see the ampersand.

Our friend stopped by the night we made this, so of course, Pete had to take a photo with ...

Homemade-Marquee-Letters

... her dog.

You don't have to use this for human couples, and you don't even have to use this symbol. We have plans to make an L and P and adorn them with purple lights so we can have L&P at the lounge in our reception hall. You can make a heart, your name, whatever you can cut.

Unless you aren't that crafty. You can still have this. Instead of making the letter from cardboard, you can just purchase a wooden letter. Paint it any color (I would suggest using a metallic paint) and string the lights around it.

We absolutely love how this came out. I'm sure you will too.

BRIDAL BABBLE: If you made these, what letter(s) or symbol(s) would you make?