Thursday, January 29, 2015
Win $500 In Wedding Items From Oriental Trading (Enter Weekly Until December 29)
How is your wedding planning going?
Have you gone to all the bridal expos? Do you feel comfortable to sit down, go through the information, and start booking vendors? (If you haven't been yet, be sure to check out our post on How To Survive A Bridal Expo.)
Don't forget to start thinking about the minor details, like centerpieces and favors. Those definitely add to the cost of the wedding (and really, the last thing you need is to add to the cost).
If you're feeling the pain in your wallet already, worry not. I was just looking online and found Oriental Trading's weekly wedding giveaway. Each week, you can enter to win a $500 gift card. Only one person per household can enter, so if you live with your fiance, you can't both register (but if you don't, you're in luck!).
We've actually done a ton of wedding DIY posts using items from Oriental Trading. You can check them out below so you can get ideas of items you would make if you won:
BRIDAL BABBLE: What would you buy if you won?
Wednesday, January 28, 2015
How To Survive A Bridal Expo
We got engaged in September and we decided to have an engagement party. We live in North Carolina and all our friends and family are in New York. We don't see everyone very often (or, really, at all) and I thought it was a great excuse to see everyone and celebrate, especially since we were planning on going to New York for Thanksgiving that year anyway.
Plus, we knew a bunch of our family and friends wouldn't be able to travel for the wedding, so this was our only chance of celebrating our marriage with them.
We had a second trip planned to New York that Christmas, and I told Pete we could start planning the wedding when we got back after New Year's. I couldn't plan a wedding and engagement party simultaneously, and I also couldn't plan a wedding and Christmas at the same time. I need to compartmentalize things.
When we got back in January, we found out that there was a bridal expo two weeks later. "Are you prepared?" a friend asked. I was going to a bridal expo, not to battle. What was there to prepare for?
Actually, a lot.
But don't get overwhelmed. I'm a bridal expo expert now (I ended up at about a dozen), so I put together this Hot To Survive A Bridal Expo guide.
How To Survive A Bridal Expo
This guide is broken into three parts: before the bridal expo, during the bridal expo, and after the bridal expo. I figured that makes it a little easier to read through instead of just one long list.
Before the bridal expo
1. Get the address.
The same bridal expos seem to happen year after year. These are the things you start to notice if your engagement lasts more than twelve months. We went to an expo one year, and then my mom was in town the following year so I went to the same expo with her. Except at the last minute, they changed the address. There was someone at the original venue who was there to tell people where to go instead, but if not for her, we would have been out of luck. I checked the address few days before but not the day of. So, before you leave the house, be sure to confirm the address so you don't waste time driving around.
2. Bring address labels with you.
This is one of the tips someone gave me that I ignored, then quickly regretted at the bridal expo. There's a good chance you're planning on ordering address labels for your wedding stationery anyway. Add a couple more to your order and bring them with you to the expo. Each booth will ask for your contact information (including address, phone number, and email). Instead of handwriting it every time, you can just affix an address label. Much easier. Plus, CafePress sells a ton of really cure wedding address labels for really cheap, so just order an extra sheet for bridal expos (it'll set you back less than $3 and save you time and hand cramps. Totally worth it).
Small aside: Consider creating an email address solely for wedding stuff. That way, your wedding emails don't get mixed up with your personal ones. Big thanks to my wedding twin Kristiana for the reminder on that
Small aside: Consider creating an email address solely for wedding stuff. That way, your wedding emails don't get mixed up with your personal ones. Big thanks to my wedding twin Kristiana for the reminder on that
3. Bring a notebook with you.
I picked up a journal-style notebook from Night Owl Paper Goods before we started planning (this one is the exact notebook, if you really want to know). It was small enough to fit in my purse, but the flexible wood cover was most of the appeal. It would "move" with my purse so I wasn't feeling a stiff notebook jam into my arm while I was courting vendors. And yet, it wasn't a paper cover that I feared would bend and ruin over time.
I split the notebook into sections with a tab at the top for each section: venues, caterers, photographers, flowers, cakes, music, etc. That way, I was completely prepared before I got to the venue.
4. Pack a bottle of water.
These expos are always packed with people and it's hot inside. No matter what the season or venue, that many people in a room, walking and talking and hurrying, it's warm. Some vendors are life savers and will bring bottled water (and some actually are smart are label the bottles with their information). But, you can't rely on generous vendors. Pack your own bottle of water, just to be safe.
During the bridal expo
1. Bring a friend.
Bridal expos can be really tiring. You're moving from one table to the next, talking to people and trying to plan a wedding. It's not fun on your own. Bring someone with you: your mom, your maid of honor, one of your bridesmaids, even your groom. I suggest bringing one and only one person. You're not Princess Kate. You don't need an entourage. Plus too many people makes it slow to go from one booth to another.
I actually brought Pete with me to every expo except one (and that's only because it was year two of our engagement and we had a friend get engaged so I had a woman to go with). It was great having him around, though. It made it so we were planning our wedding, not just me. Bridal expos do know that men usually aren't as interested as women, though, and one we went to actually had a man cave. While I was around talking with vendors, there was booze and boys (and tuxedo companies) in the man cave.
2. Pick up the entry bag.
At most expos (I say most because I haven't been to them all, but at every single one I've been to), you have to sign in when you get there. It's filled with papers and business cards from local vendors, some that are at the expo and some that aren't. What's the most helpful, though, is that it's a bag. When you go around to the vendors, they will definitely give you additional cards and information. You'll need a bag to collect it all, so it's really nice that bridal expos provide you with one.
3. Ask questions (and write down your thoughts).
You don't want to just walk around the bridal expo collecting information on paper. You want to engage each vendor. Talk to them. Not only will you get answers to important questions (like cost of the caterer, how many people will fit in the venue, if the photographer gives you the rights to your photos, etc.), you'll get a feel for the vendor. Maybe you feel really comfortable with them or maybe they give you the creeps. And it's okay if they do. This is a person who will be participating in one of the biggest days of your life. If you don't feel like they're a good fit, that's okay. You don't have to work with them. But if you don't talk to them and ask questions, you'll never know.
When you're talking to them, be sure to write down what they have to say in your notebook. Don't expect to remember it all later. When you step away from the table, jot down your feelings on the back of their business card. I can't stress this enough. It was the most important piece of picking our vendors. I was absolutely incredibly nice to everyone's face, but when I turned around, I made sure to be honest with myself. I would write things like, "I love their photos" or "old, stuffy" or just "bad." These are personal comments for you that will help you choose the right vendors. Be honest.
4. Try the veal.
Okay, not veal exactly. But there's a good chance there will be a caterer present with food to try. And cake makers often have cake samples. Try them. This is a good way to get an idea of what the caterer or baker has to offer without setting up a tasting (which often requires a payment). If you like the food, that's great. And if you don't, you don't have to waste your time and money (and their time and resources) to set up a formal tasting.
Be sure to write down your opinions about the menu or cake on the back of business cards too. The food and cake are so important, so be honest with what you think about them (and don't feel bad about trying a cake bite and not choosing that cake vendor. The samples are there for you and other brides to try).
After the bridal expo
1. Organize.
Go home and actually dump everything on the floor. Then, be sure to match business cards with brochures and staple them together. Write down any notes you forgot to write before, then put everything back in the bag. Then, label the bag with the name of the bridal expo you went to. It was so much easier for me to remember who I saw where and check that specific bag for the information rather than trying to swim through a sea of information to find what I wanted.
2. Follow up with vendors.
Many of the vendors will send you generic emails after the wedding expo. But if you really love that vendor, be sure to follow up yourself. Call, email, follow them on Facebook, whatever it takes for you to keep in touch. Make sure to get any additional information that you weren't able to get during the bridal expo.
3. Schedule appointments.
If you absolutely love a vendor, schedule an appointment with them early. You weren't the only bride at the expo, so you probably weren't the only bride to fall in love with them. If you want to assure that you book them before anyone else, you really need to get in the door as soon as possible. Schedule a tour of the venue, a tasting, or just a sit down meeting. If you are first and your wedding date is on the books (even in pencil), you'll get priority over anyone else.
4. Be ready for aggressive vendors.
I actually had the last tip as "get ready for round two" because you will be doing this again, but I'm actually hosting #BridalBabble on Twitter right now and everyone seems to be warning against aggressive vendors. Yes, there will be pushy vendors at a bridal expo (or after) that want to sign you up for everything and anything -- and immediately. They may call or email you (again and again). It's okay. You can politely tell them you are not ready to make a decision or you can just tell them you're not interested. Or heck, you can just ignore them. It's your wedding and your decisions. Don't feel pressured to go with a vendor just because they (or your mom, maid of honor, or bridesmaids) are pushy.
BRIDAL BABBLE: What tips to you have for brides going to their first bridal expo?
Monday, January 26, 2015
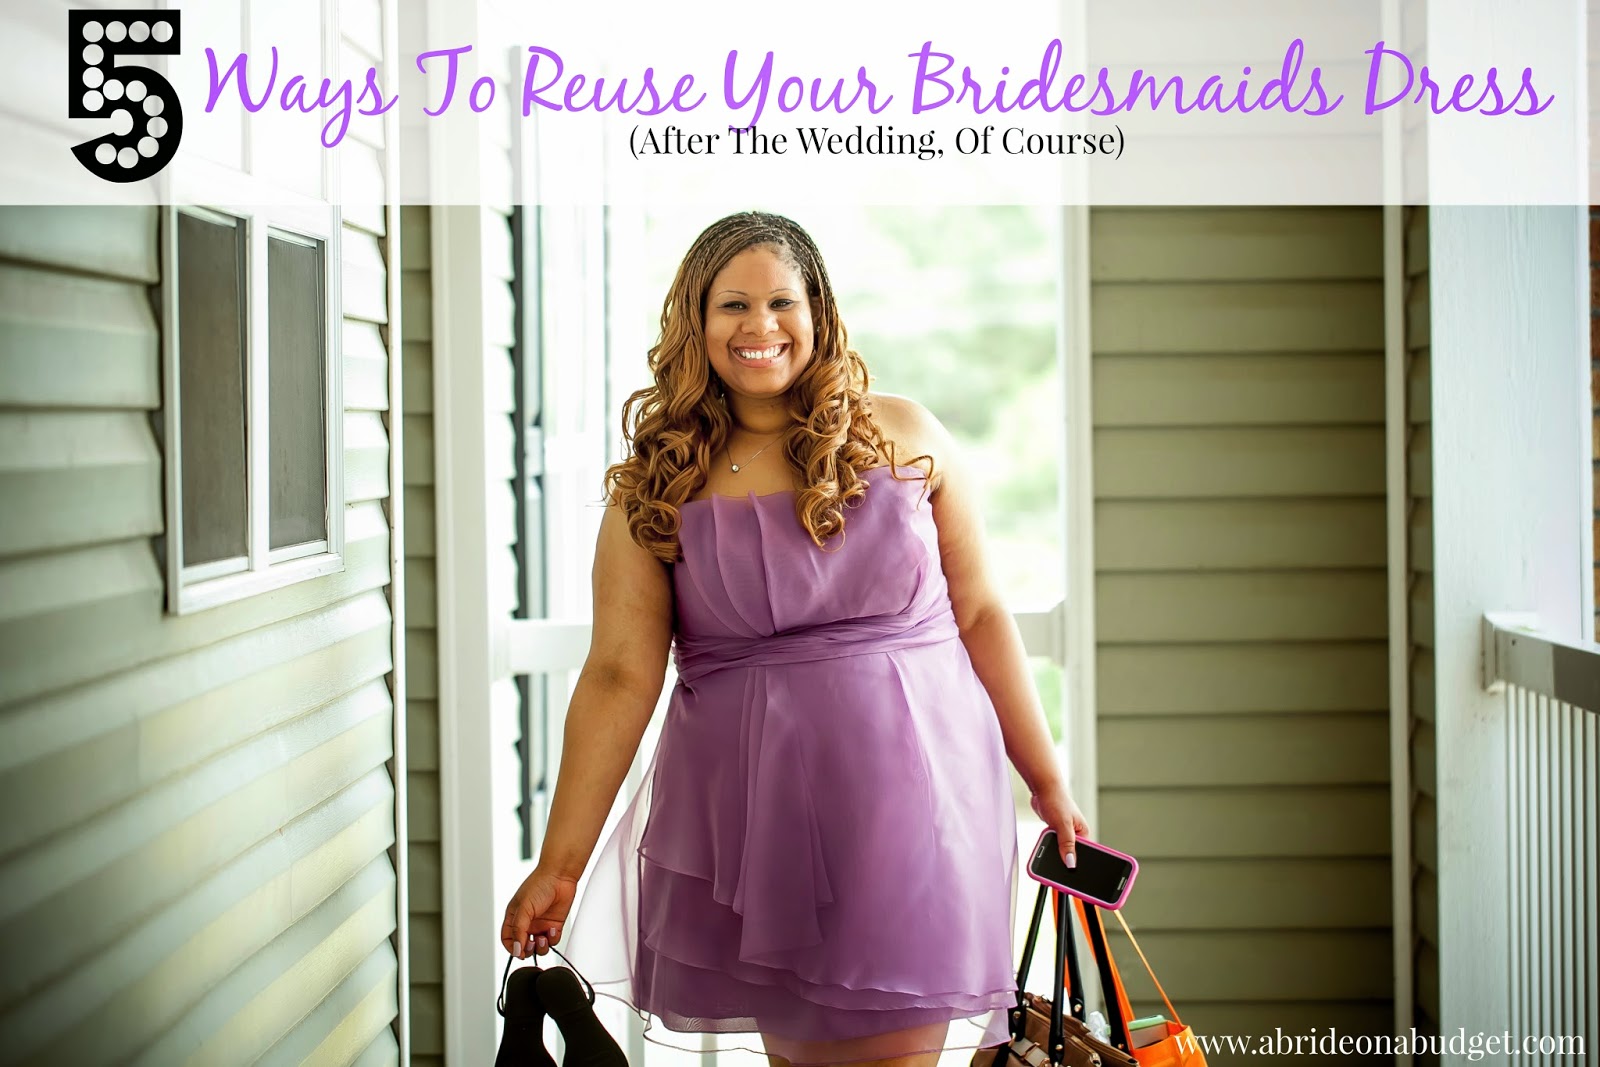
Five Ways To Reuse Your Bridesmaids Dress (After the wedding, of course)
I absolutely loved the bridesmaids dresses I picked for my girls. I loved them so much that I thought I might end up picking the dress up for myself to wear to a wedding in the future. And I loved the shoes I finally ended up picking for them. It took months of looking (seriously), but I ended up going with these Nina Women's Forbes Satin Peep-Toe Pump in silver. My bridesmaids said they were heels that they would be able to reuse, which is great because so often bridesmaids end up with heels and a dress that will forever be stuffed in the back of a closet.
If I'm being honest, my friend is about to celebrate her eleven year wedding anniversary to her high school sweetheart in a few months. And my bridesmaid dress from that wedding is still sitting in a bag in my parents' basement. I never even took it to get cleaned. I just put it in a bag and figured her wedding was over so I had no use for that used bridesmaid dress. And that was that.
Do you have a dress or two like that? If you do, this post is for you.
1. Go as a prom queen for Halloween.
It's almost an instant Halloween costume. Pick up a prom queen sash and prom queen crown and you're done. Seriously, it was that easy. You can even wear the bridesmaids heels too so you're reusing everything.
2. Donate it (to a company or a friend).
There are websites out there like Fairy Godmothers Inc. that will allow you to donate your bridesmaids dress. The dress must be less than five seasons old, so you need to do this as soon as possible. The dresses can then be purchased at an incredible discount (think $10) to girls in need who are planning to go to prom. If you're never going to wear it, you might as well donate it to someone who will. (Small aside: We have no personal relationship with Fairy Godmothers Inc. I just found them when I was googling. I didn't do too much research into them, so you might want to look deeper.)
If you don't want to mail it to a company you found online, and your local donation center won't take it, ask a friend. Friends ask me all the time if I have dresses they can borrow. If you're closet looks like Katherine Heigl from 27 Dresses, you should let your friends shop in your closet.
3. Turn it into a baby blanket.
If you know how to sew, this is a perfect idea. Use the front of your dress as one side of the blanket and purchase flannel material for the other side. Use the majority of the dress for the actual blanket and save any ruffles or bows to decorate the blanket. If you're like me and can't sew, you can purchase something like this on etsy (Small aside: I haven't purchased anything from that etsy seller. I just bookmarked that link because I love this idea.)
4. Wear it to another wedding.
The photo above is from my friend Mallory's wedding. She asked her bridesmaids to purchase matching shoes (which I was obsessed with) and then told them they could purchase any dress as long as it was black. The style was up to the bridesmaid. That makes bridesmaids dress shopping easy, doesn't it? Purchase whatever you love best, as long as the color works. With that sort of dress shopping, you can guarantee that the bridesmaid dress is something you like and can wear again. If it's a little too fancy for date night, save it for another wedding.
5. Toss it.
I know, this is the most horrible solution, but if you're never going to wear your bridesmaid dress again, you can't find someone to accept your donation, a friend doesn't want it, and the bride is never getting pregnant, just throw it out. Don't let it take up valuable closet space. Just let it go.
BRIDAL BABBLE: What are some other ways to reuse your bridesmaid dress?
If I'm being honest, my friend is about to celebrate her eleven year wedding anniversary to her high school sweetheart in a few months. And my bridesmaid dress from that wedding is still sitting in a bag in my parents' basement. I never even took it to get cleaned. I just put it in a bag and figured her wedding was over so I had no use for that used bridesmaid dress. And that was that.
Do you have a dress or two like that? If you do, this post is for you.
Five Ways To Reuse Your Bridesmaids Dress (After The Wedding, Of Course)
1. Go as a prom queen for Halloween.
It's almost an instant Halloween costume. Pick up a prom queen sash and prom queen crown and you're done. Seriously, it was that easy. You can even wear the bridesmaids heels too so you're reusing everything.
2. Donate it (to a company or a friend).
There are websites out there like Fairy Godmothers Inc. that will allow you to donate your bridesmaids dress. The dress must be less than five seasons old, so you need to do this as soon as possible. The dresses can then be purchased at an incredible discount (think $10) to girls in need who are planning to go to prom. If you're never going to wear it, you might as well donate it to someone who will. (Small aside: We have no personal relationship with Fairy Godmothers Inc. I just found them when I was googling. I didn't do too much research into them, so you might want to look deeper.)
If you don't want to mail it to a company you found online, and your local donation center won't take it, ask a friend. Friends ask me all the time if I have dresses they can borrow. If you're closet looks like Katherine Heigl from 27 Dresses, you should let your friends shop in your closet.
3. Turn it into a baby blanket.
If you know how to sew, this is a perfect idea. Use the front of your dress as one side of the blanket and purchase flannel material for the other side. Use the majority of the dress for the actual blanket and save any ruffles or bows to decorate the blanket. If you're like me and can't sew, you can purchase something like this on etsy (Small aside: I haven't purchased anything from that etsy seller. I just bookmarked that link because I love this idea.)
4. Wear it to another wedding.
The photo above is from my friend Mallory's wedding. She asked her bridesmaids to purchase matching shoes (which I was obsessed with) and then told them they could purchase any dress as long as it was black. The style was up to the bridesmaid. That makes bridesmaids dress shopping easy, doesn't it? Purchase whatever you love best, as long as the color works. With that sort of dress shopping, you can guarantee that the bridesmaid dress is something you like and can wear again. If it's a little too fancy for date night, save it for another wedding.
5. Toss it.
I know, this is the most horrible solution, but if you're never going to wear your bridesmaid dress again, you can't find someone to accept your donation, a friend doesn't want it, and the bride is never getting pregnant, just throw it out. Don't let it take up valuable closet space. Just let it go.
BRIDAL BABBLE: What are some other ways to reuse your bridesmaid dress?
Saturday, January 24, 2015
Red Velvet Soda Recipe (and a chat about Target wedding registries) #TargetWedding
If you love this recipe, be sure to Yum it here: Yum
Content and/or other value provided by our partner, Target. All opinions are my own.


Content and/or other value provided by our partner, Target. All opinions are my own.
Last night, Pete and I went out to dinner. We got to eat, phone and distraction free. Of course, it wasn't work free. He talked about his job and I mentioned a post that I was doing for Target Weddings.
The idea of the post (as it has been in the past) is to create a wedding registry that reflects the couple -- but also one that can be used. I mean, adding China settings to your registry is great (we did it) but the times you're going to be using that China is slim (ours has been in uncracked boxes for a year).
What we do use daily is the glasses that we put on our registry, so if you're planning on creating a Target registry, be sure to add a variety of drinkware. Different sizes are good for different drinks. I mean, you're not going to make an 18 ounce Old Fashioned (unless you had a terrible day at work and you're sharing with someone). But the tall glasses, they can be used to make Red Velvet Soda.
Yes, Red Velvet Soda. Pete actually came up with the concept yesterday at dinner. We spent the time between our appetizer and dinner coming up with a recipe for it. And today, we made it. It was shockingly delicious.

Red Velvet Soda
I love red velvet anything. It's my birthday cake of choice. It's basically a vanilla cake with a dash of cocoa powder. Delicious. But I've never seen it in drink form before, so we had to really brainstorm a way to make it work.
What You'll Need:
What You'll Do:
Make soda in the Soda Stream. Add about 3/4 of the lemon-lime syrup that you would usually add. Pour it into a glass.
Add about three drops of vanilla extract. (It will start to bubble)
Add one (and only one) drop of red food coloring.
Add a large pinch of cocoa powder. (The bubbles will be really be active now)
Gently stir.
Now, I'm going to really give you a big warning here: Stir gently. By now, your Red Velvet Soda is really starting to bubble. And a stir makes this drink think it's a volcano. It will bubble over and explode, just like shaken soda. So definitely be super calm with it.
I made this by the glass, but you could make a whole pitcher of it ... that is, if you have a pitcher.

If you don't, you can always add one onto your Target registry. We didn't add one because we already had three and didn't need to add one more to the mix. But if you need one, Target has a wide array to choose from.
What's actually cool about Target is it pretty much has everything.
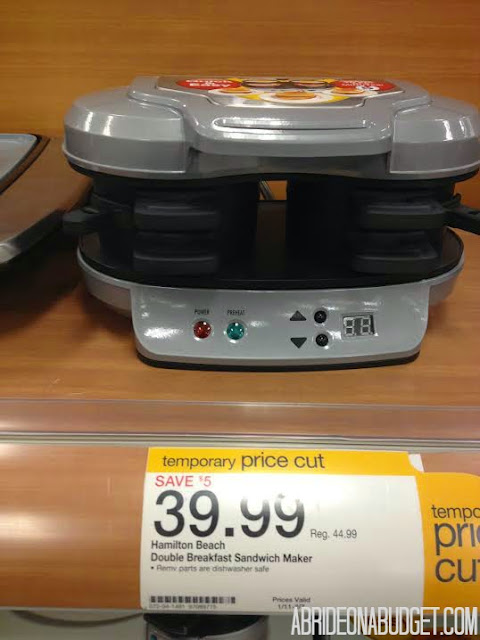
Like stand mixeres, cookware sets, speakers, cameras, and this Hamilton Beach Double Breakfast Sandwich Maker.
I actually only heard about these last week and I have no idea how my life has existed without it. We make breakfast sandwiches at home often, but this actually makes sandwiches for you. Plus, after you get married, there are two of you to start to cook for. So a double breakfast sandwich maker is definitely what you need.
You'll only need one vacuum, though. At least, that's what I think. And since they are quite expensive, don't expect more than one to fly off your registry.
Even if you don't think anyone will buy you a $400 vacuum, it's worth it to add it to your wedding registry. See, the week of your wedding, Target will send you a 15% completion coupon. That way, you can save 15% off anything that wasn't purchased. That's an easy way to save a chunk of change off high ticket items, like a vacuum. You can even get Target registry rewards when starting your registry too.
What I would add, if I was registering, is this Threshold table lamp. It looks very similar to a lamp that was in a hotel scene from House of Cards that I fell in love with. In the middle of the episode, I had to stop and tell Pete that I absolutely wanted that lamp. And then I wondered if I could find something similar on Pinterest to help me make one. If you are registering, you can just add this lamp. You don't have to worry about DIY'ing one. Just scan it.
If you are planning on creating a Target Wedding Registry, be sure to add items that are useful but also include ones that are fun too. You want to choose stuff that reflects your personality but is also stuff that you will use. And these Red Velvet Soda ingredients are something you'll use (if you are me, at least).
BRIDAL BABBLE: Do you think you would try to make this Red Velvet Soda recipe?
Tuesday, January 20, 2015
Five Social Media Rules For Your Wedding
CatPrint provided A Bride On A Budget the Instagram cards and business cards mentioned below. All thoughts and opinions belong to ABOAB.
When I got my first (and actually, only so far) smart phone, it was when I decided I was going to blog full time. Since my entire livelihood would now be reliant on the Internet, I needed to have it in my pocket at all times.
I was late to the smart phone party. Really late. The latest phone at that time was the iPhone 4S, so its grandpa, the iPhone, was already five years old. Three years later I still have the 4S, filled with photos and apps. Like most everyone else, I don't go anywhere without my phone -- not even weddings.
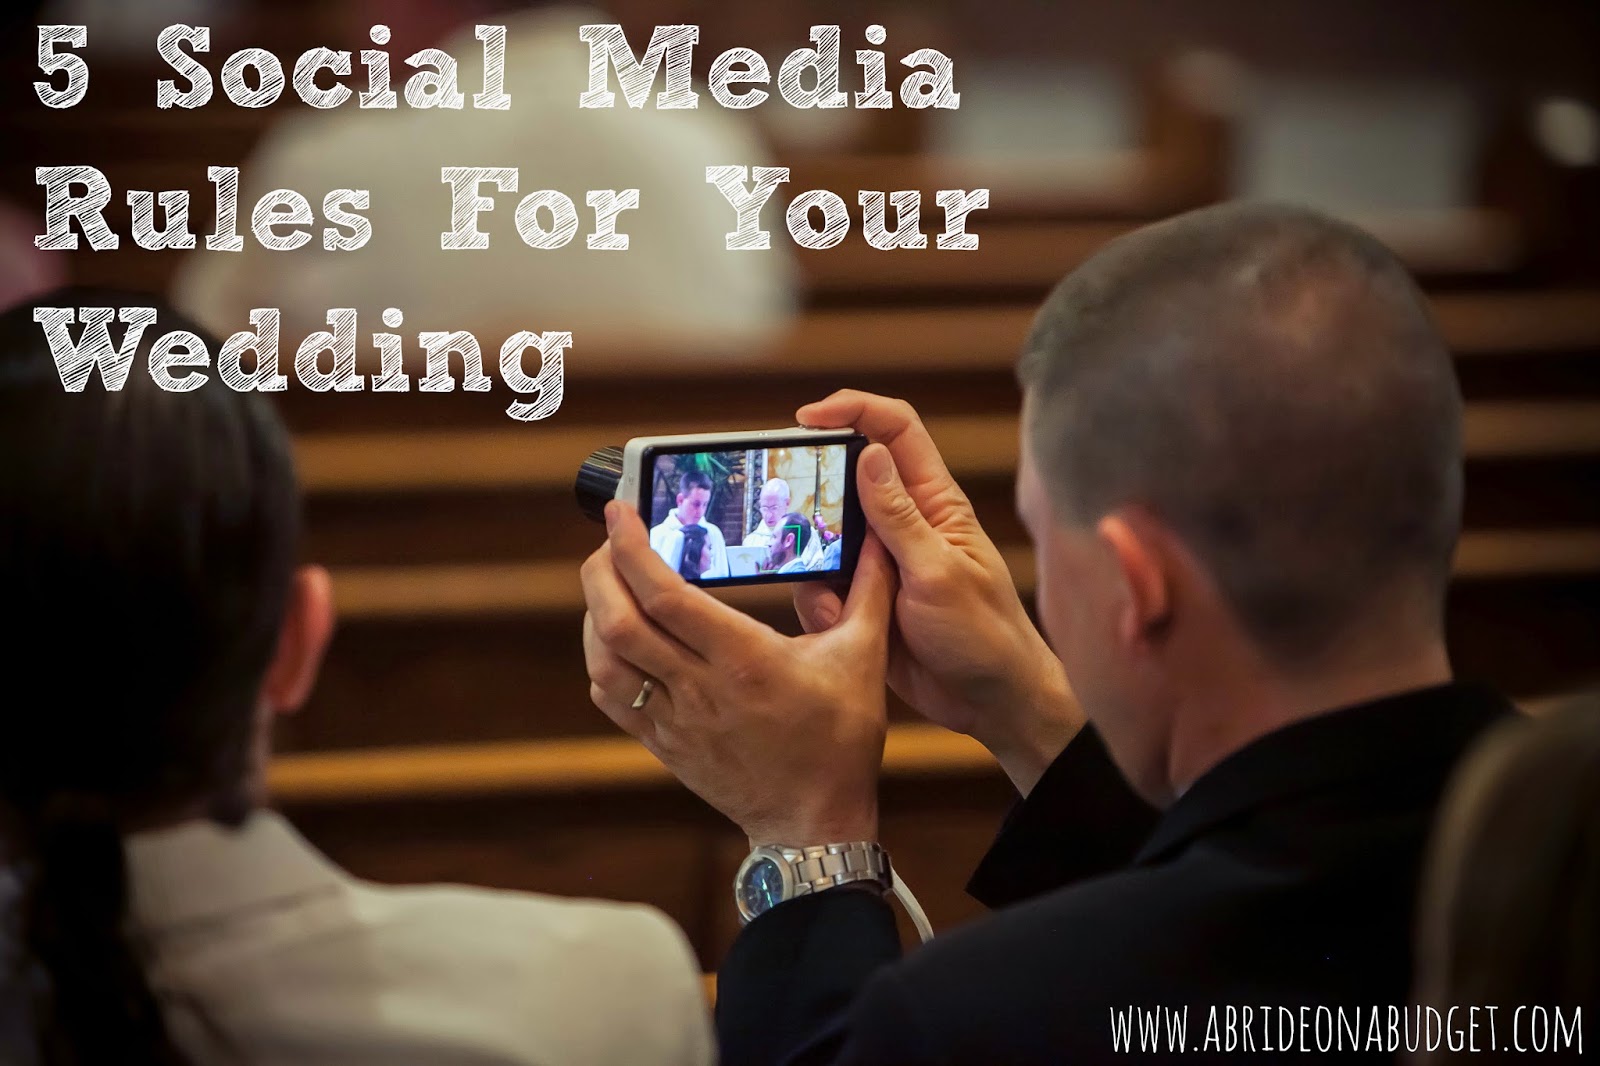
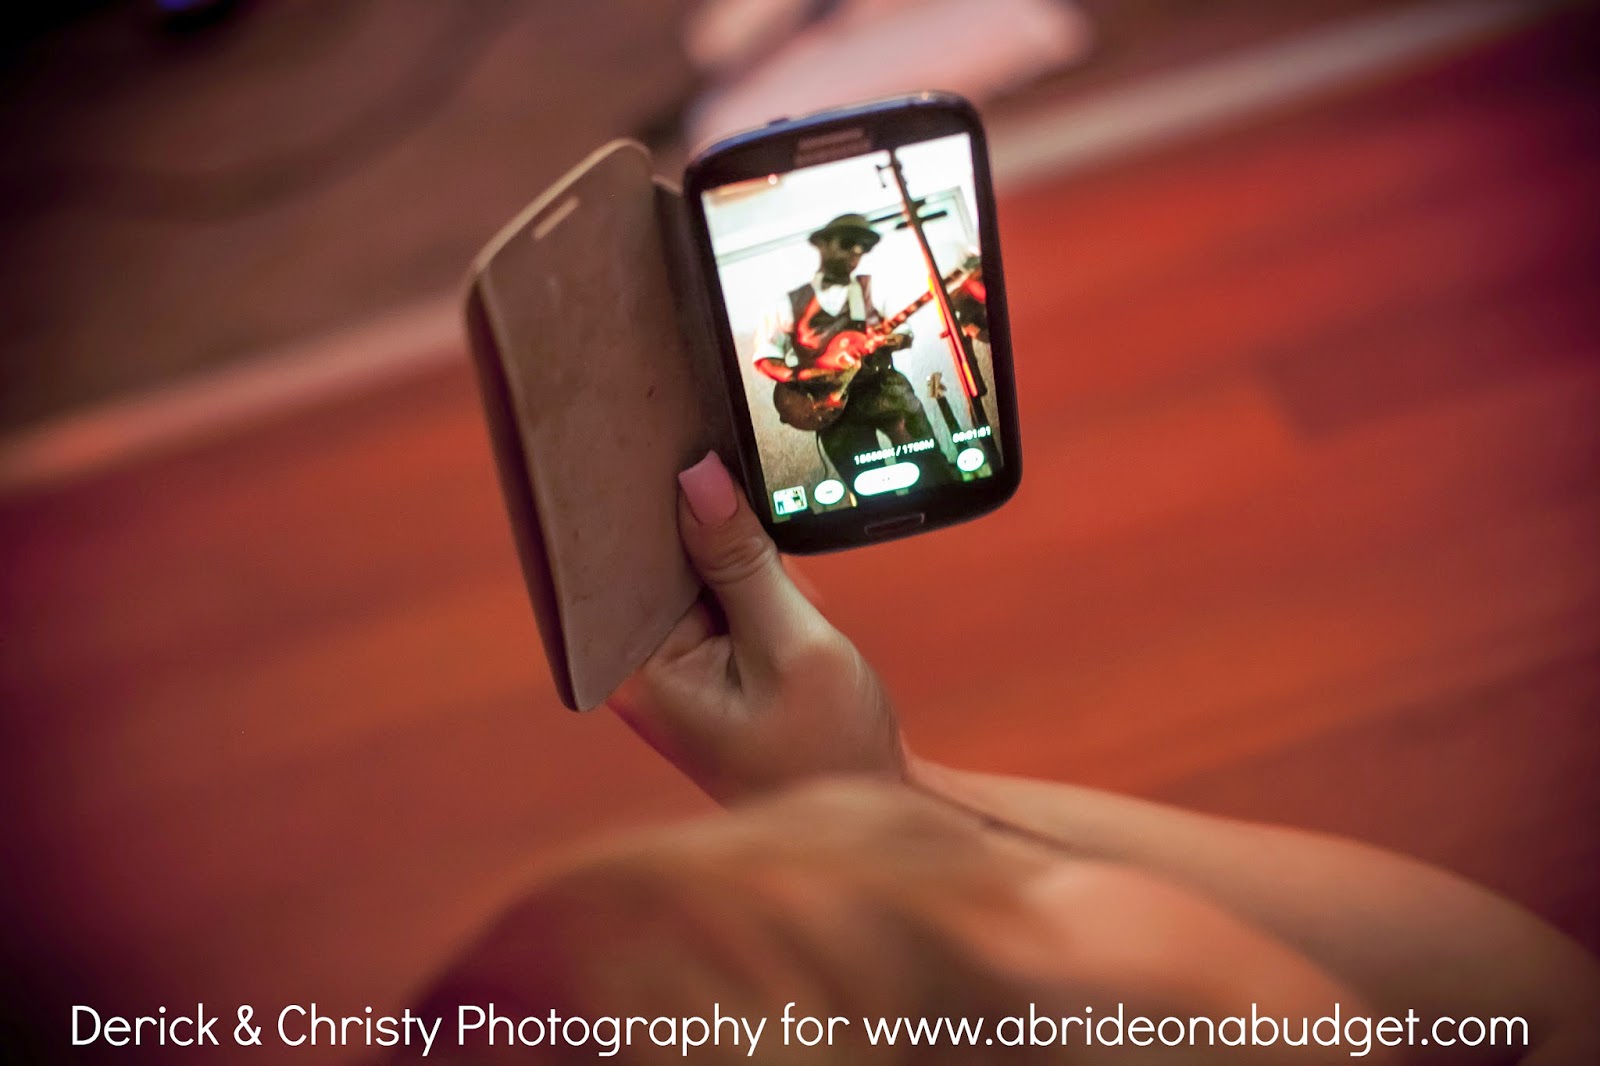
And that has changed weddings. We've had to worry about things like unplugged weddings, which was something brides didn't have to worry about in the past. Yes, a guest would bring a camera and take a few photos, but when your camera lives in your pocket and social media is a mere app away, it's so much more tempting to take a photo and immediately tweet it or Instagram it. And then your guests are spending time looking down, watching your wedding through a screen instead of their own eyes.
But there's a way to do social media properly at your wedding.
1. No posting photos of the bride or groom before the wedding.
This is a rule that you assume is a given, but it's safer to spell it out than assume. Your bridesmaids and parents will have phones in arms reach when everyone is getting ready for the big day. They'll be snapping selfies, photos of you, and photos with you. And that's fine. They are going to want to preserve these memories just as much as you do. But just make sure they don't immediately preserve them and post anything to social media before you walk down the aisle. And, to take it even further, make sure they don't text any photos out (at least of you) before the wedding either. The bride's reveal is huge and such a beautiful moment. You don't want one tag on Facebook to ruin that.
2. If you're really worried, change your privacy settings on Facebook.
I don't post on my personal Facebook page all that very often. I post on A Bride On A Budget's Facebook page several times a week. The last time I posted on my personal page was August 30 because I was doing some five days of grateful challenge. That was day four. I never made it to day five. But the last time a friend posted on my timeline was this morning. So even though you might not really be into Facebook, your friends might be. Be sure to change your privacy settings so you have to approve any tagged photos before they appear on your page. That way, you can make sure nothing unflattering shows up while you're on your honeymoon.
3. Create a wedding hashtag ... and let people know about it.
So many people mock hashtags, including Jimmy Fallon and Justin Timberlake, but hashtags can actually be really effective. I use the #BridalBabble hashtag on Twitter every week to host our wedding chat, but you can use them for a wedding too. Create a hashtag that is unique to you (and be sure to check social media for that hashtag first because, believe it or not, you might not be the first couple trying to use #MrAndMrsSmith). Be sure to post on social media that you are, indeed, using a hashtag. But also, make business cards to share at the welcome table and/or each individual table or wedding welcome bags so your guests know what the wedding hashtag is. If no one knows, no one can use it.
Small aside: I actually designed the cards above on PicMonkey and had them printed at CatPrint. What I really like about CatPrint -- and why it's so wedding friendly -- is there are no order minimums. Want ten Instagram wedding hashtag cards because you'll have ten tables? Sure. They can do that. Need five personalized cards to ask your girls to be your bridesmaids? Done. Need 100 save the date postcards? They can do that too.
But what I like most about them, especially as a bride, is how incredible customer service is. When I was designing my cards, I had a few issues: First it was with orientation (but that was more of me not understanding the design process rather than an actual issue), second it was bleeding (or something like that, which I still don't fully understand). When you're planning a wedding, you know any minor crisis turns into something insurmountable. CatPrint's customer service did a lot of hand holding for me. I ended up sending them a desperation email that was something along the lines of, "I'm sorry. I don't understand. Can you just fix it for me?" And they did. Done. They even offered to send a free hard copy proof -- something they offer every customer. It adds a few days onto your production time, but you are able to receive one copy of your item in hand before an entire order is created. You can check spacing and coloring (and you know just how important color matching is). You can receive a free online proof, but that isn't ideal for colors. For review, I received these Instagram cards plus a full order of business cards (which I posted a photo of on Instagram). I love them. They're thinner than business cards, which gave them such a smooth feel in my hands. They just felt elegant, and that's the exact feeling you want for a wedding.
4. Wait a few days to change your status on Facebook.
I know, your friends want you to immediately change your status from "engaged" to "married" but really, this isn't something you need to change on the alter. After the "I Do's," you'll be taking wedding photos then going to your reception (and cleaning up), then passing out. If you remember this post, you'll remember that you don't even have the time or energy to be romantic on your wedding night. So the last thing you should be concerned with is a Facebook status.
5. Text your family who couldn't make it before posting on social media.
There is a good chance that the next day, your phone will be flooded with photos from your friends and guests. They'll have shots of your cake, of you walking down the aisle, of your first dance. And they will send them all to you, way ahead of your photographer's professional shots. Take one of those photos and text it to the important family members who weren't able to travel for the wedding with a short, "Wish you were here yesterday!" message. Then, and only then, should you post anything on social media. You don't want your relatives to see your wedding day because they happened to sign into Facebook at the same time someone was posting something on your wall. Just as you wouldn't post on Facebook that you were engaged before calling your friends and family, don't post any photos before everyone has seen it from you first. Your family will really appreciate it.
BRIDAL BABBLE: What other social media rules for your wedding do you have?
Check out Cat Print on social media: Twitter | Facebook
When I got my first (and actually, only so far) smart phone, it was when I decided I was going to blog full time. Since my entire livelihood would now be reliant on the Internet, I needed to have it in my pocket at all times.
I was late to the smart phone party. Really late. The latest phone at that time was the iPhone 4S, so its grandpa, the iPhone, was already five years old. Three years later I still have the 4S, filled with photos and apps. Like most everyone else, I don't go anywhere without my phone -- not even weddings.
And that has changed weddings. We've had to worry about things like unplugged weddings, which was something brides didn't have to worry about in the past. Yes, a guest would bring a camera and take a few photos, but when your camera lives in your pocket and social media is a mere app away, it's so much more tempting to take a photo and immediately tweet it or Instagram it. And then your guests are spending time looking down, watching your wedding through a screen instead of their own eyes.
But there's a way to do social media properly at your wedding.
Five Social Media Rules For Your Wedding
1. No posting photos of the bride or groom before the wedding.
This is a rule that you assume is a given, but it's safer to spell it out than assume. Your bridesmaids and parents will have phones in arms reach when everyone is getting ready for the big day. They'll be snapping selfies, photos of you, and photos with you. And that's fine. They are going to want to preserve these memories just as much as you do. But just make sure they don't immediately preserve them and post anything to social media before you walk down the aisle. And, to take it even further, make sure they don't text any photos out (at least of you) before the wedding either. The bride's reveal is huge and such a beautiful moment. You don't want one tag on Facebook to ruin that.
2. If you're really worried, change your privacy settings on Facebook.
I don't post on my personal Facebook page all that very often. I post on A Bride On A Budget's Facebook page several times a week. The last time I posted on my personal page was August 30 because I was doing some five days of grateful challenge. That was day four. I never made it to day five. But the last time a friend posted on my timeline was this morning. So even though you might not really be into Facebook, your friends might be. Be sure to change your privacy settings so you have to approve any tagged photos before they appear on your page. That way, you can make sure nothing unflattering shows up while you're on your honeymoon.
3. Create a wedding hashtag ... and let people know about it.
So many people mock hashtags, including Jimmy Fallon and Justin Timberlake, but hashtags can actually be really effective. I use the #BridalBabble hashtag on Twitter every week to host our wedding chat, but you can use them for a wedding too. Create a hashtag that is unique to you (and be sure to check social media for that hashtag first because, believe it or not, you might not be the first couple trying to use #MrAndMrsSmith). Be sure to post on social media that you are, indeed, using a hashtag. But also, make business cards to share at the welcome table and/or each individual table or wedding welcome bags so your guests know what the wedding hashtag is. If no one knows, no one can use it.
Small aside: I actually designed the cards above on PicMonkey and had them printed at CatPrint. What I really like about CatPrint -- and why it's so wedding friendly -- is there are no order minimums. Want ten Instagram wedding hashtag cards because you'll have ten tables? Sure. They can do that. Need five personalized cards to ask your girls to be your bridesmaids? Done. Need 100 save the date postcards? They can do that too.
But what I like most about them, especially as a bride, is how incredible customer service is. When I was designing my cards, I had a few issues: First it was with orientation (but that was more of me not understanding the design process rather than an actual issue), second it was bleeding (or something like that, which I still don't fully understand). When you're planning a wedding, you know any minor crisis turns into something insurmountable. CatPrint's customer service did a lot of hand holding for me. I ended up sending them a desperation email that was something along the lines of, "I'm sorry. I don't understand. Can you just fix it for me?" And they did. Done. They even offered to send a free hard copy proof -- something they offer every customer. It adds a few days onto your production time, but you are able to receive one copy of your item in hand before an entire order is created. You can check spacing and coloring (and you know just how important color matching is). You can receive a free online proof, but that isn't ideal for colors. For review, I received these Instagram cards plus a full order of business cards (which I posted a photo of on Instagram). I love them. They're thinner than business cards, which gave them such a smooth feel in my hands. They just felt elegant, and that's the exact feeling you want for a wedding.
4. Wait a few days to change your status on Facebook.
I know, your friends want you to immediately change your status from "engaged" to "married" but really, this isn't something you need to change on the alter. After the "I Do's," you'll be taking wedding photos then going to your reception (and cleaning up), then passing out. If you remember this post, you'll remember that you don't even have the time or energy to be romantic on your wedding night. So the last thing you should be concerned with is a Facebook status.
5. Text your family who couldn't make it before posting on social media.
There is a good chance that the next day, your phone will be flooded with photos from your friends and guests. They'll have shots of your cake, of you walking down the aisle, of your first dance. And they will send them all to you, way ahead of your photographer's professional shots. Take one of those photos and text it to the important family members who weren't able to travel for the wedding with a short, "Wish you were here yesterday!" message. Then, and only then, should you post anything on social media. You don't want your relatives to see your wedding day because they happened to sign into Facebook at the same time someone was posting something on your wall. Just as you wouldn't post on Facebook that you were engaged before calling your friends and family, don't post any photos before everyone has seen it from you first. Your family will really appreciate it.
BRIDAL BABBLE: What other social media rules for your wedding do you have?
Check out Cat Print on social media: Twitter | Facebook
Tuesday, January 13, 2015
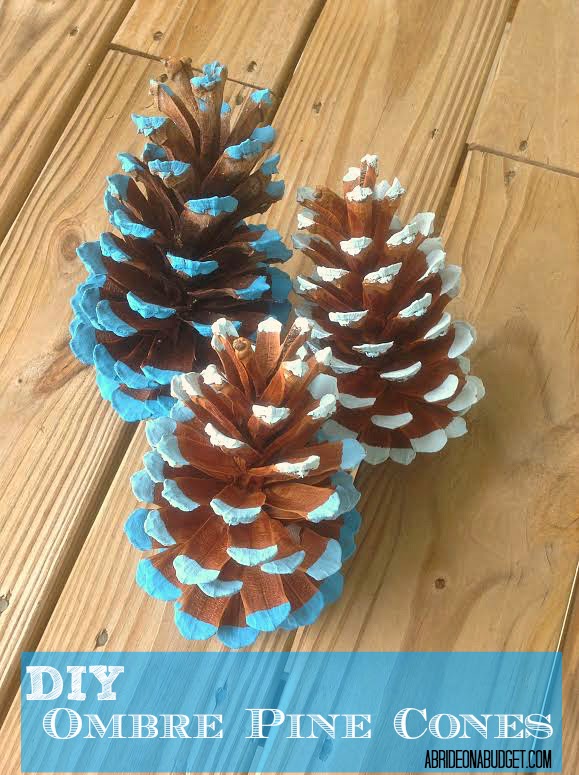
DIY Ombre Pine Cones
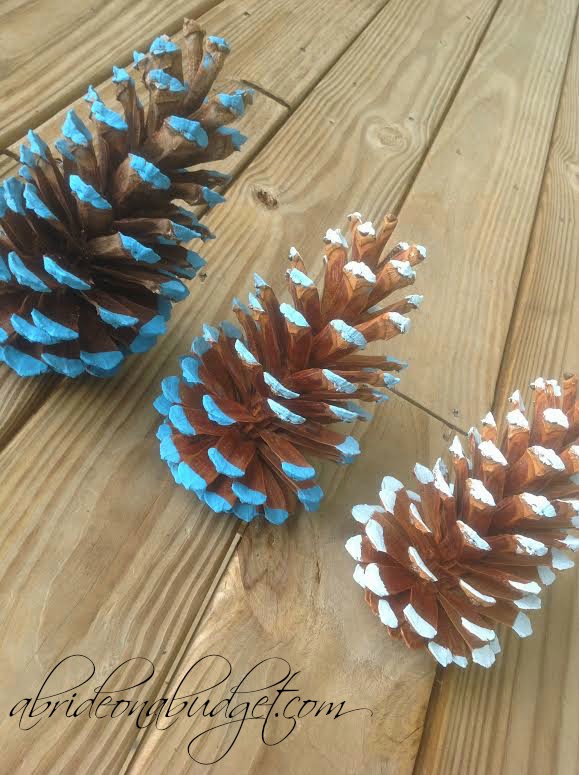
Ombre is still really hot right now, but it wasn't ever a trend I got into. I never had ombre hair, even though I am obsessed with this ombre hairstyle I pinned on Pinterest. But then I found this post for ombre pine cones. Her method is a little less organic (because she uses multiple hues) and I wanted to stick with the same paint for a more traditional feel.
So of course, I had to put together my own DIY Ombre Pine Cones post.
They're actually pretty simple and would make beautiful wedding centerpieces. If you do make them for centerpieces, though, I would advice you to employ some bridesmaids to help you. These are easy, but they can be time consuming. I made three; I couldn't imagine making 30 by myself.
The best part, honestly, is that these are so inexpensive. The pine cones are free and you only use a few dabs of paint on each. You could do three per table, and do ten table's worth, and still have paint left over. Each tube is under $.60 at Walmart, so for under $1.20 you can make 30 pine cones. That makes them four cents. Four. A table with three is completely decorated for twelve cents. You can't beat that.
DIY Ombre Pine Cones
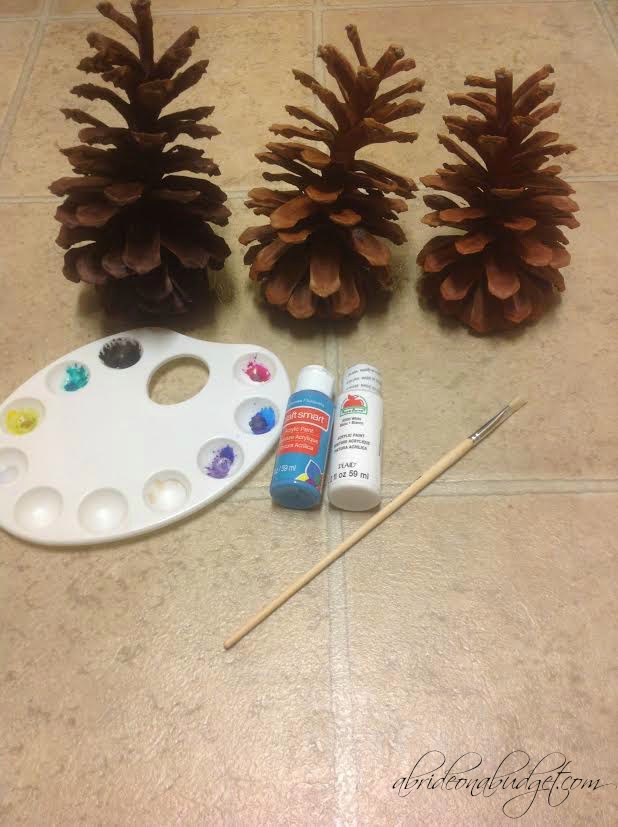
What You'll Need:
- Pine cones (make sure you properly prepare pine cones for crafting, according to our post)
- Colored paint (acrylic)
- White paint (acrylic)
- Paint tray (or any sort of surface if you don't have one; think: plastic lids)
- Paint brush
What You'll Do:
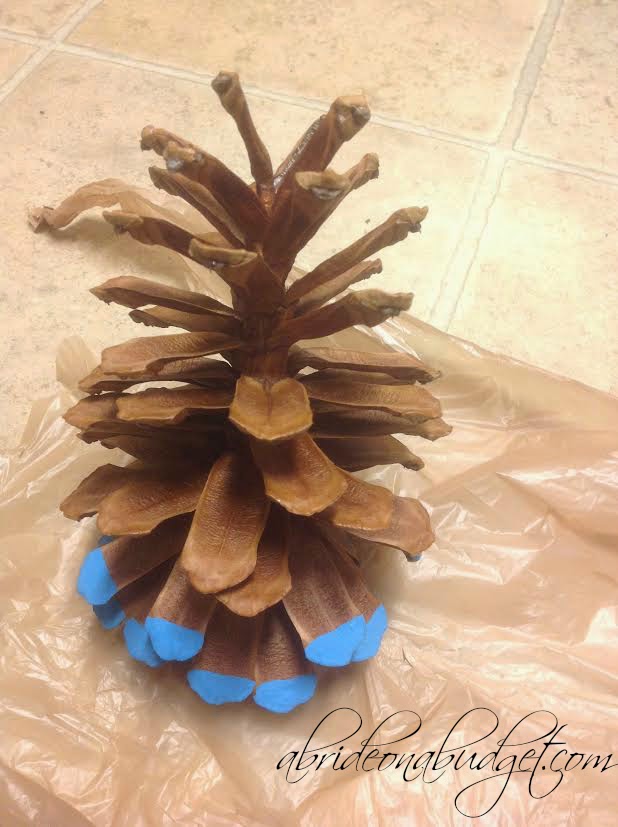
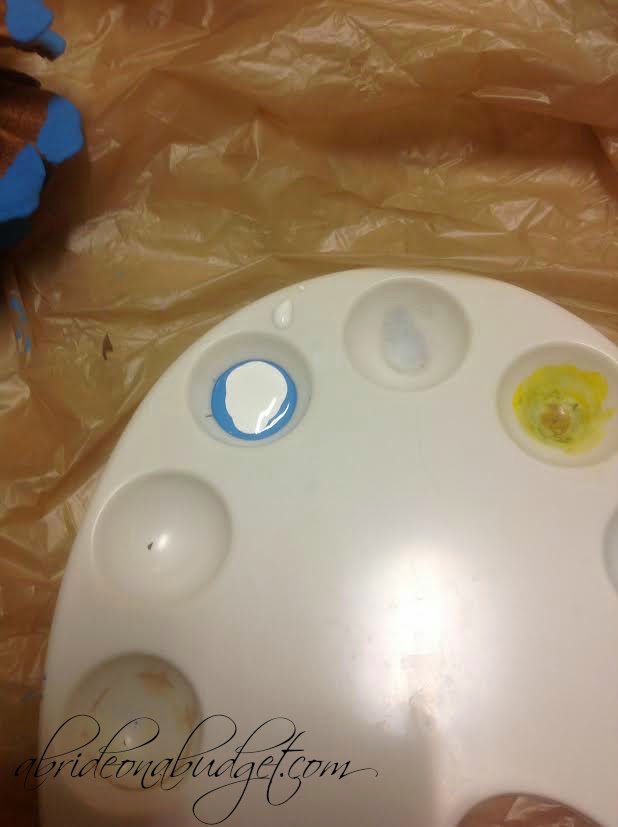
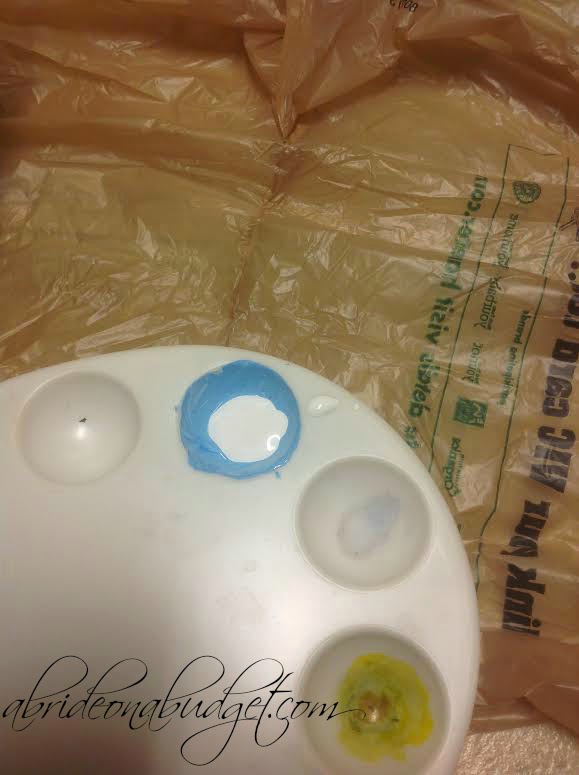
Squirt the colored paint into the paint tray (don't mind my leftover watercolor paint in the wells. A drop of water added and those will be reusable so I never wash watercolors form my paint tray. Acrylics, yes; watercolors, no).
Paint the bottom third of the pine cone with the solid color. I just did straight lines across but you could do any sort of design.
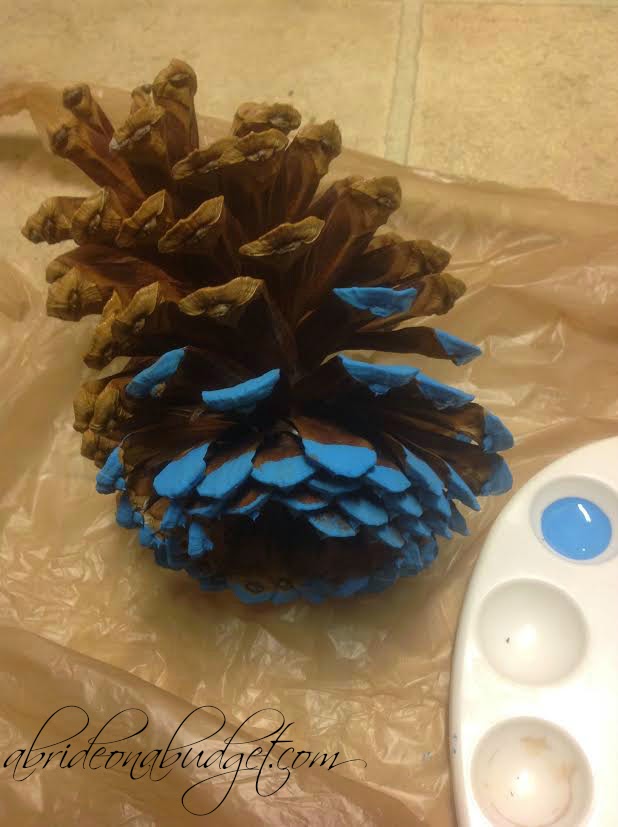
Flip the pine cone over and paint the underside of the bottom third. You need to paint the underside because, depending on the angle, you will only see the underside and it looks terribly unfinished if paint isn't on both sides.
Add white paint to the solid color paint's well. Mix together completely.
Paint the middle third of the pine cone. Be sure to also paint the underside.
Add more white to the mix. Paint the top third of the pine cone and its underside.
I ended up doing three pine cones, but I only wanted one completely ombre pine cone. I painted one pine cone the entire "top" color and I painted another pine cone the entire "bottom" color. To me, that was the perfect balance.
I left them outside overnight to completely dry ... and of course, we had a monsoon during the night and they got wet. The pine cones dried out and the paint stayed perfectly. So if you're making these and there's a storm (and there will be because, really, with weddings, anything that can go wrong will), you don't have to worry about these getting ruined.
I picked blue for these because blue is such a perfect winter wedding color, but you can choose any color to DIY ombre pine cones. I just would suggest picking a bold color for the base because the color will get really thinned out by the time you get to the top. If you choose a light pink to start, you won't really even notice the ombre feel (and if that's the case, you should just go with solid pine cones).
BRIDAL BABBLE: Do you think you could make these ombre pine cones?
Don't forget to properly prepare your pine cones. | |
|---|---|
Find out how in our tutorial here.
|
Monday, January 12, 2015
Pin Of The Week: Ring Shot In A Toy Car
It's been a while since I did a pin of the week post. I'm not sure why, honestly. I've been pinning a ton of great stuff on A Bride On A Budget's Pinterest page, but I stopped sharing it here.
I absolutely love this pin, though, so it's a great reason to resurrect our Pin of the Week post.
I absolutely love this pin, though, so it's a great reason to resurrect our Pin of the Week post.
I just think this ring shot in a toy car is such an adorable way to photograph the rings. Most are just hanging on a flower or dropped in a champagne glass. This is so much better, especially if your groom is a car guy.
If you type in "toy car" in Amazon's search bar, you'll get a bunch of options. If you're in love with a specific car, you can search for that too. I would recommend really paying attention to dimensions before you buy it, though. Something like a huge Barbie car isn't going to work for this shot. And a mini Hot Wheels car won't work either. Something in between (without a roof) will give you a great shot.
BRIDAL BABBLE: What type of unique ring shots do you love?
Tuesday, January 6, 2015
How To Properly Prepare Pine Cones For Crafting
I just went for a walk in the park and the trail was lined with pine cones. Now is the time they're falling -- and now is the time to collect them if you're planning on using them for any wedding crafts.
If you're having a fall wedding, you should definitely consider using them in your centerpieces or escort cards. They're festive and timely, but, even better than that, they're free. Just look in your backyard and you should have some. And if you don't, ask your bridal party to check their homes. Or, if you're getting in shape, take a walk outdoors and look around for some. Just be sure to carry a plastic bag with you in case you do find any since they can be sticky from sap and dangerous because of the small points on the edges.
But you can't just take pine cones from the woods and put them on a table and that's that. No, you have to properly prepare pine cones.
How?
It's actually really easy, just a bit time consuming.
What You'll Need:
What You'll Do:
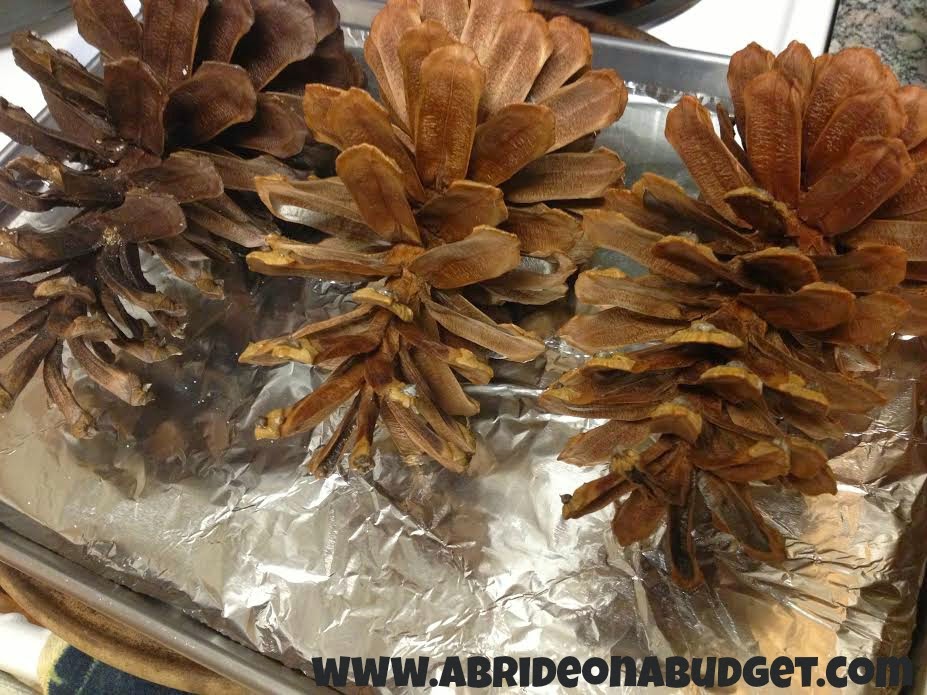
Place the pine cones on a foil-lined cookie sheet.
Bake at 350-degrees for 30 minutes.
Leave the pine cones on the foil-lined cookie sheet to cool for 24 hours. Any sap and/or insects will be caught on the foil, so you'll want to leave this just as is. The leaves of the pine cone will actually open a little, making them fuller than they were when you put them in the oven.
You can then decorate them with paint, glitter, and more.
BRIDAL BABBLE: How would you decorate using pine cones?
If you're having a fall wedding, you should definitely consider using them in your centerpieces or escort cards. They're festive and timely, but, even better than that, they're free. Just look in your backyard and you should have some. And if you don't, ask your bridal party to check their homes. Or, if you're getting in shape, take a walk outdoors and look around for some. Just be sure to carry a plastic bag with you in case you do find any since they can be sticky from sap and dangerous because of the small points on the edges.
But you can't just take pine cones from the woods and put them on a table and that's that. No, you have to properly prepare pine cones.
How?
It's actually really easy, just a bit time consuming.
How To Properly Prepare Pine Cones For Crafting
What You'll Need:
- Pine Cones
- Foil
- Large cookie sheet
- Oven
What You'll Do:
Place the pine cones on a foil-lined cookie sheet.
Bake at 350-degrees for 30 minutes.
Leave the pine cones on the foil-lined cookie sheet to cool for 24 hours. Any sap and/or insects will be caught on the foil, so you'll want to leave this just as is. The leaves of the pine cone will actually open a little, making them fuller than they were when you put them in the oven.
You can then decorate them with paint, glitter, and more.
BRIDAL BABBLE: How would you decorate using pine cones?
What did we do with our pine cones? | |
|---|---|
Made DIY Ombre Pine Cones.
Check out our tutorial here.
|
Monday, January 5, 2015
So you're engaged ... now what? (What to do before you say "I Do")
It's engagement season, which means your Facebook timeline has probably been filled with photos of gals showing off their new holiday bling. Between Christmas and Valentine's, a ton of couples get engaged. And maybe you're one of those lucky couples.
Had your eye on that Jimmy Choo purse? It's gonna have to wait.
You're in love. You see a box in front of you with a very shiny ring inside. You say yes. You're engaged. Now what?
What to do before you say "I Do"
What to do immediately after you get engaged
1. Tell your parents (before social media).
I know, this sounds like a no brainer, but it's something people often forget. You get so wrapped up in the moment, you immediately want to change your status on Facebook. Goodbye "in a relationship"; hello "engaged."
But, if you dare tell Mark Zuckerberg before your immediate family, you'll start your engagement off on the wrong foot.
Be sure to actually call your mother. Don't send her a text that says, "I said yes!" You can save that for your old chem lab partner and your next door neighbor. But for your parents and grandparents, you absolutely need to call them. No matter what time it is.
After we got engaged, I actually called my parents' house around 11pm. My little brother picked up and told me everyone was sleeping.
"I know," I said. "Just put mom on the phone."
She was startled from her slumber, worried that something was wrong, but there's nothing like letting your mom know she's getting a son-in-law that will change her tune.
Let her call her friends, and you call or text yours. Then, after everyone has pretty much heard already, and only then, change your status on social media.
Pete was ready to change his Facebook status the next morning, but I made him wait almost 48 hours. I needed to make sure my grandma had time to tell my great aunt before she saw the update in her notifications, stuffed between requests for lives on Candy Crush.
2. Paint your nails.
Everyone will want to see the ring. People who see you in real life will grab your hand and people you text will reply asking for a photo.
You don't want to show everyone a beautiful ring attached to a finger with chipped green polish.
Even if you're not a manicure type of girl, it's worth it to get one now (and another if you take engagement photos). Trust me.
Personally, I think OPI nail polishes last the longest of any brand, and neutral colors are your best friend, so look for something like OPI's Bubble Bath when you're at the salon. Or heck, grab a bottle off Amazon and keep it in the bathroom if you have an idea he's gonna pop the question.
3. Stop spending money.
3. Stop spending money.
Had your eye on that Jimmy Choo purse? It's gonna have to wait.
Actually, any sort of "extras" between now and the wedding will have to be put on hold.
Love going out for lunch every day for French onion soup? Sorry. You're gonna have to brown bag it for a while and google French onion soup recipes to learn to make it at home. Sure, it doesn't sound like a lot to spend $6 on soup or sandwich every day, but that's $30 a week, which is $1,560 a year and that's basically a wedding dress.
So what would you rather: lunch out or a wedding dress? Exactly. Bring your lunch.
What not to do immediately after you get engaged
1. Ask anyone to be in your wedding.
Through the years, you've probably told every female friend of yours that she is going to be a bridesmaid at your wedding. But, realistically, you have to talk with your fiancé about it. Because (yay!) you now have a fiancé.
You need to decide if either of you actually are having a bridal party and how many people you both want in it.
It's going to cause you to rank your friends, which is a terrible sounding thing but it's something every bride does. If you ask every woman in your life to be in your bridal party, you won't have anyone to sit in the pews when you're walking down the aisle.
Maybe one drunken night you promised your college roommate that she could sing "At Last" at the ceremony, but until you actually know how the ceremony is going to go, you can't ask her because maybe you'll be getting married at a church that doesn't allow anyone outside the congregation to sing and now you have the awkward task of un-asking her her.
So until you have some details ironed out, don't ask anyone to be anywhere at your wedding.
2. Set a date.
Setting a date is a whole heck of a lot harder than you can imagine. You don't just open your calendar, find your favorite date, and say that's when you're getting married.
You need to make sure the venue is available, you need to make sure your ceremony site is available, and you need to make sure you can afford that day (dates change price, days of the week change price, and if you pick a date too close to your engagement, you won't have time to save).
Your best bet is to pick a season and let everything else fall into place.
3. Take engagement photos.
No one takes their engagement photos immediately after they get engaged. Some people don't even take them until the month of their wedding. Just because you have a ring on your finger doesn't mean you have to take them right away.
Plus, a lot of engaged couples actually use engagement photos as a trial for their wedding photographer. If you run out to take them immediately, you're missing that opportunity (or risk retaking them, which means paying twice ... and trust me, you don't want to pay more for anything than you have to).
What to do eventually after you get engaged
In sequential-ish order, here's a list of everything you need to do before you say, "I Do." Just use this as a rough list to get you started.
2. Pick a ceremony site (and coordinate the date with the venue).
3. Book them both. Schedule the rehearsal at the ceremony site the day before the wedding.
4. Book your photographer (I absolutely cannot stress how much you absolutely should do this before anything else. Your photographer is the most important vendor and you don't want to wait and risk your favorite photographer booked and unavailable on your wedding day).
Here's where the "ish" comes into play. You can do these in any order, but the first four things are set in stone.
5. Put together a list of your guests. Get their addresses.
6. Decide on a wedding theme.
7. Order save the date cards. Send them as soon as possible (but not longer than a year before).
11. Let your fiance choose his groomsmen. Have him ask them. Hope they say yes. Choose their tuxes or suits.
12. Order wedding invitations. Send them (with a stamped RSVP card) three months before the wedding.
13. Order your flowers.
14. Order your cake. Ask if you can borrow a cake stand and cake knife (if the bakery says no, ask your venue).
15. Go for a tasting. Choose your menu.
16. Book a band or DJ. Be sure to sit down with them and make a playlist, including songs on your do not play list.
17. Choose a wedding song.
19. Book a videographer, if you so choose.
20. Figure out where you are staying that night and book it.
21. Purchase thank you gifts for everyone in your wedding (including anyone helping at the ceremony).
22. Book a hair and makeup person/people.
23. Set a block of hotel rooms at a local hotel for out of town guests.
26. Figure out the rehearsal dinner (if you're ordering food, having it at a restaurant, etc.).
27. If you're getting married at a church, take your marriage prep/pre-cana course(s). Find out more about those here.
28. Figure out if you are having readings at the ceremony and ask people to read. Be sure to have the readings selected so you can give them to the readers early so they can practice.
29. Choose the music for the ceremony.
30. Order menu cards.
32. Create a seating chart. Order escort cards and table numbers. Don't let anyone bully you and tell you where they want to sit. People will mingle anyway.
34. Decide on additional venue decorations.
35. Purchase your wedding rings. (Get yours cleaned two weeks before and do not wear it until the day of).
36. Get your marriage license (do this the week of).
37. Get your nails done (do this the day before).
38. Pay everyone.
39. Say "I Do."
40. Enjoy your wedding day.
BRIDAL BABBLE: Anyone scared yet?
And a big thank you to my beautiful wedding twin Kay who is in the photo above.
And a big thank you to my beautiful wedding twin Kay who is in the photo above.
That's her actual proposal from her now-husband Scott. They went to JMU together and got engaged at the Kissing Rock.
She said to me: It's actually cute because legend says whoever you kiss on the rock is who you marry. When I gave tours of JMU, I would tell my tour groups, "Don't kiss on the rock if you can't afford a rock."
Her husband's sister and friend actually hid in the bushes to get that series of shots. Love it!
Subscribe to:
Comments (Atom)


